7
Administrator Setup
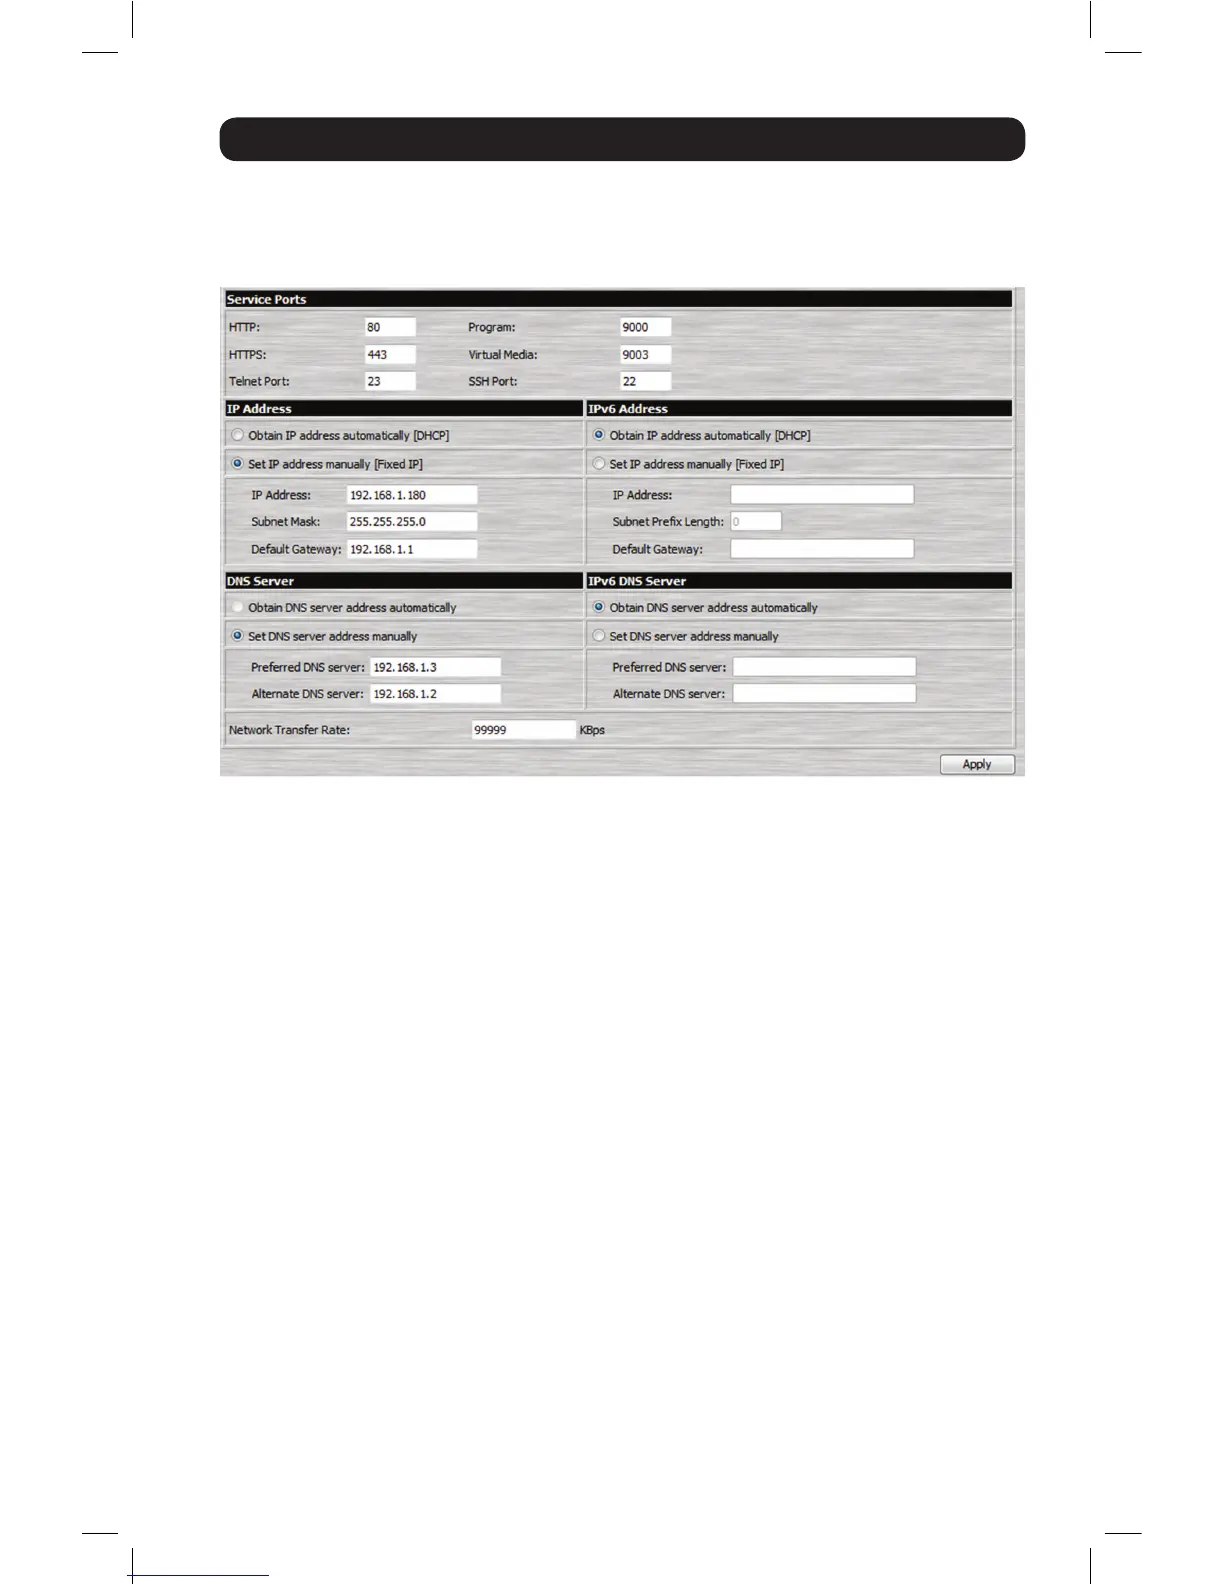
4. Click on the Network icon at the top of the page to bring up the Network Settings page.
5. By default, the Obtain IP address automatically [DHCP] checkbox is checked. To set a
xed IP address, check the Set IP address manually [Fixed IP] check box in the IPv4 or
IPv6 settings section, depending on your network.
6. The IP Address, Subnet Mask and Default Gateway elds will be activated upon checking
the Set IP address manually [Fixed IP] checkbox. Fill in these elds with information
appropriate for your network.
7. As with the IP Address settings, the DNS Server settings can be obtained automatically or
assigned manually. To manually enter these settings, check the Set DNS server address
manually checkbox and ll in the Preferred DNS server and Alternate DNS server elds
with information appropriate for your network. Note: The Alternate DNS server field is
optional.
8. When you have entered the IP Address and DNS Server settings, click the Apply button.
Clicking the Apply button will automatically check the Reset on exit checkbox located in
the Customization page of the Admin Utility. When you log out, the unit will be reset and
your network changes will be applied.
See Network Settings section in the Owner’s Manual for complete information on the rest of
the settings located in this page.
Network Setup - IP Address Determination continued
12-003 932851-EN.indd 7 8/7/2012 8:59:45 AM

 Loading...