Do you have a question about the Tripp Lite SmartPro SMART1000RM2U and is the answer not in the manual?
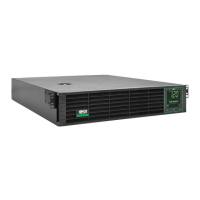
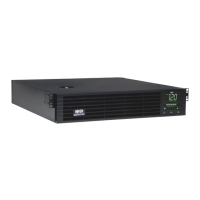
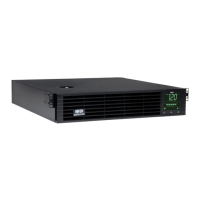
| Form Factor | Rackmount |
|---|---|
| Input Voltage | 120V |
| Output Voltage | 120V |
| Number of Outlets | 8 |
| Output voltage regulation (line mode) | +/- 5% |
| Output voltage regulation (battery mode) | +/- 5% |
| Input Frequency | 50/60 Hz |
| Output Frequency | 50/60 Hz |
| Audible alarm | Yes |
| Power Capacity | 1000 VA |
| Outlets | NEMA 5-15R |
| Battery Type | Sealed Lead Acid (SLA) |
| Recharge Time | 8 hours |
| Interface port | USB, Serial |
| Transfer Time | 4 ms (typical) |
| Operating Temperature | 0°C to 40°C |
| Operating Humidity | 0% to 95% (non-condensing) |
| Certifications | cUL |
| Waveform Type | Modified Sine Wave |
Safety guidelines for placing the UPS unit indoors, considering temperature and ventilation.
Warnings related to connecting the UPS to power sources and proper grounding.
Warnings about using the equipment in life support and connecting surge protectors.
Precautions regarding battery handling, disposal, replacement, and operation without batteries.
Guidelines for connecting external battery packs safely.
Information on how to recycle Tripp Lite products and batteries.
Step-by-step instructions for mounting the UPS in a 4-post rack system.
Procedures for 2-post rack mounting and wall mounting using specific kits.
First step of installation: connecting the UPS to a suitable power source.
Connecting connected devices to the UPS outlets.
Procedure for powering on the UPS unit.
Connecting the UPS to a computer for monitoring and control via USB or RS-232.
Connecting the EPO port for emergency shutdown functionality.
Instructions for connecting external battery packs to extend runtime.
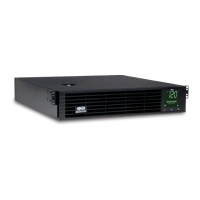
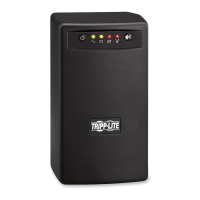
Overview of the UPS's LCD screen and its icons.
How to use the ON/OFF button to power the UPS on and off.
Functionality of the MODE button for navigating menus and displays.
Using the ENTER/MUTE button for controls and silencing alarms.
Icon indicating the need for battery replacement or a failed self-test.
General warning indicator for critical conditions like overload or battery issues.
Explanation of the Battery Capacity indicator on the LCD.
Icon indicating load percentage or daily power consumption.
Icon indicating Battery Capacity percentage.
Icon indicating a UPS self-test is in progress.
Icon indicating estimated battery runtime.
Icon for setting AC input line sensitivity.
Enabling automatic cycling through display modes.
Icon indicating AVR function status.
Icon indicating external battery setting control is active.
Icon describing the battery capacity bar graph.
Displays the current input voltage to the UPS.
Displays the current output voltage from the UPS.
Shows the remaining battery runtime in minutes.
Displays the current load on the UPS as a percentage.
Displays the current load in watts or kilowatts.
Accessing and configuring various UPS settings via the control menu.
Setting to enable or disable audible alarms.
Initiating a UPS battery self-test.
Enabling automatic scrolling of UPS operating conditions.
Viewing and resetting the count of ON Battery events.
Viewing and resetting the count of Automatic Voltage Regulation events.
Setting the AC input line sensitivity (100%, 50%, 25%).
Configuring the UPS for the presence of external batteries.
Restoring LCD settings to factory defaults.
Description of rear panel features like AC outlets and ports.
Details about the NEMA 5-15R AC outlets and their functions.
Port for connecting external battery packs.
Location and function of the UPS input breaker.
Information on connecting communication ports for software interaction.
Instructions for properly storing the UPS.
Procedures and policies for obtaining service or returning the product.
Step-by-step guide for replacing the UPS batteries.
Step for installing new batteries into the UPS.
Step for connecting the new batteries to the UPS.
Reinstalling the battery retention plate.
Reattaching the front panel after battery replacement.
Compliance statement regarding FCC rules for Class A digital devices.
Information on finding and using serial numbers for compliance.
Explanation of symbols used on the product label.