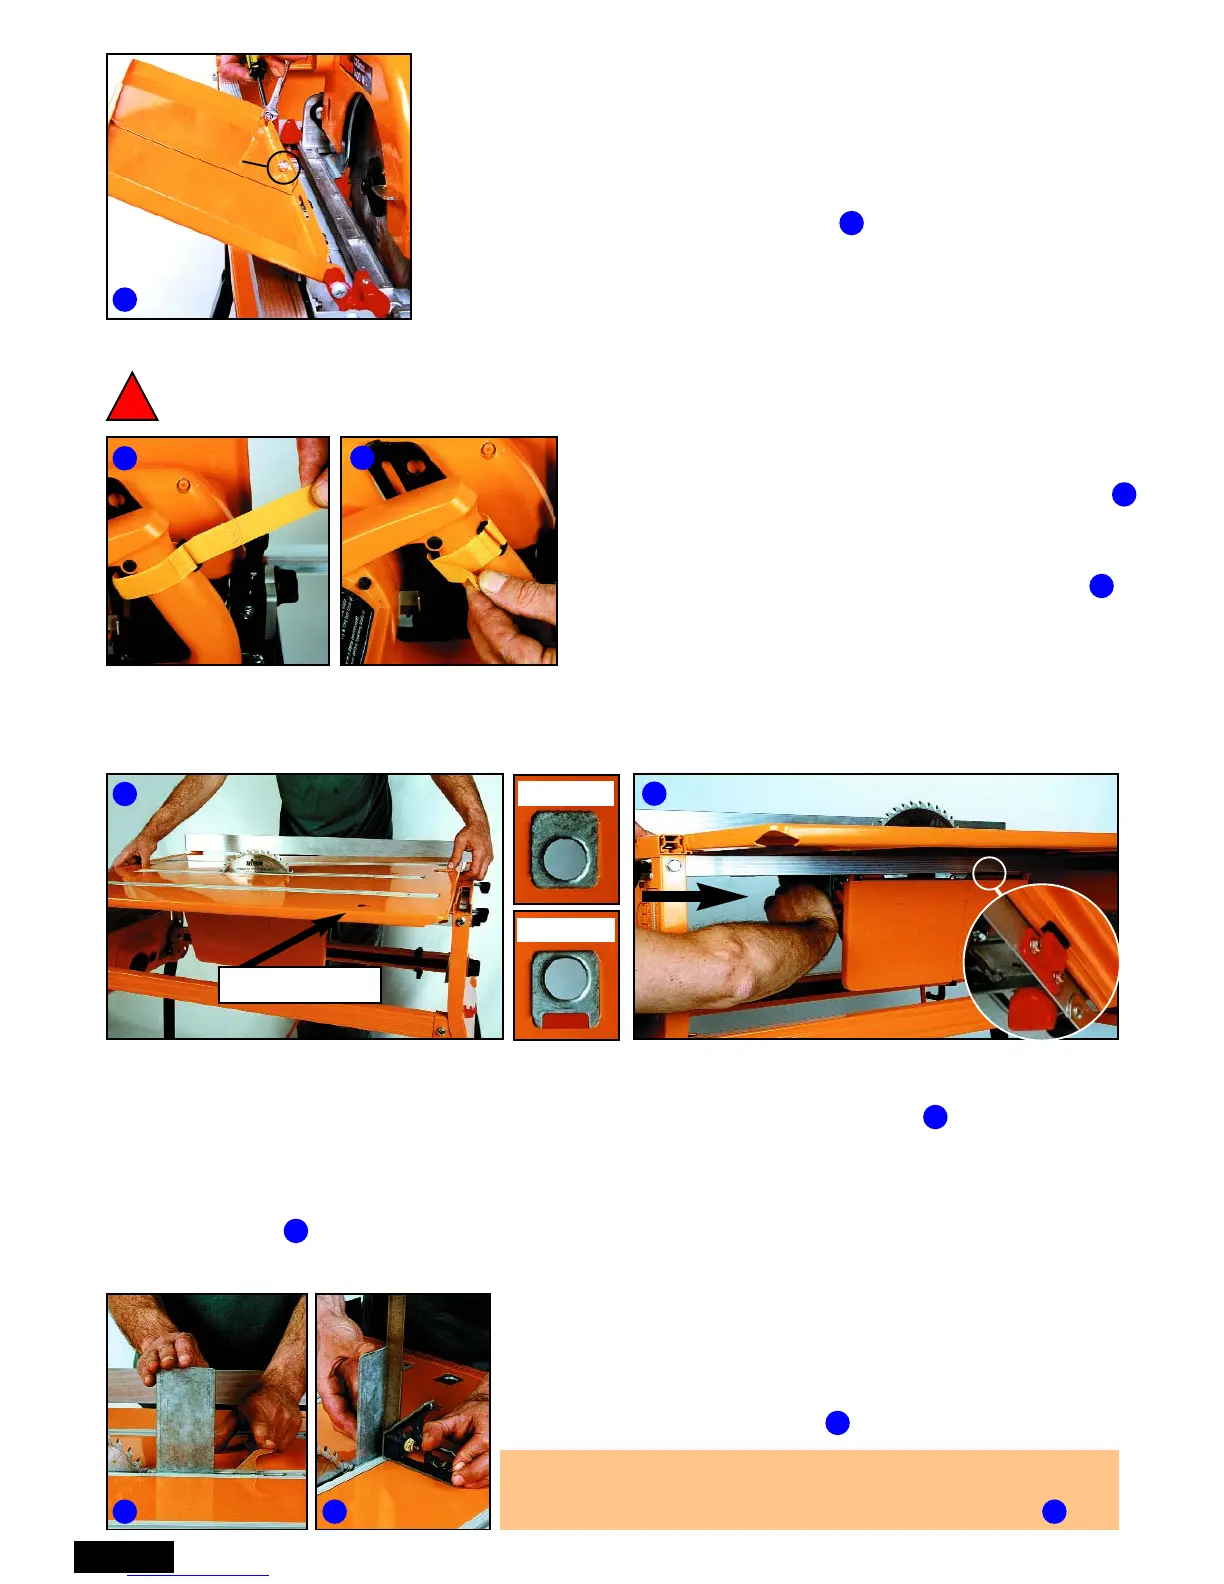
FITTING THE OVERHEAD GUARD & SUPPORT
Loosen the knob on the Overhead Guard (J) to remove the
Guard Support from its shipping position. Fit the support to
the centre table slot, using the cut-outs at the end.Ensure the
saw blade is adjusted to its maximum depth, then position
the support about 12mm behind the blade and lock it in by
pressing the locking lever down.
Lubricate the entry if it’s a tight fit. Check the guard support
is reasonably square to the table, and adjust it if necessary
by pushing evenly with your hand or a block of wood.
Page 8
Wrap the Trigger Strap (q) around the handgrip with
the furry side facing outwards. Pass the strap through
the buckle, until the security loop has passed through.
If your saw has a safety lock-out button press it and
then tighten the strap until the trigger clicks “ON”.
Wrap the free end of the strap around the handgrip.
With most saws, the strap can be slid on and off the
saw trigger, without undoing it each time.
Turn the slide chassis upside down. Position it roughly half-way between the end panels. The front
of the saw must be facing the front panel (switchbox end).
Lower the Table (A) over the blade, with the four T-slots closest to the rear panel. Line up the
arrows on the edges of the table with the scale pointers on top of the end panels. Push the table
latches to the “LOCK” position. The red indicators disappear from view when the latches fully locate.
Reach underneath and push the slide chassis towards the rear panel until the red catch (shown in
the inset view on ) “clicks” home and locks the chassis underneath the table.
LOCKED
UNLOCKED
FITTING THE TABLE
!
Before fitting the trigger strap (q) always ensure that the saw is disconnected from the power
and that the switch on the Workcentre front panel is in the “OFF” position.
FITTING THE TRIGGER STRAP
T-slots to rear
FITTING THE SIDE GUARD
Slide the two sections of the Side Guard (K) together until they fit
between the pivot brackets on the slide chassis. Loosely fit the short
Philips-head screw (i) and a Nyloc nut (h) to hold them together.
Fit the two longer Philips-head screws (j) and Nyloc nuts through the
pivot brackets and into the guard flanges. Tighten until the guard
is firm, but still free to pivot. Finally, tighten the screw holding the
two halves together.
Nyloc nut
on inside
1
2
3
4
5
6 7
1
2
3
4
5
6
7
Do not leave the trigger strap permanently locked on. When you have finished work for the day,
release the strap and allow the spring in the trigger to relax.