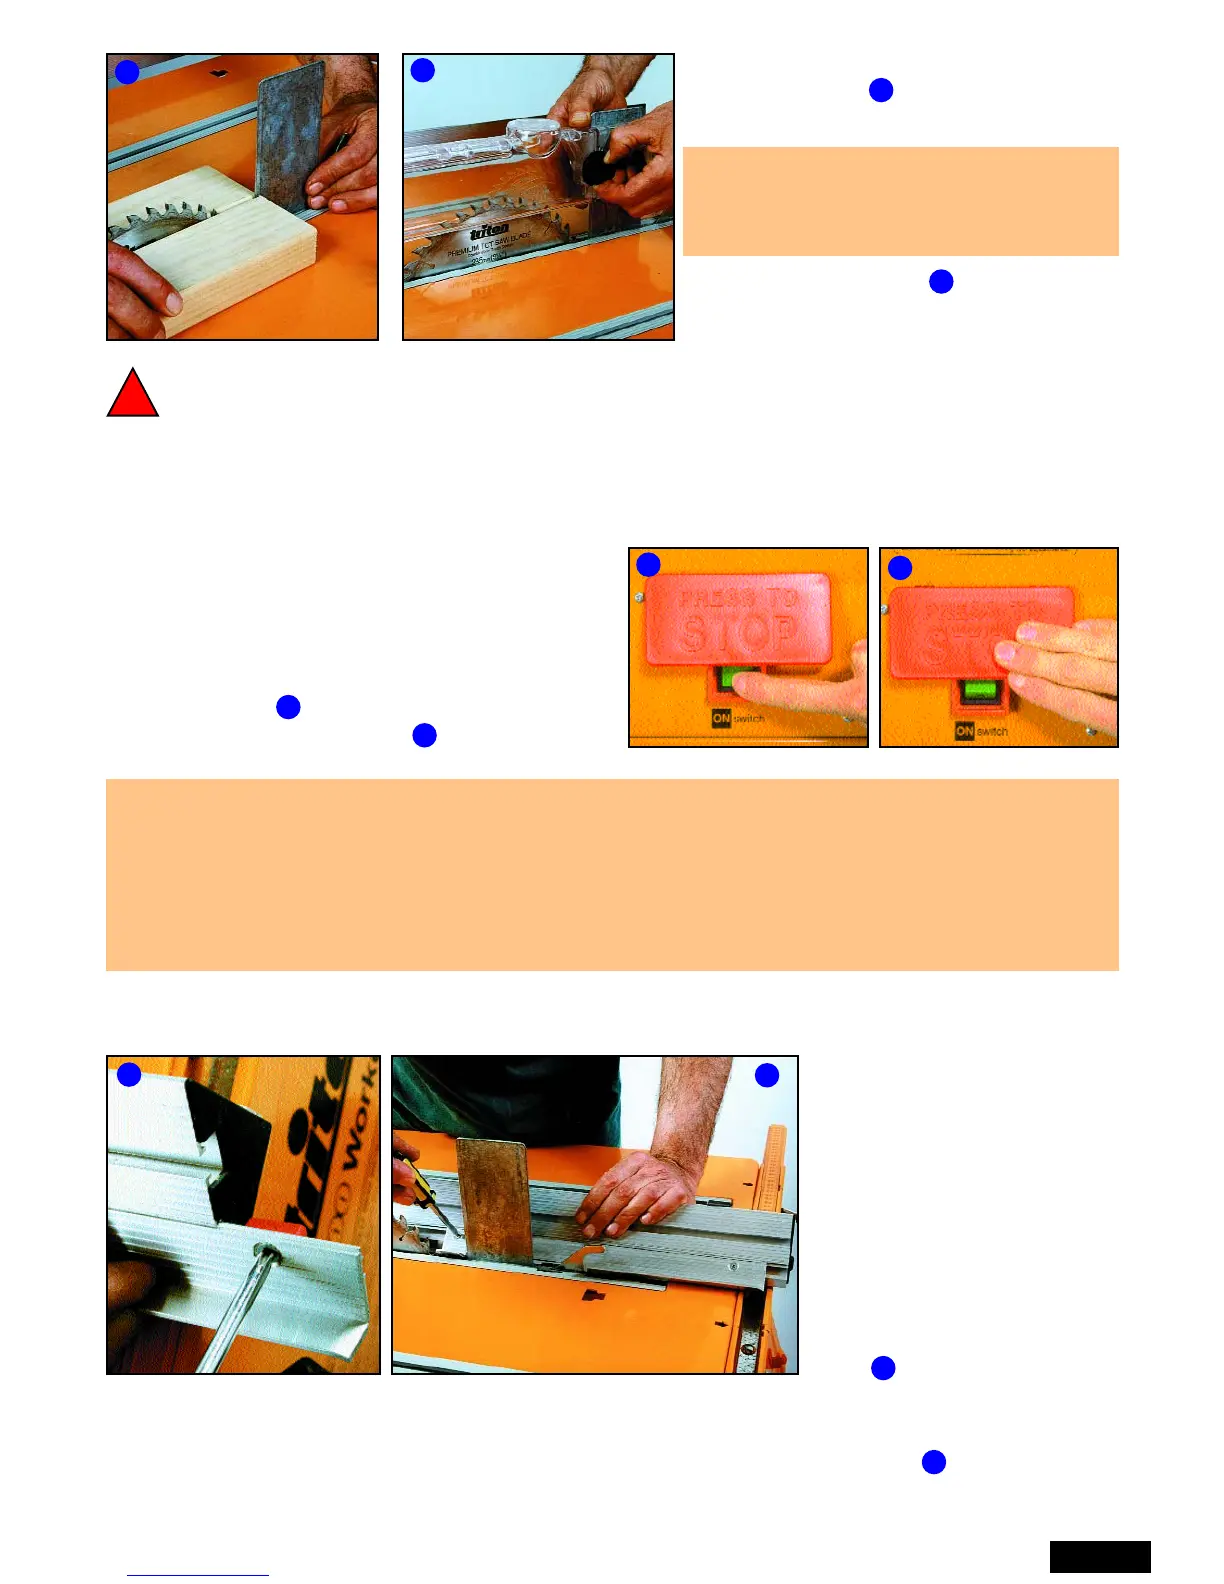
The plain bevel guide fits in front of the blade. The notched bevel guide fits at the rear, with the
small tab locating between the blade and the overhead guard support. (If your power saw is fitted
with a riving knife remove the small tab (circled) from the guide using a hacksaw.)
Tighten the Phillips head screws. The function of the guides is described on 20.
Hold 2 straight pieces of wood lightly
against the blade. The overhead guard
support should fit between the pieces.
Fit and lower the guard. Spin the blade
by hand before connecting the power to
ensure it is not touching anything.
If not you may have to adjust the saw
position slightly. This is only likely if you
have a very thin kerf blade (2.0 - 2.2mm
cut width)
Page 9
CONNECTING THE POWER
Make sure the switch is “OFF”, plug the saw into
the switch box, and bring power to the switch box
via a 10 Amp extension cord.
Press the green switch with your finger to switch
the power “ON”. Tap the stop plate with your
hand or knee to switch “OFF”.
Switch the power on and off and watch the blade. If it quivers sideways on start-up it’s a sign of a
worn arbor in your saw, or excessive slack in the mountings between the motor and baseplate.
If the blade vibrates significantly at full speed or on slow-down, it’s either buckled or not seated
properly on the arbor. Check the flatness of the blade with a straightedge, check the fit of any
arbor-reducing washers, and check for resin/sawdust build-up on the arbor or flange washers.
A slight quiver is generally noticeable on slow-down in most blades, and shouldn’t affect your cuts.
Always make sure the blade is at full height, the guard is fitted, and the table is locked to the
end panels before switching on the power.
Check that the teeth on your blade are pointing in the same direction as the etched symbols
on the guard. If not, you have incorrectly fitted the blade to your saw.
!
Reverse the fence so that
when fitted to the Workcentre
from the left hand side, the 45
o
face is closest to the blade.
To fit the Bevel Guides (N),
loosen the Phillips-head
screws slightly, engage the lip
at the top of each guide in the
mating section of the rip
fence, and guide the red
plastic clamping feet into the
T-slot.
1
2
3
4
5
6
1
2
5
6
3
4
FITTING THE BEVEL GUIDES