xxxx-8
ASSEMBLY STEP
Two persons are required to finish the assembly steps.
(Caution!! Please follow exactly the assembly steps below to aviod injury . )
STEP 1
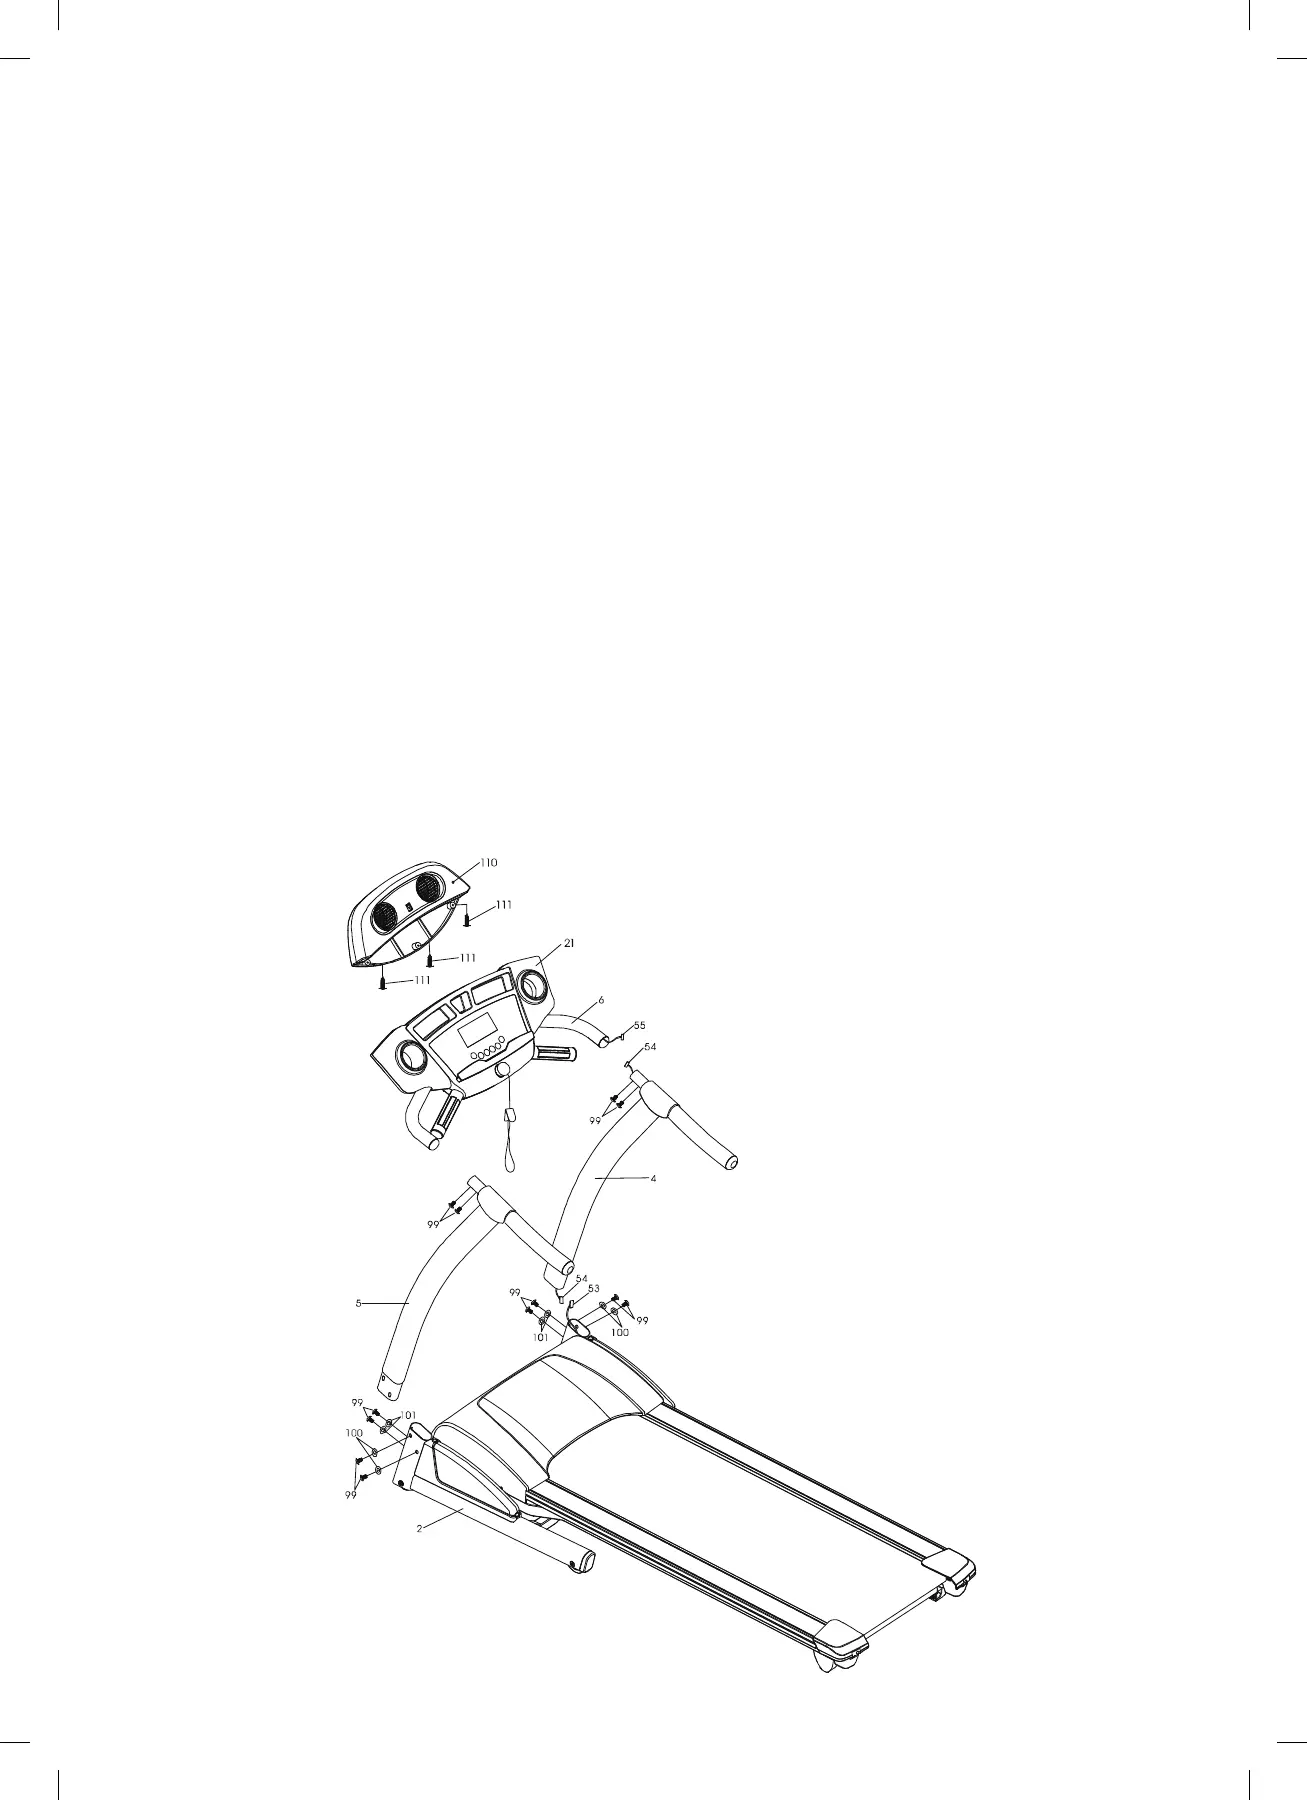
Connect Computer Cable (Lower) (53) with Computer Cable (Middle) (54).
STEP 2
Tightly fasten the Right and Left Handrails (4,5) into the Frame Base (2) with eight (5/16” x15m/m) Button Head Socket
Screws (99), four (5/16” x 18 x 1.5T) Flat Washers (100) and four (5/16”x 23 x 1.5T) Curve Washers (101) by using the
Combination (M5) Allen Wrench & Phillips Head Screwdriver (102).
STEP 3
Connect Computer Cable (Middle) (54) with Computer cable (Upper) (55).
STEP 4
Install the Console Support (6) into the Right and Left Handrails (4,5) with four (5/16” x l5m/m) Button Head Socket
Screws (99) by using Combination (M5) Allen Wrench & Phillips Head Screwdriver (102).
STEP 5
Connect the Computer Cable of Fan Assembly (110) with Console.
Install the Fan Assembly (110) onto Console (21) with three (M3 x 18m/m) Phillips Head Screws (111) by the
Combination (M5) Allen Wrench & Phillips Head Screwdriver (102).
PLEASE LOCK ALL COMPONENTS UP AFTER THE ACCESSSORIES HAVE BEEN ASSEMBLED.


 To Next Page