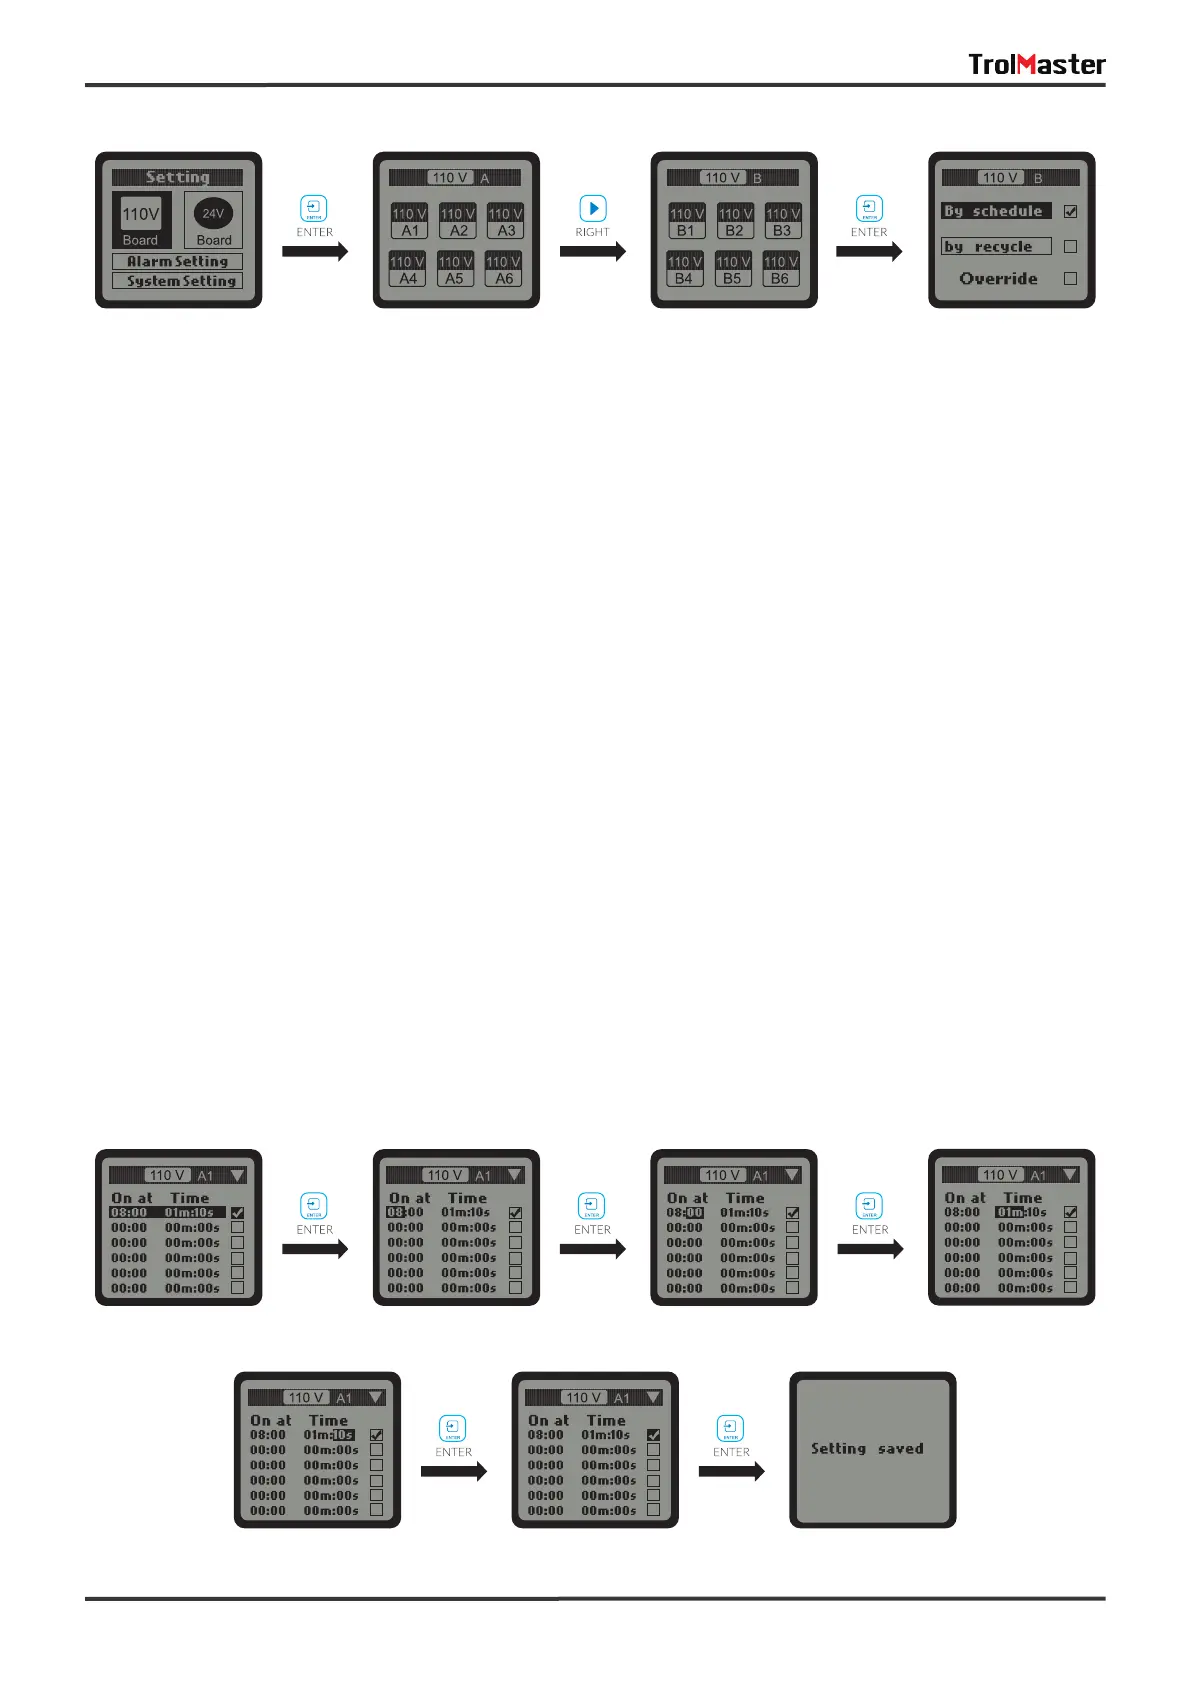
10
On the SETTING page of selected output such as 110V A1, press ENTER button and the tick icon on the “By
schedule" will be highlighted and blinking. You can also press DOWN button to select “By recycle” . Press
ENTER button to confirm and save the setting.
Once the “By schedule" setting is selected, user can press ENTER button to activate the setting for the 1 line
of total 12 lines of schedules. The HOUR of “On at" time will be highlighted and blinking, which means that it
can now be edit. User can press UP or DOWN button to change the HOUR. Press ENTER button and the
MlNUTE of “On at" will be highlighted and blinking, user can press UP or DOWN button to change the minute.
Press ENTER button and the MlNUTE of “Time" will be highlighted and blinking, user can press UP or DOWN
button to change the minute. Press ENTER button and the SECOND will be highlighted and blinking, user can
press UP or DOWN button to change the second. Press ENTER button and the tick symbol will be highlighted
and blinking. Finally, press ENTER button to confirm and save the changes and the LCD screen will
display “Setting saved”.
Similarly, user can change the “On at" & “Time" for other schedules (up to12 lines) following the steps above.
a. By schedule:
SETTING Page 110V Control Board A 110V Control Board B 110V B Setting Page
 Loading...