7 EN
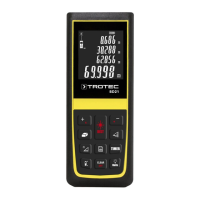
Operating manual – laser distance measuring device BD21 / BD26
Setting the timer
The device is provided with an internal timer, which can be used
to set a delay after which the measurement begins. The timer
can be used for all measuring operations.
• Briefly press the Timer button(10) to activate a delay of
5 seconds.
• Press and hold the Timer button(10) until the desired time
is displayed (30 seconds max.).
• Let go of the Timer button(10) to start the timer.
– The Timer indication(33) and a countdown(26)
indicating the remaining seconds will appear on the
display.
– The last five seconds are each accompanied by an
acoustic signal.
– After the expiration of this time the measurement is
performed.
Carrying out measurements
Warning of laser radiation
Laser class2, P max.: > 1mW, λ: 650nm,
EN 60825-1:2014
Do not look directly into the laser beam or the opening
from which it emerges.
Never point the laser beam at people, animals or
reflective surfaces. Even brief eye contact can lead to
eye damage.
Examining the laser output aperture by use of optical
instruments (e.g. magnifying glass, magnifiers and the
like) entails the risk of eye damage.
When working with a laser of class2, observe the
national regulations on wearing eye protection.
Carrying out single distance measurement
1. Briefly press the Switch-on/measurement button(7) to
activate the laser.
2. Point the laser at the target area.
3. Briefly press the Switch-on/measurement button(7) again
to perform a distance measurement.
ð The measured value is immediately indicated on the
display.
Adding / subtracting measured values
1. Carry out a single distance measurement.
2. Press the Plus button(17) to add the next measured value
to the previous one.
Press the Minus button(8) to subtract the next measured
value from the previous one.
3. Press the Switch-on/measurement button(7) to determine
the next measured value.
ð The overall result will be indicated in the lower
measurement value display. The individual measured
values will be indicated in the upper measurement
value displays.
Performing an area measurement
1. Briefly press the Area/room volume button(16) one time.
ð The symbol
for area measurement appears on the
display.
2. Briefly press the Switch-on/measurement button(7) to carry
out the first measurement (e.g.length).
3. Briefly press the Switch-on/measurement button(7) again
to carry out the second measurement (e.g.width).
ð Upon pressing the Switch-on/measurement button(7)
for the second time the device independently calculates
the area and displays this value in the lower
measurement value display. The most recently
measured value will be indicated in one of the upper
measurement value displays.
Performing a volume measurement
1. Briefly press the Area/room volume button(16) twice.
ð The symbol
for volume measurement appears on
the display.
ð The side to be measured in each case is indicated on
the display by flashing.
2. Briefly press the Switch-on/measurement button(7) to carry
out the first measurement (e.g.length).
3. Briefly press the Switch-on/measurement button(7) again
to carry out the second measurement (e.g.width).
4. Briefly press the Switch-on/measurement button(7) again
to carry out the third measurement (e.g.height).
ð Upon pressing the Switch-on/measurement button(7) for
the third time the device independently calculates the
volume and displays this value in the lower measurement
value display.