EasyManua.ls Logo

Trotec PAE 51 - User Manual

Trotec PAE 51
22 pages
Print Icon
To Next Page IconTo Next Page
Loading...
TRT-BA-PAE51/PAE51B-TC240215TTRT04-006-EN
PAE 51 / PAE 51 B
EN
INSTRUCTIONS
AIR COOLER

Other manuals for Trotec PAE 51

Question and Answer IconNeed help?

Do you have a question about the Trotec PAE 51 and is the answer not in the manual?

Summary

General Information and Safety

Symbols and Warnings

Explains warning symbols and safety pictograms used throughout the manual.

Safety Instructions

General safety instructions and precautions for operating the device.

Detailed Safety Information

General Safety Rules

Lists essential safety guidelines for device operation and maintenance.

Device Specific Safety Precautions

Foreseeable Misuse

Details improper uses of the device that should be avoided to prevent damage or injury.

Personnel Qualifications

Specifies the required knowledge and skills for safe device operation and maintenance.

Safety Signs and Labels

Explains symbols and labels affixed to the device for user safety.

Residual Risks

Details potential hazards and residual risks associated with device usage.

Device Introduction

Device Description and Features

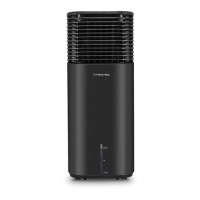
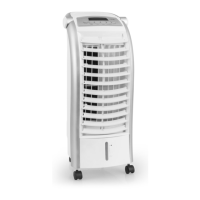
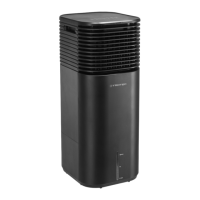
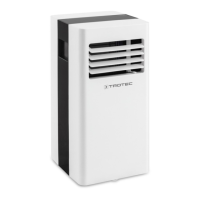
Overview of the air cooler's cooling mechanism, functions, and models.

Emergency Procedures

Instructions on how to act in case of an emergency or malfunction.

Device Components

Device Depiction and Parts List

Visual identification and labelling of all components and parts of the air cooler.

Transport and Assembly

Transport and Storage Guidelines

Guidelines for safely moving and storing the air cooler when not in use.

Scope of Delivery and Unpacking

Lists package contents and steps for safely removing the device from packaging.

Initial Start-up Procedure

Steps for setting up and preparing the device for its first use.

Initial Setup Steps

Remote Control Battery Installation

How to insert or replace the battery in the remote control.

Wheel Operation

Information on using the device's wheels and parking brakes for transport.

Filling the Water Tank

Detailed procedure for filling the water tank with fresh water.

Water Tank Filling Options

Water Tank Filling Options

Details two methods for filling the water tank, including using ice packs for cooling.

Filter and Slider Setup

Slider Position Adjustment

Steps to adjust the slider for the pump and air cooling function.

Evaporation and Air Filter Installation

Guidance on correctly installing the evaporation and air filters.

Controls and Modes

Ventilation Flap Adjustment

How to adjust the ventilation flaps for directing cooled air flow.

Power Connection and Standby

Instructions for connecting the device to power and entering standby mode.

Operating Elements Overview

Explanation of the device's control panel buttons and indicator LEDs.

Device Operation

Switching On and Initial Mode

Steps to power on the device and its default operating mode.

Setting Operating Modes

How to select and activate different modes like cooling, ventilation, and air freshening.

Timer Functionality

Instructions for using the timer to automatically switch off the device.

Advanced Operation Features

Remote Control Operation

How to make all device settings using the remote control.

Auto Stop and Refilling

Explains auto stop on low water and procedures for refilling the tank.

Swing Function and Memory

How to use the swing function and the device's memory function.

Operational Functions and Shutdown

Filter Drying Function

How to activate and use the filter drying function for transport or storage.

Automatic Switch-off and Shutdown

Information on automatic shut-off and steps for safe device shutdown.

Available Accessories

Lists specified accessories and warnings related to their use.

Troubleshooting Common Issues

Device Not Starting

Checks to perform if the device fails to power on.

Reduced Performance Issues

Solutions for problems affecting the device's cooling or air flow capacity.

Cooling and Pump Malfunctions

Troubleshooting steps for when cooling or pump functions fail.

Water Leaks and Vibration

Diagnosing and resolving issues related to water leaks or device vibration.

Remote Control Unresponsiveness

Solutions for when the remote control does not operate the device.

Further Troubleshooting Steps

Advice for when the device still does not operate correctly after checks.

Maintenance and Care

Maintenance Intervals

Recommended schedule for cleaning and checking the device.

Maintenance and Care Log

A logbook for recording performed maintenance activities.

Maintenance Procedures

Pre-Maintenance Safety Precautions

Essential safety steps before performing any maintenance on the device.

Visual Inspection for Dirt

Steps for visually inspecting the device's interior for dust accumulation.

Water Tank Cleaning Procedure

Detailed instructions for cleaning the water tank using citric acid.

Housing Cleaning Method

How to clean the exterior housing of the air cooler with a damp cloth.

Filter Maintenance

Water Tank Cleaning Steps

Completes the procedure for cleaning and rinsing the water tank.

Air Filter Cleaning

Detailed steps for cleaning the air filter for optimal performance.

Filter Replacement and Post-Maintenance

Reinserting the Air Filter

Steps to correctly reinstall the cleaned air filter into the device.

Evaporation Filter Replacement

Guidance on when and how to replace the evaporation filter due to soiling.

Filter Replacement Details

Evaporation Filter Removal and Insertion

Detailed steps for removing the old and inserting a new evaporation filter.

Post-Maintenance Actions

Steps to take after completing maintenance, including reconnecting or storing the device.

Technical Data and Disposal

Technical Specifications

Lists the device's technical data, dimensions, and power requirements.

Product Disposal Guidelines

Instructions for environmentally friendly disposal of the device and batteries.

Overview

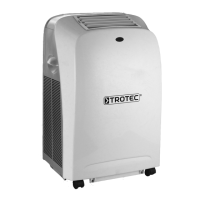
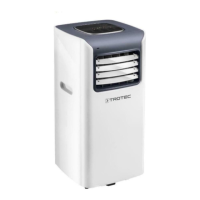
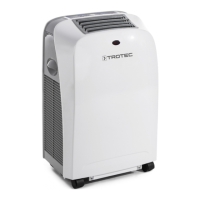
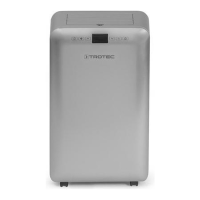
This document describes the PAE 51 / PAE 51 B air cooler, a device designed to lower room temperature through evaporation-based cooling. It can also be used for air freshening, filtering and humidifying the air. The device is suitable for use in various indoor environments such as living spaces, museums, warehouses, archives, libraries, call centers, and computer rooms.

Function Description

The air cooler operates by drawing in warm air, which then passes over an evaporation filter. This filter is moistened with cold water, optionally enhanced with ice cubes or ice packs, to cool the air. A fan then blows out the generated cold air. Beyond its primary cooling function, the device also filters and humidifies the air, thanks to an integrated air filter and the honeycomb structure of the evaporation filter.

The device offers multiple operating modes:

  • Air Cooling: This mode activates the pump to distribute water over the evaporation filter, cooling the circulating air. An acoustic signal will sound if the water tank is empty.
  • Ventilation: In this mode, the fan operates without the cooling function, offering four selectable fan speeds: ultra-silent, low, medium, and high.
  • Air Freshening: This mode generates a pleasant, natural air stream by alternately increasing and decreasing the fan speed. Air freshening cannot be activated in night mode.
  • Night Mode: Designed for ultra-silent operation during bedtime, this mode uses a preset program with different fan speeds adapted to human sleeping habits. Air cooling can be activated in night mode, but air freshening cannot.

The fan speed can be adjusted across four stages. The discharge direction of the cooled air can be manually set using the ventilation flaps or automatically via the optional swing mode. The swing function moves vertical air flaps to ensure continuous air circulation.

The device includes a timer function, allowing it to be automatically switched off after a preset number of hours (1, 2, 4, or 8 hours). It also features an energy-efficient design where LEDs automatically dim if no operating elements are actuated for 60 seconds. In case of a power failure during operation, an acoustic warning signal will be emitted, and the device will automatically switch back on. If the device is switched on from standby, any previously set timer and fan stage will be stored and the device will start in ventilation mode.

Usage Features

The air cooler can be operated either via the control panel on the device itself or using the infrared remote control provided.

Setting Up and Starting the Device:

  1. Unpacking: Remove the device from its cardboard box and all packaging materials. Unwind the power cable completely, ensuring it is not damaged.
  2. Positioning: Place the device in an upright and stable position on horizontal, stable ground, observing minimum distances from walls and other objects as specified in the technical annex. Avoid creating tripping hazards with the power cable.
  3. Wheels: The device is equipped with wheels for easy transportation. Two wheels have parking brakes to ensure a firmly fixed position during operation. Release the brakes for transport and apply them for stability.
  4. Remote Control Battery: Insert a CR 2032 battery into the remote control's battery compartment, ensuring correct polarity.
  5. Filling the Water Tank:
    • Disconnect the device from the mains.
    • There are two methods to fill the tank:
      • Option 1: Open the water funnel on top of the device.
      • Option 2 (for ice cubes/packs): Ensure the slider is in the upper position, undo the locking clasps, and lift off the top section of the device.
    • Fill the tank with fresh drinking water (max. 40 °C). Optionally, add ice cubes made of fresh drinking water or suitable ice packs. If using ice packs, freeze them for at least 4 hours beforehand and place them in the tank before adding water.
    • Observe the minimum and maximum filling levels indicated. The tank must be filled to the minimum level for pump operation.
    • Close the water funnel flap or reattach the top section and secure the locking clasps.
    • Wipe any dampness from the outside of the device.
  6. Inserting Filters: Ensure both the evaporation filter and air filter are installed before switching on. The evaporation filter is crucial for cooling, and the air filter prevents internal contamination.
  7. Connecting Power: Insert the mains plug into a properly fused mains socket. An acoustic signal will confirm the device is in standby mode.
  8. Adjusting Ventilation Flaps: Adjust the ventilation flaps at the air outlet before switching on.

Operating the Device:

  • Switching On: Press the On/Off button. The device starts in ventilation mode at fan stage II, with the On/Off, Ventilation, and Fan stage II LEDs illuminated.
  • Selecting Operating Mode: Use the Mode button to cycle through Ventilation, Air Freshening, and Night Mode. The corresponding LED will illuminate.
  • Adjusting Fan Speed: In Ventilation mode, use the Speed button to select the desired fan stage (ultra-silent, low, medium, or high). The Silent fan stage is only available in ventilation mode.
  • Activating Air Cooling: Press the Cooling/Humidification button. The Cooling/Humidification LED will illuminate, and the pump will start. Select the desired fan stage using the Speed button. Press the Cooling/Humidification button again to switch off air cooling.
  • Activating Swing Function: Press the Oscillation button to turn the swing function on or off. The Oscillation LED will illuminate when active.
  • Setting the Timer: Press the Timer button to select the desired automatic switch-off time (1, 2, 4, or 8 hours). The corresponding Hours LEDs will display the setting.
  • Filter Drying Function: To activate, press and hold the Speed button for 3 seconds. The fan will run at maximum speed for 20 minutes, and the Fan stage III LED will flash. This function terminates automatically or can be stopped by pressing the On/Off button.
  • Automatic Switch-off: The device automatically switches off after 15 hours of continuous operation.

Maintenance Features

Regular maintenance ensures the device's safe and functional operation. Always disconnect the device from the mains before performing any maintenance, care, or repair work. Hold onto the mains plug when pulling it out of the socket.

Cleaning the Water Tank:

  • The water tank should be cleaned every 3 days if actively used, or before longer periods of non-use/storage and prior to recommissioning.
  • Ensure the slider is in the upper position. Open the locking clasps and lift off the top section of the device.
  • Thoroughly rinse the tank with citric acid (descaling agent) for a maximum of 20 minutes, then rinse with water.
  • Dry the inside of the tank with a lint-free cloth.
  • Refill with fresh drinking water if continuing operation.
  • Replace the top section and secure the locking clasps.

Cleaning the Air Filter:

  • The air filter should be cleaned as soon as it is dirty (indicated by reduced capacity).
  • Loosen the screw at the air filter and remove it.
  • Clean the filter with a slightly damp, soft, lint-free cloth. For heavy contamination, use warm water mixed with a neutral cleaning agent.
  • Allow the filter to dry completely before reinserting it. Ensure the filter is undamaged and dry before reinserting.
  • Reinsert the air filter and reattach the screw.

Replacing the Evaporation Filter:

  • The evaporation filter should be replaced if heavily soiled, typically once a year in standard operation.
  • Allow the evaporation filter to dry before removal.
  • Loosen the screw at the air filter and remove the air filter.
  • Remove the old evaporation filter and dispose of it according to national regulations.
  • Insert the new evaporation filter.
  • Reinsert the air filter and reattach the screw.

Cleaning the Housing:

  • Clean the housing with a soft, damp, and lint-free cloth.
  • Ensure no moisture enters the housing or electrical components.
  • Do not use aggressive cleaning agents, sprays, solvents, alcohol-based, or abrasive cleaners.

Visual Inspection for Dirt:

  • Remove the air filter.
  • Use a torch to illuminate the device's openings and check for dirt inside.
  • If a thick layer of dust is present, have the device cleaned by a specialist electrical company or Trotec.
  • Reinsert the air filter.

Storage:

  • Before storing, empty and clean the water tank and allow the evaporation filter to dry to prevent musty smells upon restart.
  • Disconnect the power cable.
  • Store the device in a dry location, protected from frost, heat, dust, and direct sunlight, in an upright position.
  • If needed, use a cover to protect against dust.
  • Do not place other objects on top of the device.
  • Remove batteries from the remote control if storing for a longer period.

Trotec PAE 51 Specifications

General IconGeneral
TypePortable evaporative air cooler
Control typeTouch
Product colorBlack, White
Handles quantity1
Number of wheels4 wheel(s)
Carrying handle(s)Yes
Airflow663 m³/h
Air speed7 m/s
Noise level60 dB
Number of speeds4
Water tank capacity20 L
Timer duration (maximum)15 h
Suitable for room area up to60 m²
AC input voltage220 - 240 V
Power source typeAC
AC input frequency50 Hz
Package depth390 mm
Package width342 mm
Package height897 mm
Package weight8000 g
Air purifiers functionsCooling, Fan

Related product manuals