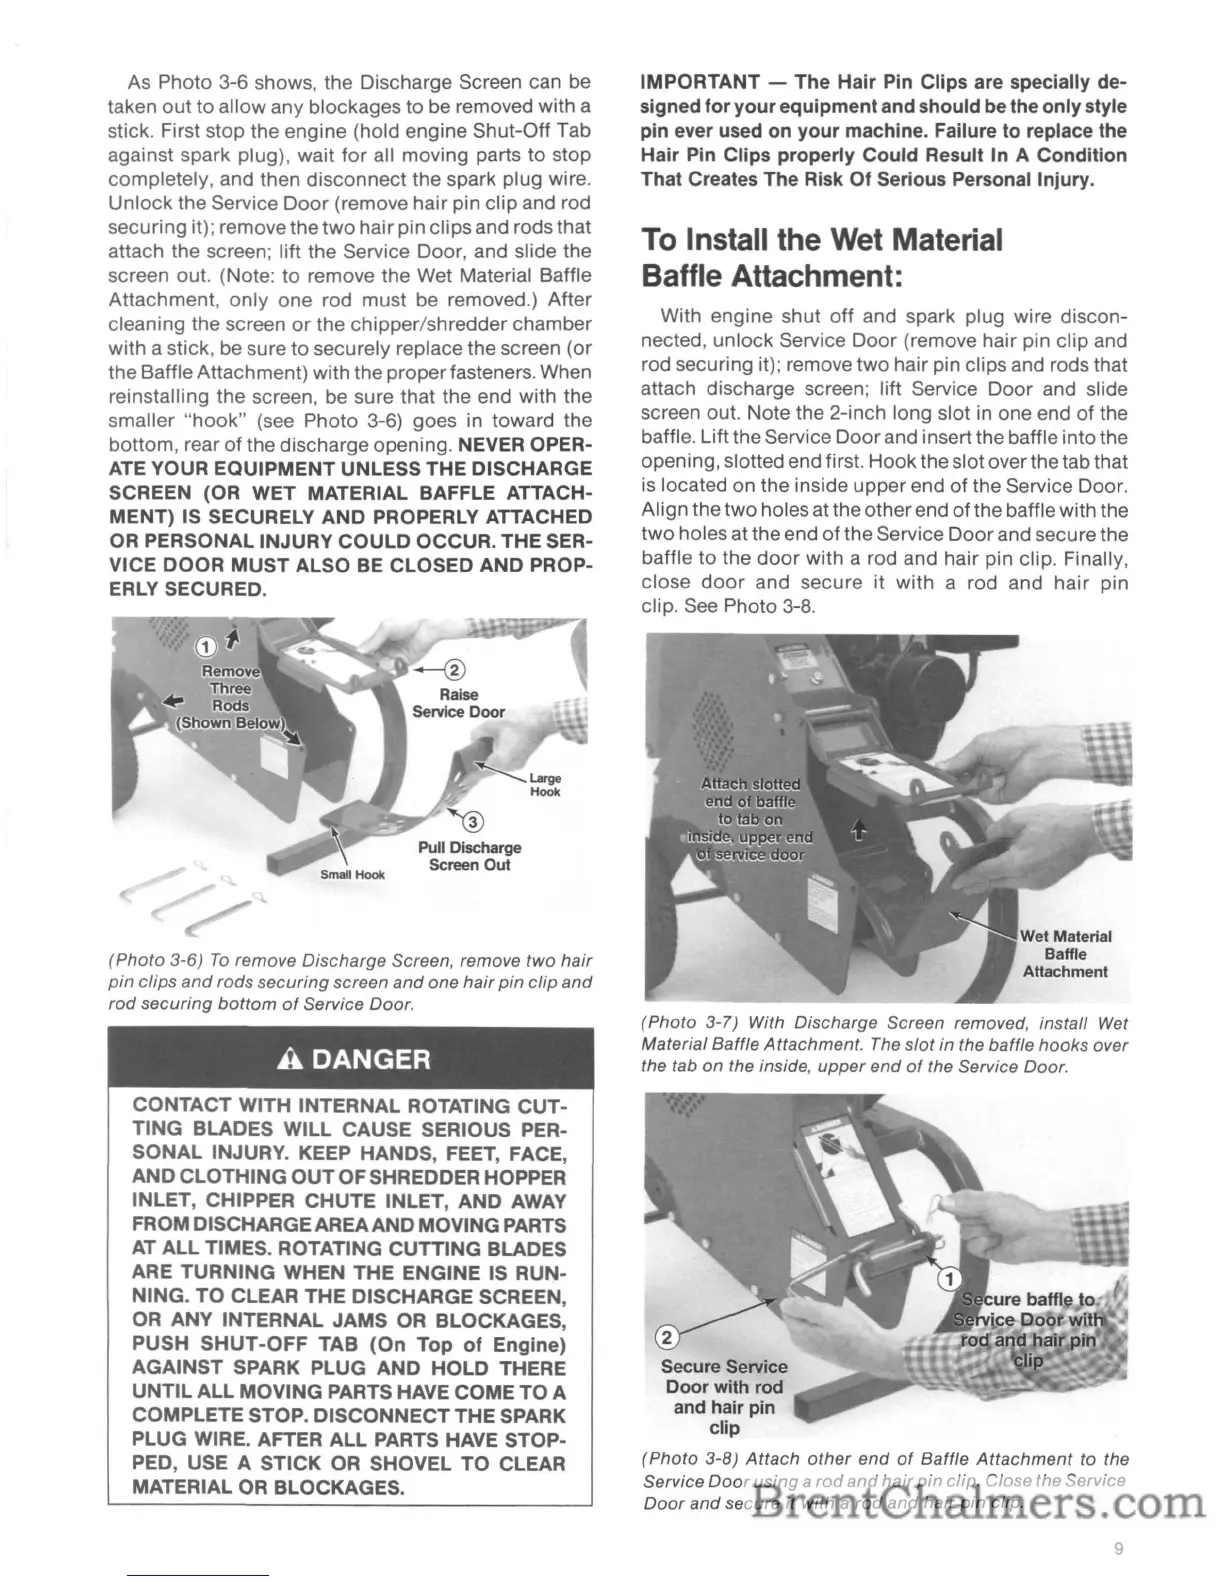
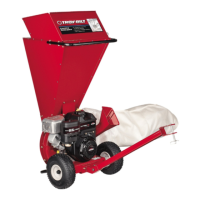
As Photo 3-6 shows, the Discharge Screen can be
taken
out
to allow any blockages to be removed with a
stick. First stop the engine (hold engine Shut-Off Tab
against spark plug), wait
for
all moving parts to stop
completely, and then disconnect the spark plug wire.
Unlock
the Service
Door
(remove hair pin clip and rod
securing it); remove the
two
hair pin clips and rods that
attach the screen; lift the Service Door, and slide the
screen out. (Note: to remove the Wet Material Baffle
Attachment,
only
one rod must be removed.) After
cleaning the screen
or
the chipper/shredder chamber
with a stick, be sure
to
securely replace the screen (or
the Baffle Attachment) with the properfasteners. When
reinstalling the screen, be sure that the end with the
smaller
"hook"
(see Photo 3-6) goes in toward the
bottom, rear of the discharge opening. NEVER OPER-
ATE YOUR EQUIPMENT UNLESS THE DISCHARGE
SCREEN (OR WET MATERIAL BAFFLE ATTACH-
MENT) IS SECURELY
AND
PROPERLY ATTACHED
OR PERSONAL INJURY
COULD
OCCUR. THE SER-
VICE DOOR
MUST
ALSO BE CLOSED
AND
PROP-
ERLY SECURED.
'®
Pull Discharge
Screen Out
(Photo
3-6)
To
remove
Discharge
Screen, remove
two
hair
pin
clips
and
rods
securing
screen
and
one
hair
pin
clip
and
rod
securing
bottom
of
Service Door.
A DANGER
CONTACT
WITH INTERNAL ROTATING
CUT-
TNG
BLADES
WILL
CAUSE SERIOUS PER-
SONAL
INJURY. KEEP HANDS, FEET, FACE,
AND
CLOTHING
OUT
OFSHREDDER HOPPER
INLET, CHIPPER
CHUTE
INLET,
AND
AWAY
FROM DISCHARGEAREAAND MOVING PARTS
AT
ALL
TIMES. ROTATING
CUTTING
BLADES
ARE
TURNING
WHEN THE ENGINE IS RUN-
NING.
TO
CLEAR
THE
DISCHARGE SCREEN,
OR ANY INTERNAL
JAMS
OR BLOCKAGES,
PUSH
SHUT-OFF
TAB
(On
Top
of
Engine)
AGAINST
SPARK PLUG
AND
HOLD
THERE
UNTIL
ALL
MOVING PARTS HAVE COME
TO
A
COMPLETE STOP.
DISCONNECT
THE SPARK
PLUG WIRE. AFTER
ALL
PARTS HAVE STOP-
PED, USE A
STICK
OR SHOVEL
TO
CLEAR
MATERIAL OR BLOCKAGES.
IMPORTANT -
The
Hair
Pin Clips are specially de-
signed
for
your
equipment
and should be the
only
style
pin ever used on
your
machine. Failure
to
replace the
Hair
Pin Clips
properly
Could
Result
In
A
Condition
That Creates The Risk
Of
Serious Personal Injury.
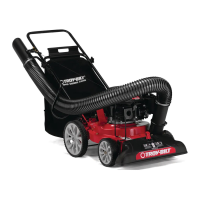
To Install the Wet Material
Baffle Attachment:
With engine shut off and spark plug wire discon-
nected, unlock Service Door (remove hair pin clip and
rod securing it); remove two hair pin clips and rods that
attach discharge screen; lift Service Door and slide
screen out. Note the 2-inch long slot in one end of the
baffle.
Lift
the Service Doorand insert the baffle into the
opening, slotted end first. Hook the slotover the tab that
is
located on the inside upper end of the Service Door.
Align the two holes at the other end of the baffle with the
two
holes at the end of the Service
Door
and secu
re
the
baffle to the
door
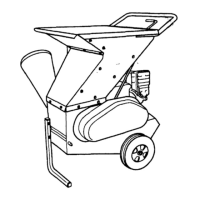
with a rod and hair pin clip. Finally,
close
door
and secure it with a rod and hair pin
clip. See Photo 3-8.
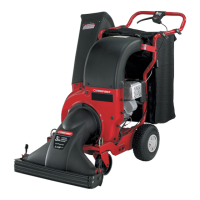
(Photo
3-7) With Discharge Screen removed, install Wet
Material Baffle Attachment. The
slot
in the baffle
hooks
over
the tab
on
the inside,
upper
end
of
the Service Door.
Secure Service
Door
with
rod
and
hair pin
clip
(Photo
3-8)
Attach
other
end
of
Baffle
Attachment
to the
Service
Door
using
a
rod
and
hair
pin
clip. Close the Service
Door
and
secure
it
with a
rod
and
hair
pin
clip.
9