24
COMPLETING THE INSTALLATION
1
2
3
Confirm that the cold water supply main is turned on and that main power is connected to the unit.
Replace the outer cover of the unit by lining up the cutouts with their corresponding pipe connectors, etc.,
and sliding it into place. Tighten the four (4) truss head screws (two at bottom of unit and two at top) until
comfortably snug. Do not over tighten. Only now is trutankless MODEL BR/BC Water Heater ready for power-up
and configuration.
Switch ON the main power circuit breakers.
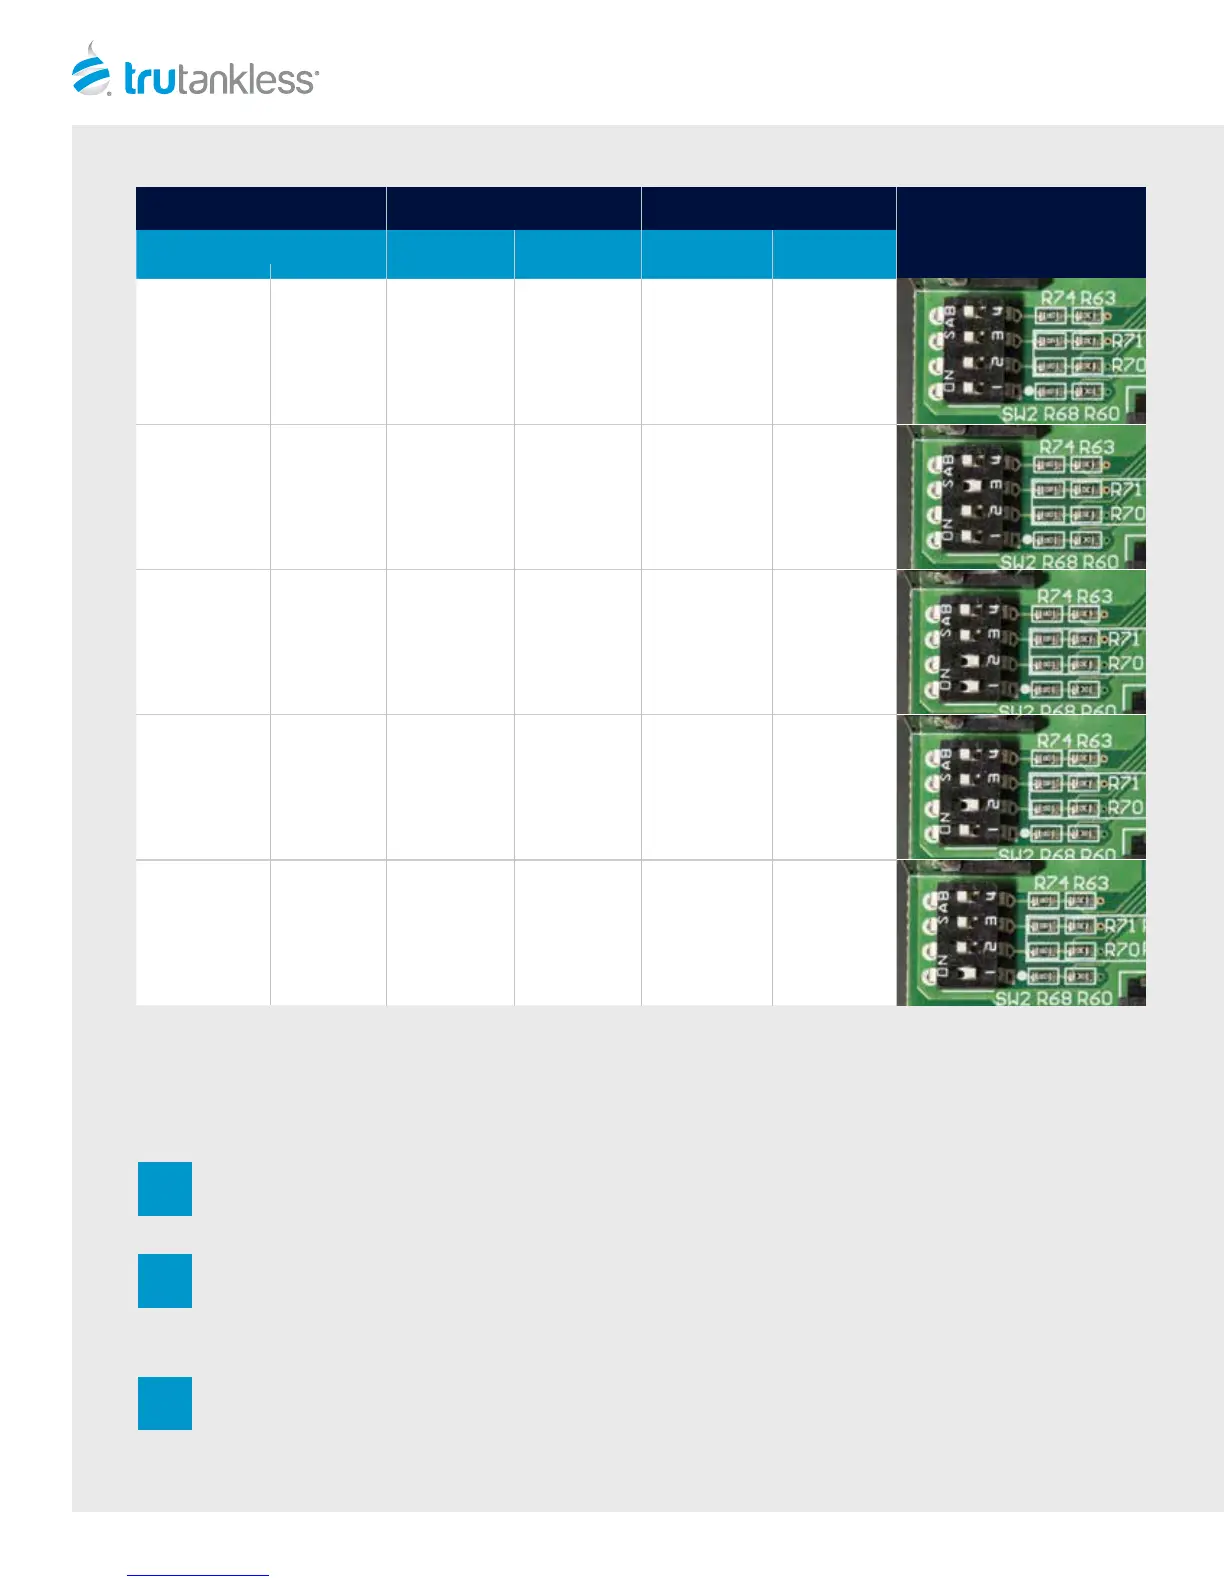
Model
Maximum
Amperage
Minimum
Breaker Size
Minimum
Wire Size
Minimum
Breaker Size
Minimum
Wire Size
TR36/TC33
160
2 x 80 Amp
2-Pole Breakers
4 x #4 Ga.
Copper
TR29/TC25
120
2 x 60 Amp
2-Pole Breakers
4 x #6 Ga.
Copper
1 x 125 Amp
2-Pole Breakers
2 x #2 Ga.
Copper
TR24/TC21
100
2 x 50 Amp
2-Pole Breakers
4 x #6 Ga.
Copper
1 x 100 Amp
2-Pole Breakers
2 x #2 Ga.
Copper
TR20/TC17
80
2 x 40 Amp
2-Pole Breakers
4 x #8 Ga.
Copper
1 x 80 Amp
2-Pole Breakers
2 x #4 Ga.
Copper
TR15/TC13
60
2 x 30 Amp
2-Pole Breakers
4 x #8 Ga.
Copper
1 x 60 Amp
2-Pole Breakers
2 x #6 Ga.
Copper
ELECTRICAL REFERENCE OPTION 1 OPTION 2 DIP SWITCH
CONFIGURATION