V1.0
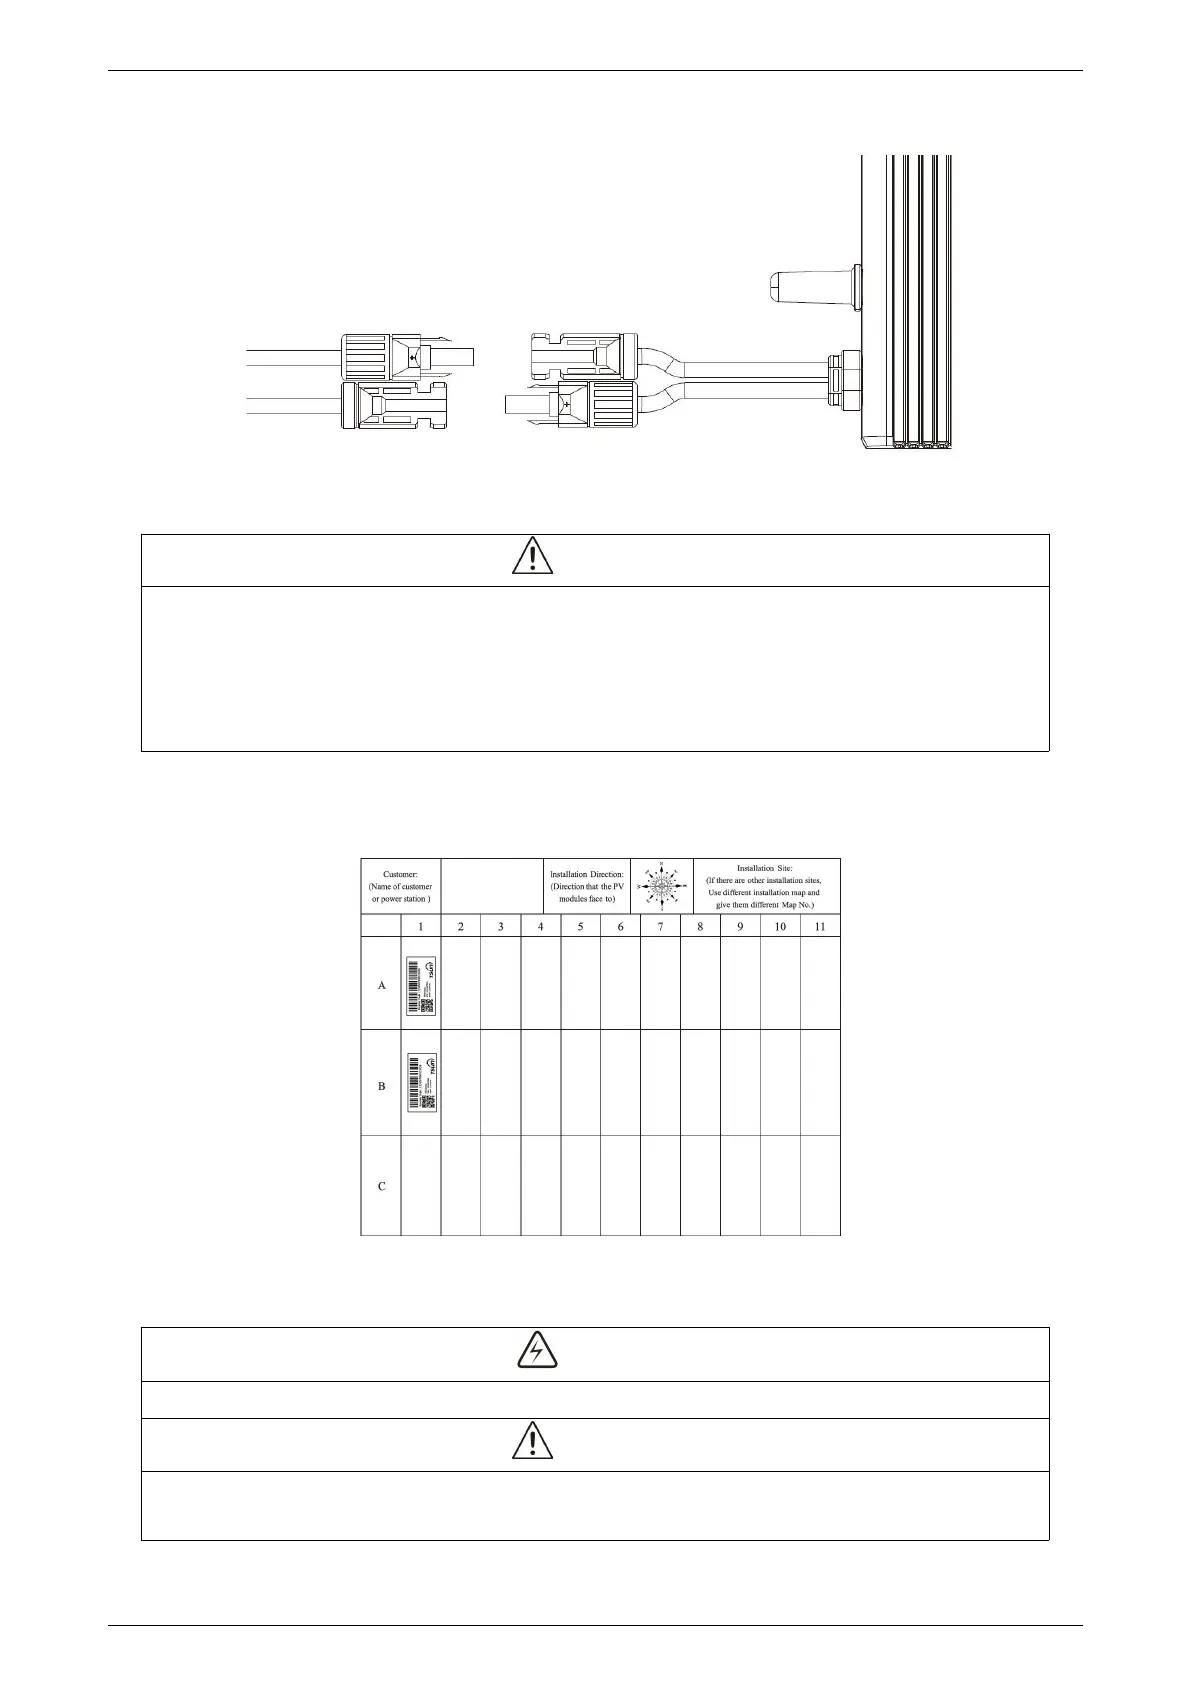
Step 6. Make an installation map
·If there is more than one installation site, please make the installation map separately and
give a clear description of the installation site.
·The row of the table corresponds to the shorter side of the PV module and the column of the
table corresponds to the longer side of the PV module. The direction in the upper left corner
means the actual installation orientation.
Take out the SN labels and installation map from the package. Paste the SN labels on the installation
map below and complete the information on the solar plant.
Step 7. Start the System
·Only qualified personnel should connect this system to the utility grid.
·Do not connect micro-inverters to the grid or energize the AC circuit(s) until you have
completed all the installation procedures and have received prior approval from the electrical