40 41
7. OPERATION OF THE SYSTEM 7. OPERATION OF THE SYSTEM
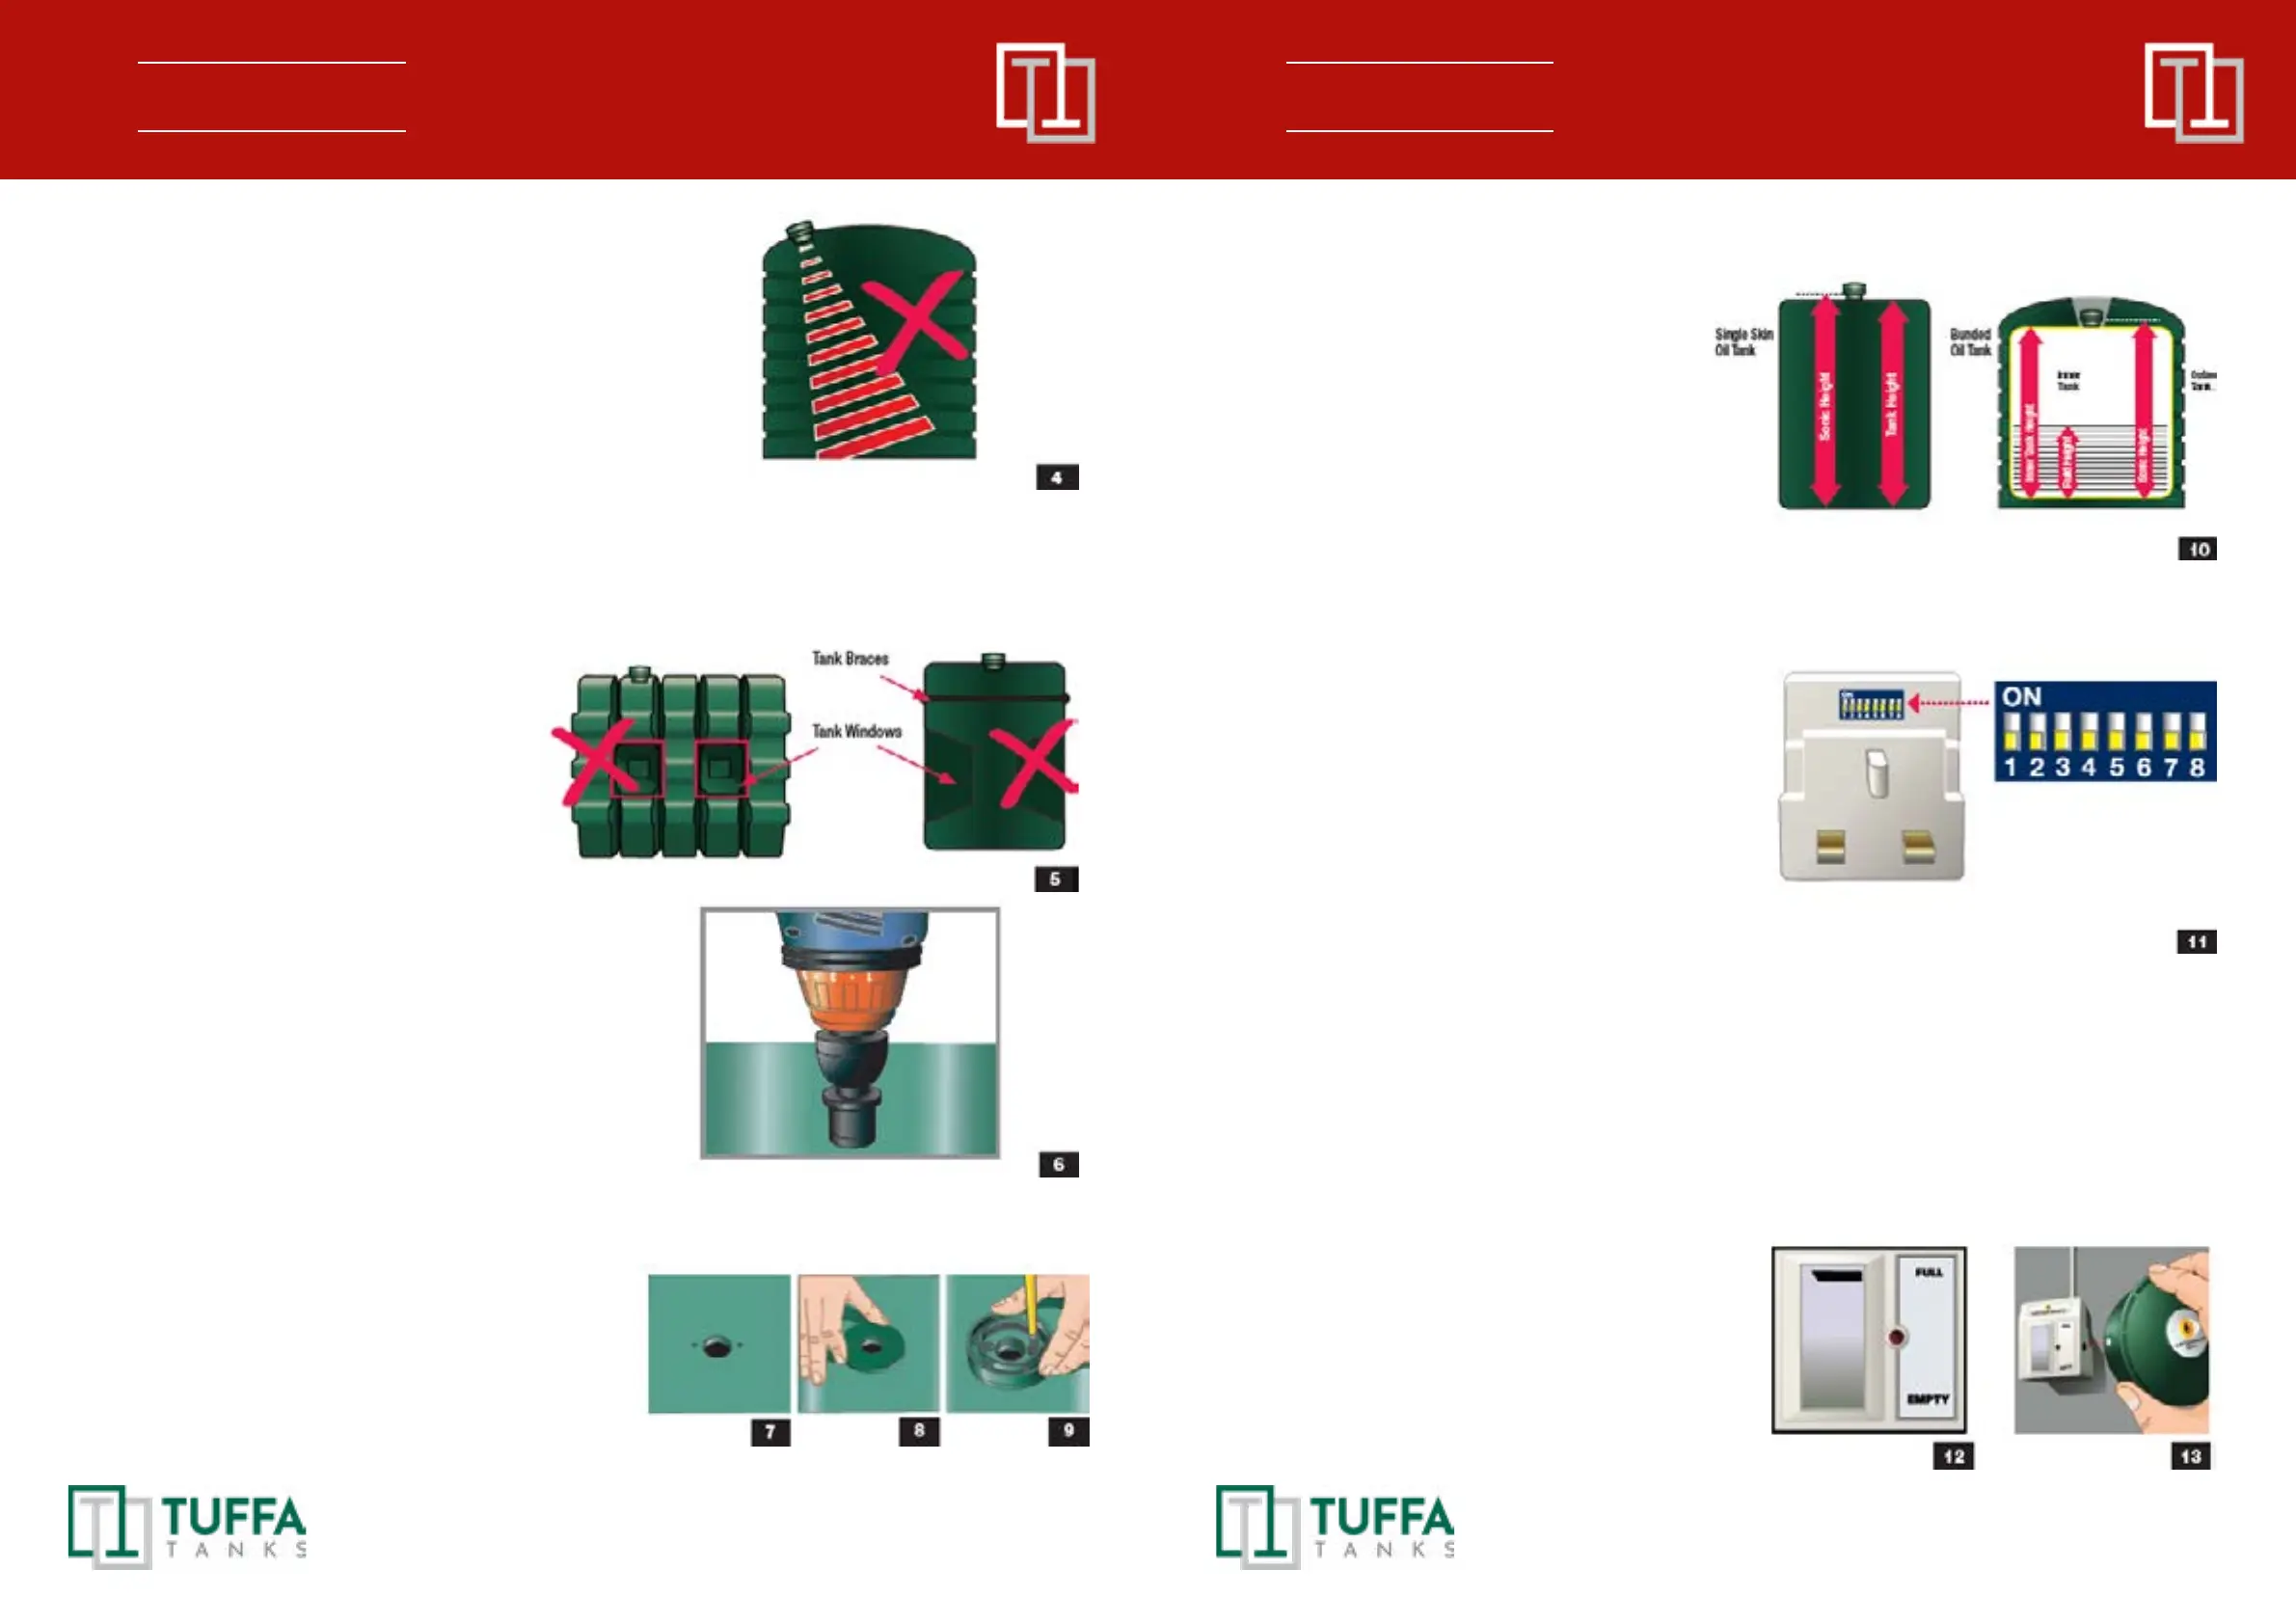
4. DEFINE THE SONIC HEIGHT
Accuratelymeasurethesonicheightmaking
noteofthismeasurement.Thepermissible
maximumtankheightis3metresfromthe
baseofyourtanktothepositionofthe
WatchmanSonic(whichshouldbenolower
thanthellpoint).(SeeninPicture10).
•Heightdoesnotincludethebase/piers
whichtanksitson.
5. SETTING THE SWITCHES ON THE RECEIVER
Usingthetankheightchart(seesection9),read
acrosstotherelevantmultiswitchsettingusing
tankmeasurementsyoutookdownearlier.The
multiswitchesarelocatedinarecessatthe
backofthereceiverabovethepins.
Usingascrewdriverortipofaballpointpen,ip
therelevantswitch(e.g.)upwards(=ON).
NOTE:Switches1&2arefactorysetswitches
andarenorelevancetotheenduser.Ifyou
wishtosettheaudibleringfeaturetheSwitch1
needstobemovedup.Switchoneifsetinthe
on(up)positionwillcausetheunittobleepin
theeventofalowlevelreading.
6. MATCHING RECEIVER AND TRANSMITTER
Youshouldmatchthereceiver(PartA)withthetransmitter(PartD)sothatthesystemcodeis
uniquetoyourtank.Plugreceiverintoasuitableandconvenientelectricalsocketandswitchon.
Pluginthereceiverandswitchiton.Thedisplayscreenonthefrontofthereceiverwillshowa
ashingbar(Picture12).Thisindicatesthatthereceiveriswaitingonauniquecode.Thisbar
willcontinuetoashfor2minutesduring which time you can match the transmitter to the
receiver.
TheTransmittercan’tsitatanangleasthisgivesan
incorrectlevelreadingonthereceiver.Takecarenotto
chooseanareaonwhichwatercouldgatheri.e.adent/
depressionorapositiondirectlyaboveanyrestrictedarea
insidethetank.(SeePicture4)
NB:Fortankswithwindowcorrugationsorinternalbraces
pleaseensurethattheWatchmanSonicisnotpositioned
aboveorwithin15cmoftheareaoftheWINDOWorthe
edgeofthetank.(SeePicture5).Ensurethatthesonicpath
iscleartothebottomofthetankasperpic2.
Drillaholeintheplacethatyouhaveselectedonthe
tank’stopsurfaceusinga32mmhole-saw.(shownin
Picture6)
Warning:Ifyouareunsureifyoushoulddrillthetank
pleasecheckwiththetankmanufacturerrst.
3. FITTING TRANSMITTER BASE
Fortankswithpre-drilledholes.Ensureguidelinesfrompoints4&5areadheredto.
•Removecapfromthehole(Picture7)andinsert
transmitterbase,ensuringtheweathersealis
securelyinplace(Picture8&9).
•TightentheWatchmanSonicbase(PartE)onto
thetankwith2stainlesssteelself-tapping,counter
sunkscrewssupplied(PartC).Donotovertighten!