17
English
- Make sure that only one person uses the equipment at a time� The
equipment must not be used by persons weighing more than 135
kg (300 lbs)�
- Do not open equipment without consulting your dealer�
Electrical safety
- Before use, always check that the mains voltage is the same as the
voltage on the rating plate of the equipment�
- Do not use an extension cable�
- Keep the mains cable away from heat, oil and sharp edges�
- Do not alter or modify the mains cable or the mains plug�
- Do not use the equipment if the mains cable or the mains plug
is damaged or defective� If the mains cable or the mains plug is
damaged or defective, contact your dealer�
- Always fully unwind the mains cable�
- Do not run the mains cable underneath the equipment� Do not run
the mains cable underneath a carpet� Do not place any objects on
the mains cable�
- Make sure that the mains cable does not hang over the edge of a
table�
- Make sure that the mains cable cannot be caught accidentally or
tripped over�
- Do not leave the equipment unattended when the mains plug is
inserted into the wall socket�
- Do not pull the mains cable to remove the mains plug from the wall
socket�
- Remove the mains plug from the wall socket when the equipment
is not in use, before assembly or disassembly and before cleaning
and maintenance�
⚠ WARNING
• Never use water or any other liquid directly on or near the
equipment, but only via a damp cloth if moist is required to
clean the machine�
• Using liquid directly is harmful for the equipment’s components,
and may result in an electric shock caused by a short cut circuit�
This could result in serious personal injury or even death�
Assembly instructions
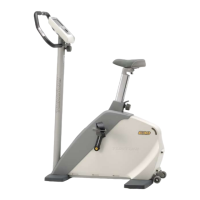
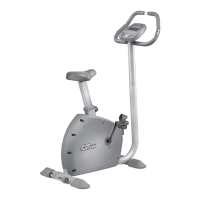
Description illustration A
The illustration shows what the trainer will looks like after the
assembly is completed�
You can use this as a reference during your assembly, but do follow
the assembly steps always in the correct sequence as showed in the
illustrations�
Description illustration B
The illustration shows what components and parts you should find
when un-boxing your product�
‼ NOTE
• Small parts can be hidden/ packed in hollow spaces in the
Styrofoam product protection
• If a part is missing, contact your dealer�
Description illustration C
The illustration shows the hardware kit that comes with your product�
The hardware kit contains bolts, washers, screws , nuts etc� and the
required tools to properly fit your trainer�
Description illustration D
The illustrations shows you in the correct following order how to
assembly your trainer best�
‼ NOTE
• Part numbers shown in the assembly steps are commencing with
the spare part drawing that can be found in the online version
user manual�
⚠ WARNING
• Assemble the equipment in the given order�
• Carry and move the equipment with at least two persons�
⚠ CAUTION
• Place the equipment on a firm, level surface�
• Place the equipment on a protective base to prevent damage to
the floor surface�
• Allow at least 100 cm of clearance around the equipment�
• Refer to the illustrations for the correct assembly of the
equipment�
Additional assembly information.
D3 How to fit the pedals correctly.
‼ NOTE
• Right and left side are determined from an exercising positions
perspective�
Right hand pedal
Find the “R” or “L” mark on the pedal axle
- Fit the right hand pedal “R” into the right hand crank�
- Firstly turn the pedal axle in clockwise direction by hand�
- Use the wrench to fully tighten the pedal�
Left hand pedal
- Fit the left hand pedal “L” into the left hand crank�
- Firstly turn the pedal axle in counter-clockwise direction by hand�
- Use the wrench to fully tighten the pedal�
Click to see our supportive YouTube video
https://youtu.be/3BiN9mc5Tmw?t=101
Additional information to Assembly step D4 & D5
- Establish the wire connection between the cable coming from the
main frame, and the lower part of the cable pre fitted in the upright
tube�
- Place the upright tube over the main frame fixing bracket, in where
the fixing bolts are pre-assembled and stay pre-assembled�
( While lowering the upright tube, gently pull the upper part of the
cable up, to avoid the cable get caught by the connection� )
- The upright tube should automatically find the centre position, but
it is advisable to make the slightest correction needed to make sure
the position is good�
- The perfect position is when the fixing bolts are perfectly centred in
line with the upright tube holes�
‼ NOTE
• Avoid the cable connection between these two parts get
pinched�
• By fastening the two bolts (turning in clockwise direction) on the
front side you will widen the fixing bracket so the upright gets
fixed firmly�