Home
TVS
Printer
LP 46 PLUS
Page 25
TVS LP 46 PLUS - Page 25
46 pages
Manual
Save Page as PDF
To Next Page
To Next Page
To Previous Page
To Previous Page
Loading...
20
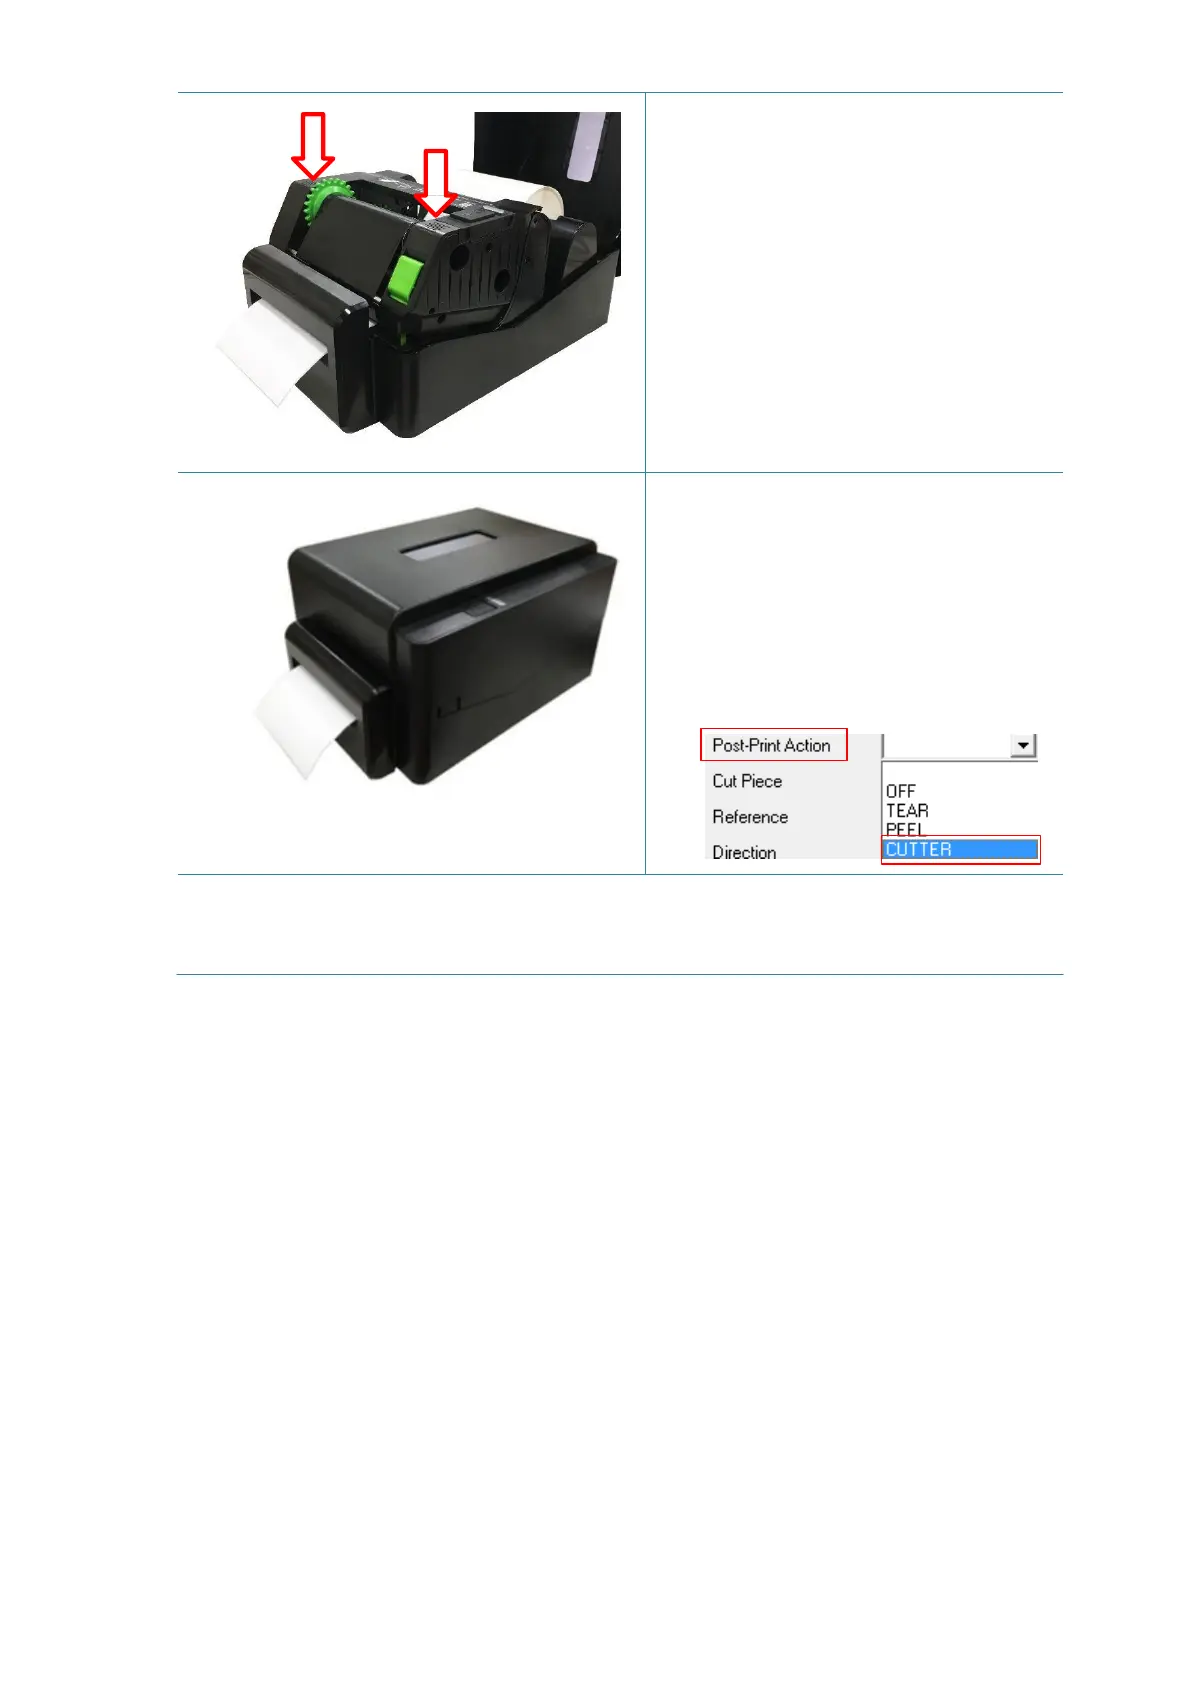
5.
Close the print head
mechanism as
indicated.
6.
Close the printer cov
er. Use the
“Diagnostic To
ol”
to
se
t
the printer
fo
r cutter mode
by selecti
ng
“CUTTER” option
f
o
r
Post-Print
Action settin
g the
n cli
ck
“Se
t”
button to
enable the cutt
er mode.
Press the FEED bu
t
ton
to
test.
Note:
Please calibrate the g
ap/black m
ark sensor w
hen changing media
.
24
26
Table of Contents
Main Page
Table of Contents
4
Introduction
6
Product Introduction
6
Product Features
7
Printer Standard Features
7
Printer Optional Features
8
General Specifications
9
Print Specifications
9
Ribbon Specifications
10
Media Specifications
10
Operations Overview
11
Unpacking and Inspection
11
Printer Overview
12
Front View
12
Interior View
13
Rear View
14
Setup
15
Setting up the Printer
15
Loading the Ribbon
16
Loading the Media
19
Loading the Roll Labels
19
External Label Roll Mount Installation (Option)
22
Loading the Media in Cutter Mode (Option)
24
Loading the Media in Peel-Off Mode (Option)
26
LED and Button Functions
28
LED Indicator
28
Regular Button Functions
28
Power-On Utilities
28
Gap/Black Mark Sensor Calibration
29
Gap/Black Mark Calibration, Self-Test and Dump Mode
30
Printer Initialization
33
Set Black Mark Sensor as Media Sensor and Calibrate the Black Mark Sensor
34
Set Gap Sensor as Media Sensor and Calibrate the Gap Sensor
34
Skip AUTO.BAS
35
Diagnostic Tool
36
Start the Diagnostic Tool
36
Printer Function
37
Calibrating Media Sensor by Diagnostic Tool
38
Auto Calibration
38
Troubleshooting
39
Common Problems
39
Maintenance
41
Revise History
42
Related product manuals
TVS LP 46 NEO
42 pages