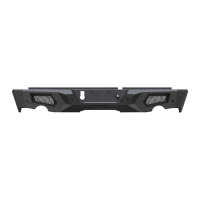
Move to the second mounting location next along the body panel
(Fig 4). Repeat STEPS 1 & 2 to attach (1) Driver/Left Side
Mounting Bracket to the second mounting location (Fig 5).
STEP 3
TYGER LanderX
Driver/Left side Installation Pictured
Driver/Left side Installation Pictured
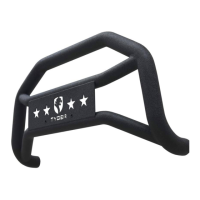
Continue to the third mounting location next along the body
panel (Fig 6). Repeat STEPS 1 & 2 to attach (1) Driver/Left Side
Mounting Bracket to the third mounting location (Fig 7).
Finally, locate the rear mounting location at the back of the cab
(Fig 6). Repeat STEPS 1 & 2 to attach the remaining Driver/Left
Side Mounting Bracket to the last mounting location (Fig 8).
STEP 4
STEP 5
3/5
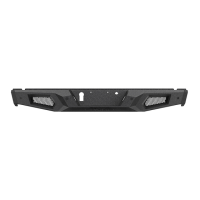
(Fig 4) Driver/left second location pictured
(Fig 5) Driver/Left Mounting Bracket
installed in second mounting location
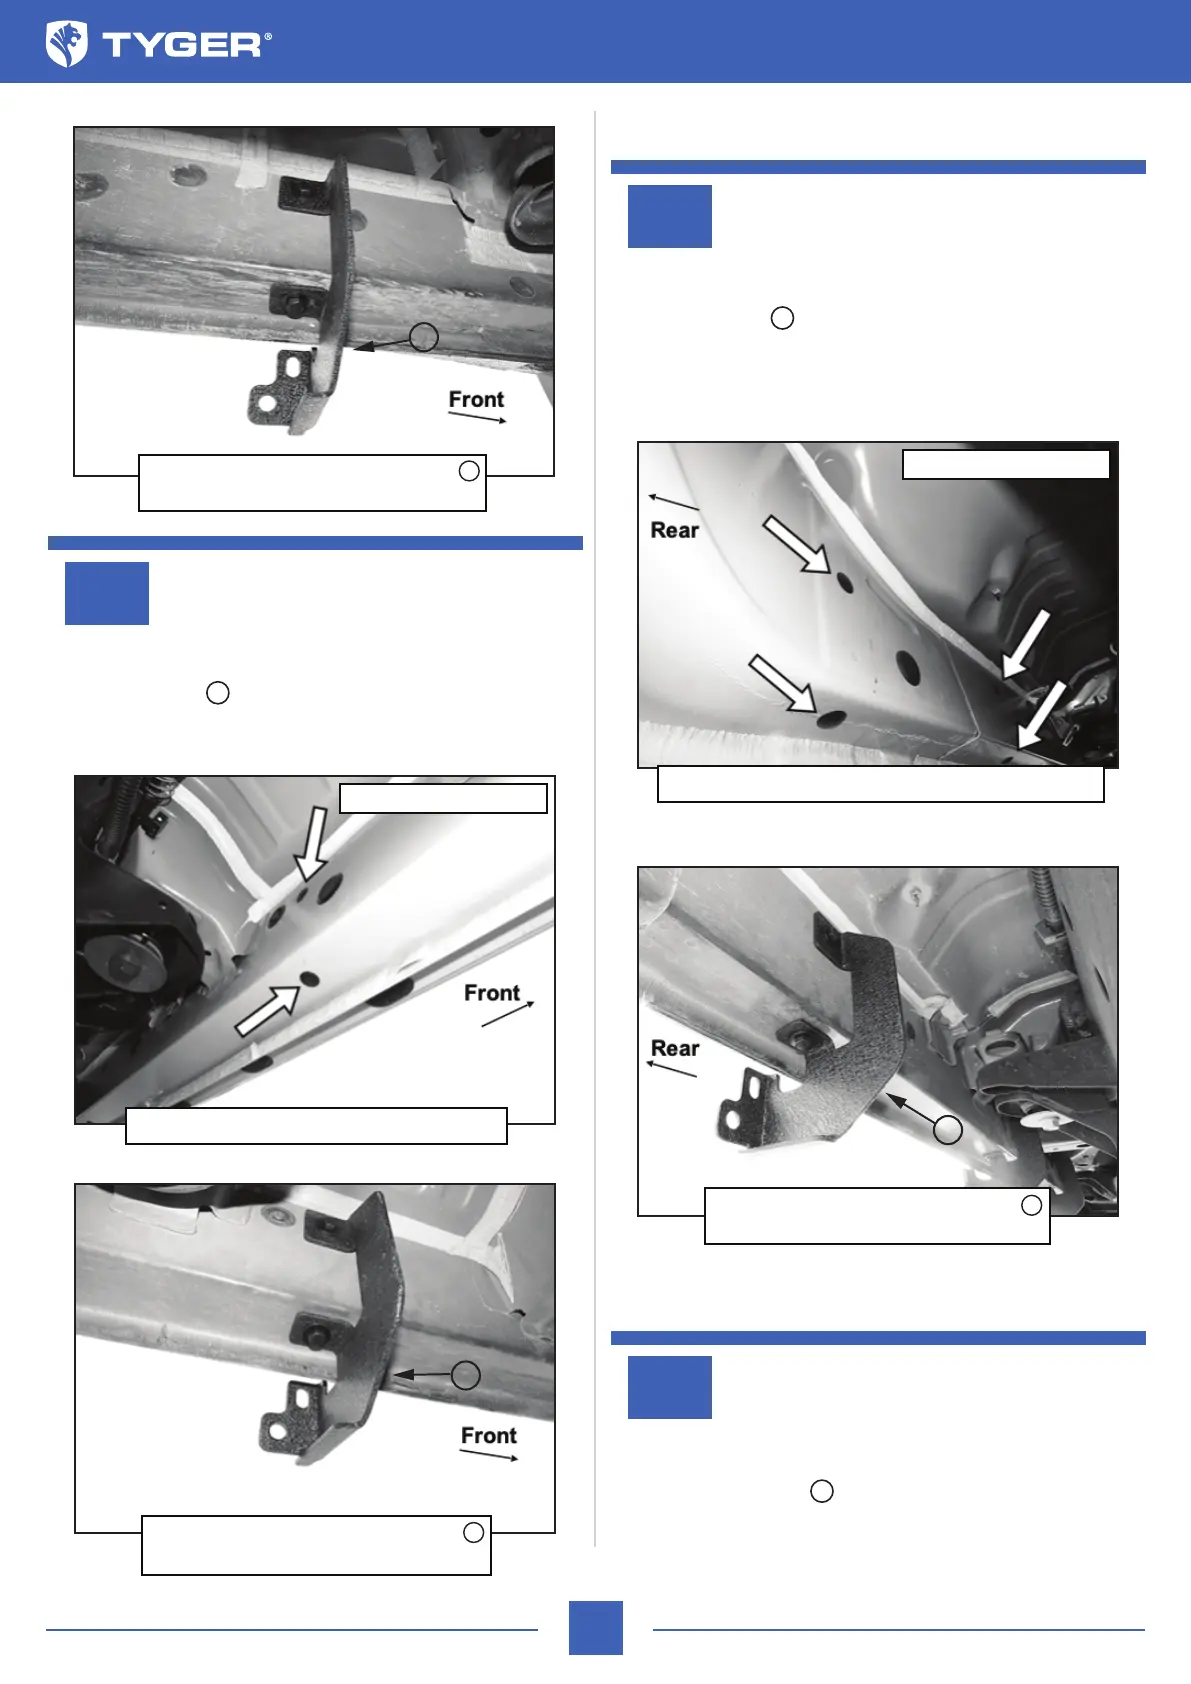
(Fig 3) Driver/Left Mounting Bracket
installed in front mounting location
A
A
A
A
A
Remove plugs (arrows)
A
(Fig 6) Driver/left third and rear locations pictured
(Fig 7) Driver/left Mounting Bracket
installed in third mounting location
A
Remove plugs (arrows)
A
A