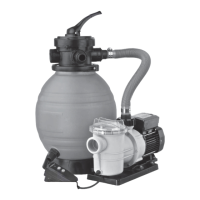
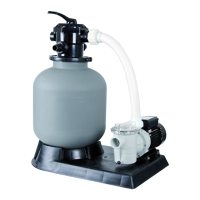
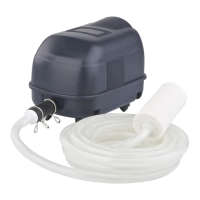
Pool Filter 300 - Pool Filter Set 300-2,5 m/h
1
The duration of the ltration must be adapted to meet the specic weather conditions and frequency with which the swimming pool is used.
During the time of year when the swimming pool is used, the ltration system mu
st run suciently long every day to ensure at least the complete exchange/purifying of the water.
(2) Regularly check the pool’s water level and the ltering system’s operating pressure.
(3) Regularly clean the pre
liminary lter basket of the skimmer and the pump.
(4) Be sure to replace the silica lter sand every two years.
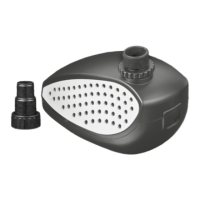
(5) Removing the vacuum lter. The vacuum lter may become damaged in the cou
rse of its installation or during use after installation. The most signicant, telltale sign of damage is
the discharge of silica sand into the swimming pool. Should this be the case, it is necessary to replace the vacuum
lter. The following contains a description of the procedure::
- Remove the sand lter.
- Briey rinse the lter out to make the removal of the vacuum lter easier.
- Turn the vacuum lter counter clockwise
a ¼ turn to remove it from its housing. Repeat this procedure for every vacuum lter that is aected.
- Replace the vacuum lter(s) and reassemble the ltering system in the reverse order used to complete the
disassembly.
WINTERING
In order to warn against any risk of freezing, it is important to drain the lter.
1 - To unscrew drain plug of the lower part of the tank and to remove the valve, in order to air the lter for
this wintering period.
CAUTION: TO DRAIN THE FILTER WITHOUT CREATING INCOMING AIR ON THE HIGHER PART WHICH CAN PERMANENTLY DAMAGE THE TANK.
2 - To place the lever of the valve In the „ WINTER „ position in order to evacuate water and to
leave the valve in this position.
3 - To drain the pump according to the instructions of the manufacturer.
MAINTENANCE
CAUTION! Before beginning with maintenance or service work, always make sure the supply of electrical power to t
he system has been reliably disconnected.
1.Winterising
A soon as the swimming season is over, the product must be stored in a dry location where it will be protected from the weather.
(1) Perform the nal rinse to cl
ean the silica sand.
(2) To drain the system of water, remove the exible lines and set the valve lever in the “ WINTER” position. Leave it in this position.
(3) Drain the vessel now using the drain tting located at the bottom section
of the tank. As soon as the water has been completely drained from the product, carefully remove all
quartz sand residues. Reinstall the drain tting to protect the threads from damage.
(4) Bleed the pump, following the manufacturer’s instr
uctions carefully.
(5) Before putting the product back into operation in the next season, it is imperative that you make sure the lter is properly lled, i.e. ensure there is no air inside it.
2. Pump maintenance
Swimming pool pumps are designed to operate with very little maintenance. However, due to the regular, continuous use of the products, the wear and exhaustion of the individual
components is inevitable. Contact your
local dealer or the manufacturer for any maintenance or service work that has to be performed on the pumps. Only qualied electricians shall
perform electrical maintenance or repair work.
SOLUTIONS TO OPERATIONAL PROBLEMS
This product and its instructions are designed primarily for the use of private persons – without the assistance of professional personnel, except in isolated cases. In the following, you
will nd problems
and their potential causes. The problems shown are common to all ltration systems and may typically occur in the course of use throughout the years. You don’t
have to be a professional to implement
the solutions. If you have questions about the warranty or customer service, please consult your dealer.
PROBLEM CAUSE SOLUTION
Leakage of water Poor connection of exible lines and inputs.
Check the connections and position and if necessary, apply Teon
tape and tighten the clamps.
After starting the lter, no water ows out of the return ou
tlet.
The valve is in the FILTER position. Shut o the product and put the valve in the right position.
The product is located at a higher level that the pool’s water level
and for this reason has emptied itself.
Place the lter in a suitable location and ll it.
The vacuum cover or plug is blocking the skimmer. Remove the vacuum cover or plug from the skimmer.
7
The ltering time must be adapted to the climatic conditions and the frequency of use of the swimming pool. During seasons in which the pool is used, it is imperative that the lter system is
put into operation every day for a sucient period of time, to ensure at least one complete transfer/cleaning of the water volume.
(2) Regularly check the water level of the pool and the operating pressure of the lter system.
(3) Clean the skimmer and pump pre
-lter baskets regularly.
(4) Be sure to replace your lter sand approximately every two years.
(5) Removal of the riser pipe with water distributor (1 component). It may be the case that the water distributor is damaged, either when the lter is installed or during later use. The main
visible eect is the introduction of the sand into the pool through the pumping function. The damaged component must be replaced in this case.
For this, yo
u must proceed as follows:
- Remove the riser pipe with water distributor.
- Briey rinse out the lter to make removal easier.
- Replace the riser pipe with water distributor and reassemble the lter system in reverse order
Manual Pool Filter 300 6-sprachig 2021_2 neu.indd 7
Manual Pool Filter 300 6-sprachig 2021_2 neu.indd 7
28.05.21 14:36