Ubee Interactive Setting Up and Connecting the DDW36C
Ubee DDW36C Advanced Wireless Gateway MSO Operations Guide • October 2111 14
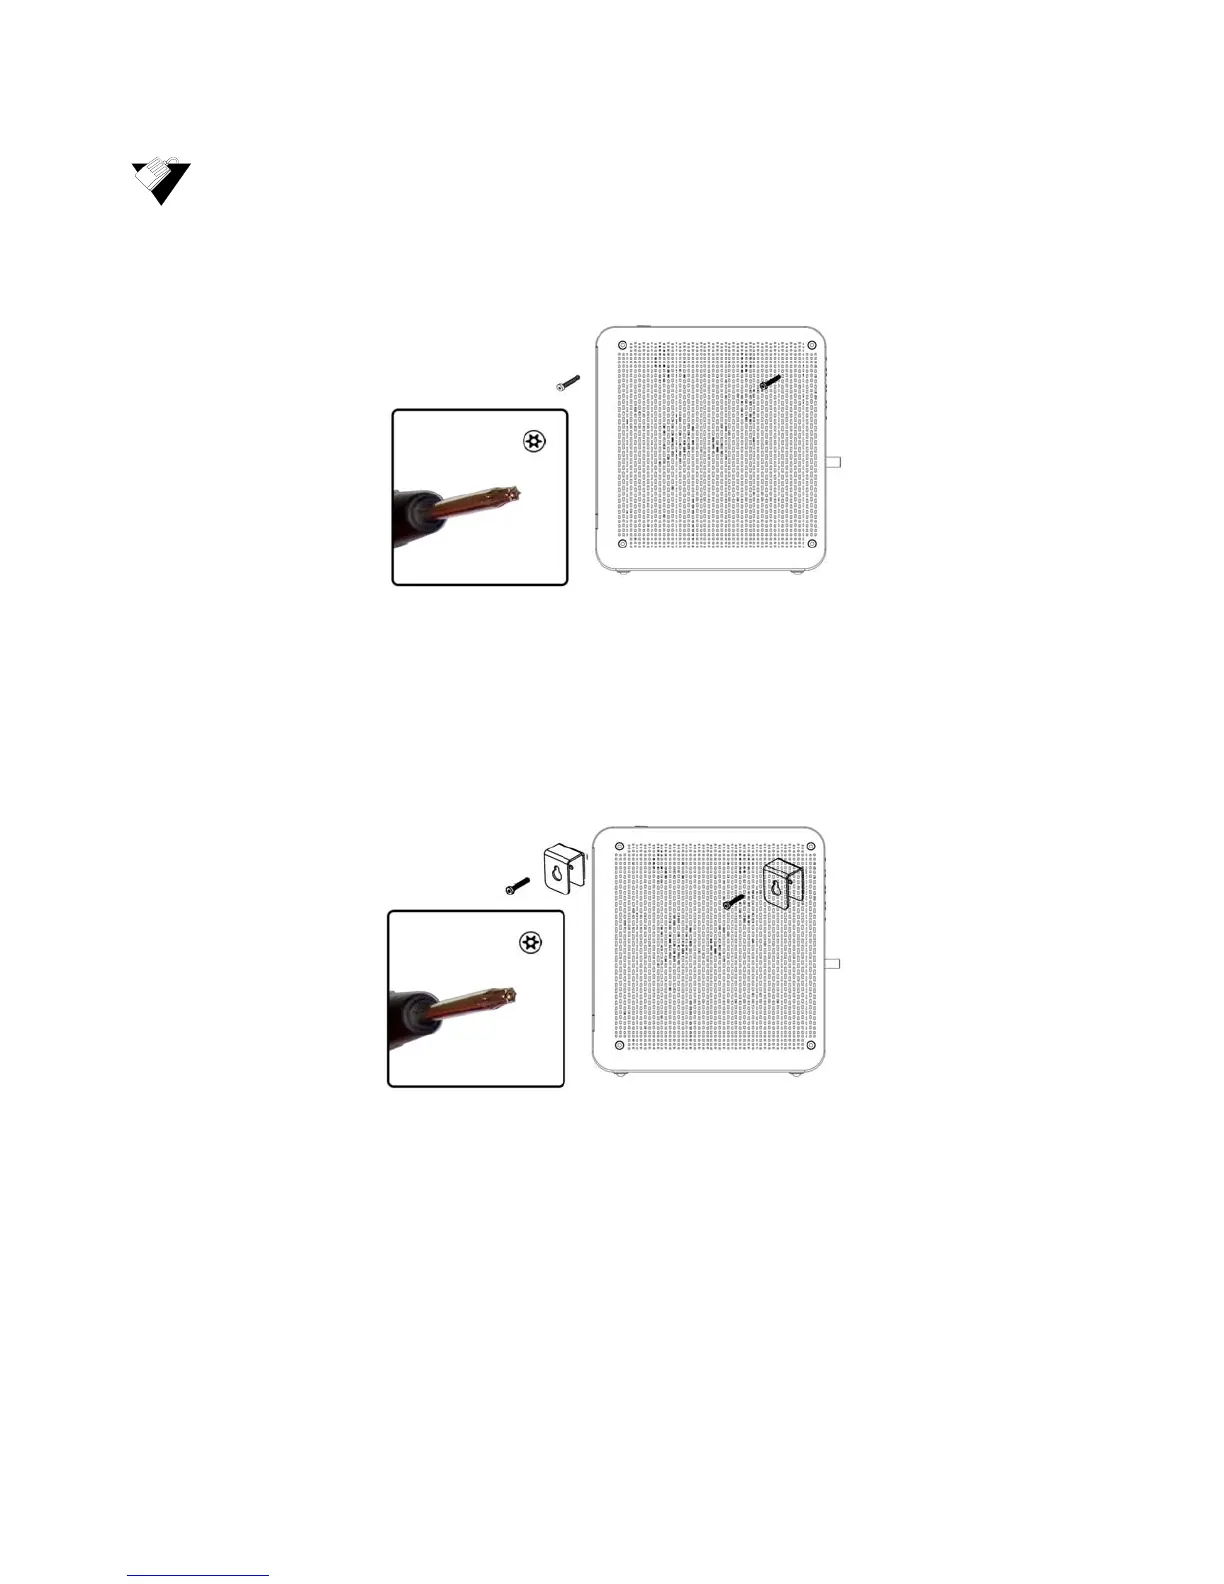
To mount the DDW36C on a wall:
1. Unscrew both screws from the top right side of the DDW36C using a Torx T10
screwdriver.
2. Screw each wall bracket to your device using the 2 new housing screws (these are
longer than the original housing screws). Make sure the brackets are pointing down
and that the smallest opening is closest to the device. Note: When attaching the
brackets, take care to properly align the screws to prevent cross threading.
Important: To avoid internal device damage, do not use the longer housing screws
without brackets.
3. Install the 2 round or pan head screws horizontally on the wall 7.5 inches (190.5 mm)
apart. The screws should protrude from the wall so that you can fit the bracket
between the head of the screw and the wall. If you install the screws in drywall, use
hollow wall anchors to ensure the unit does not pull away from the wall due to
prolonged strain from the cable and power connectors.