8 UCOM Twintalker 4700
UCOM Twintalker 4700
9 Getting started
10 Battery Charge Level
The BATTERY CHARGE LEVEL is indicated by the number of squares present inside the
BATTERY icon on the LCD Display.
• Battery Full
• Battery 2/3 charged
• Battery 1/3 charged
• Battery empty
When the battery charge level is low, a beep will be heard.
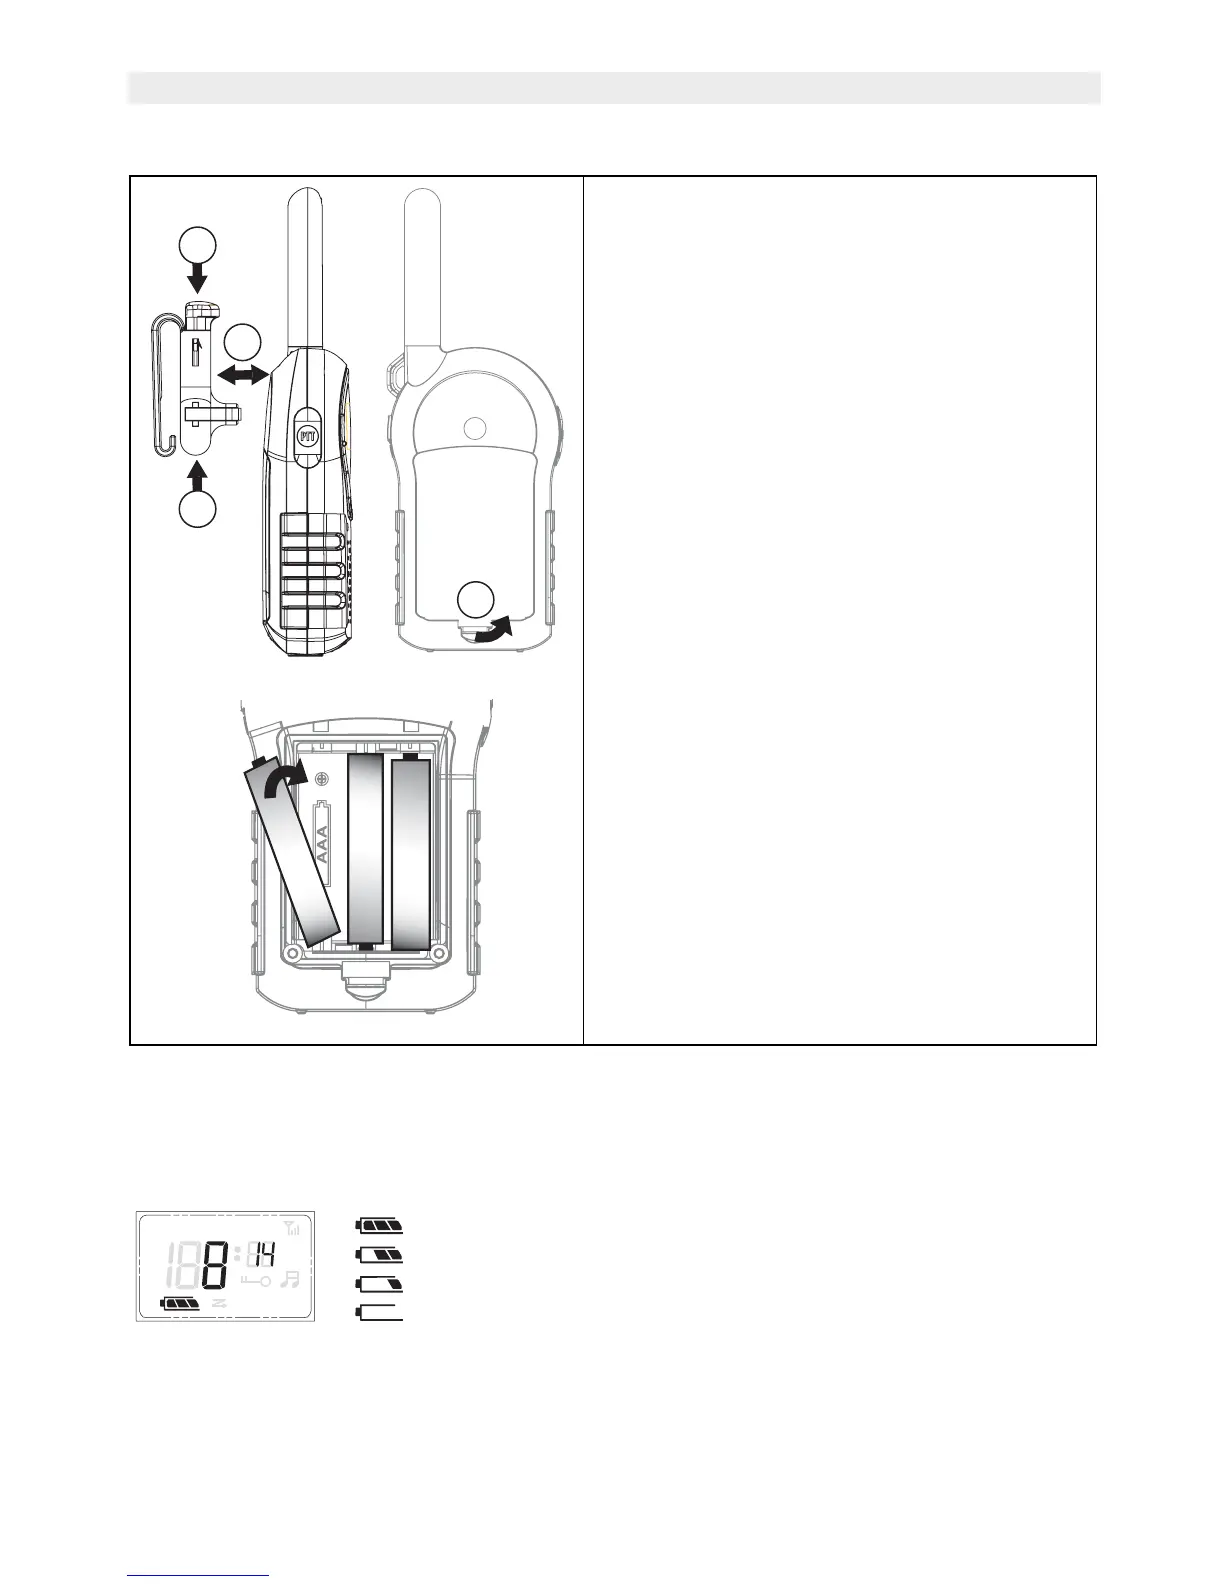
9.1 Installing/Removing the Belt
Clip
1. To install the belt clip, align the pin with
the hole in the backside. Gently push
until it clicks into position.
2. To remove the belt clip from the unit,
push the belt clip (A), while pulling the
clip away from the unit (B).
9.2 Battery Installation
1. Remove the belt clip (See 9.1).
2. Pull the battery cover tab (C) and gently
remove the battery cover.
3. Install three ‘AAA’ alkaline or
rechargeable batteries following the
polarity as shown.
4. Re-install the Battery Cover and Belt
Clip (See 9.1).
A
A
B
+
-
1 x AAA
+
-
1 x AAA
+
-
1 x AAA
C
+
APO VOX