VLS Service Manual - REV2015.04
Table of Contents
Adjustments and Settings
Page | 19
Adjustments and Settings
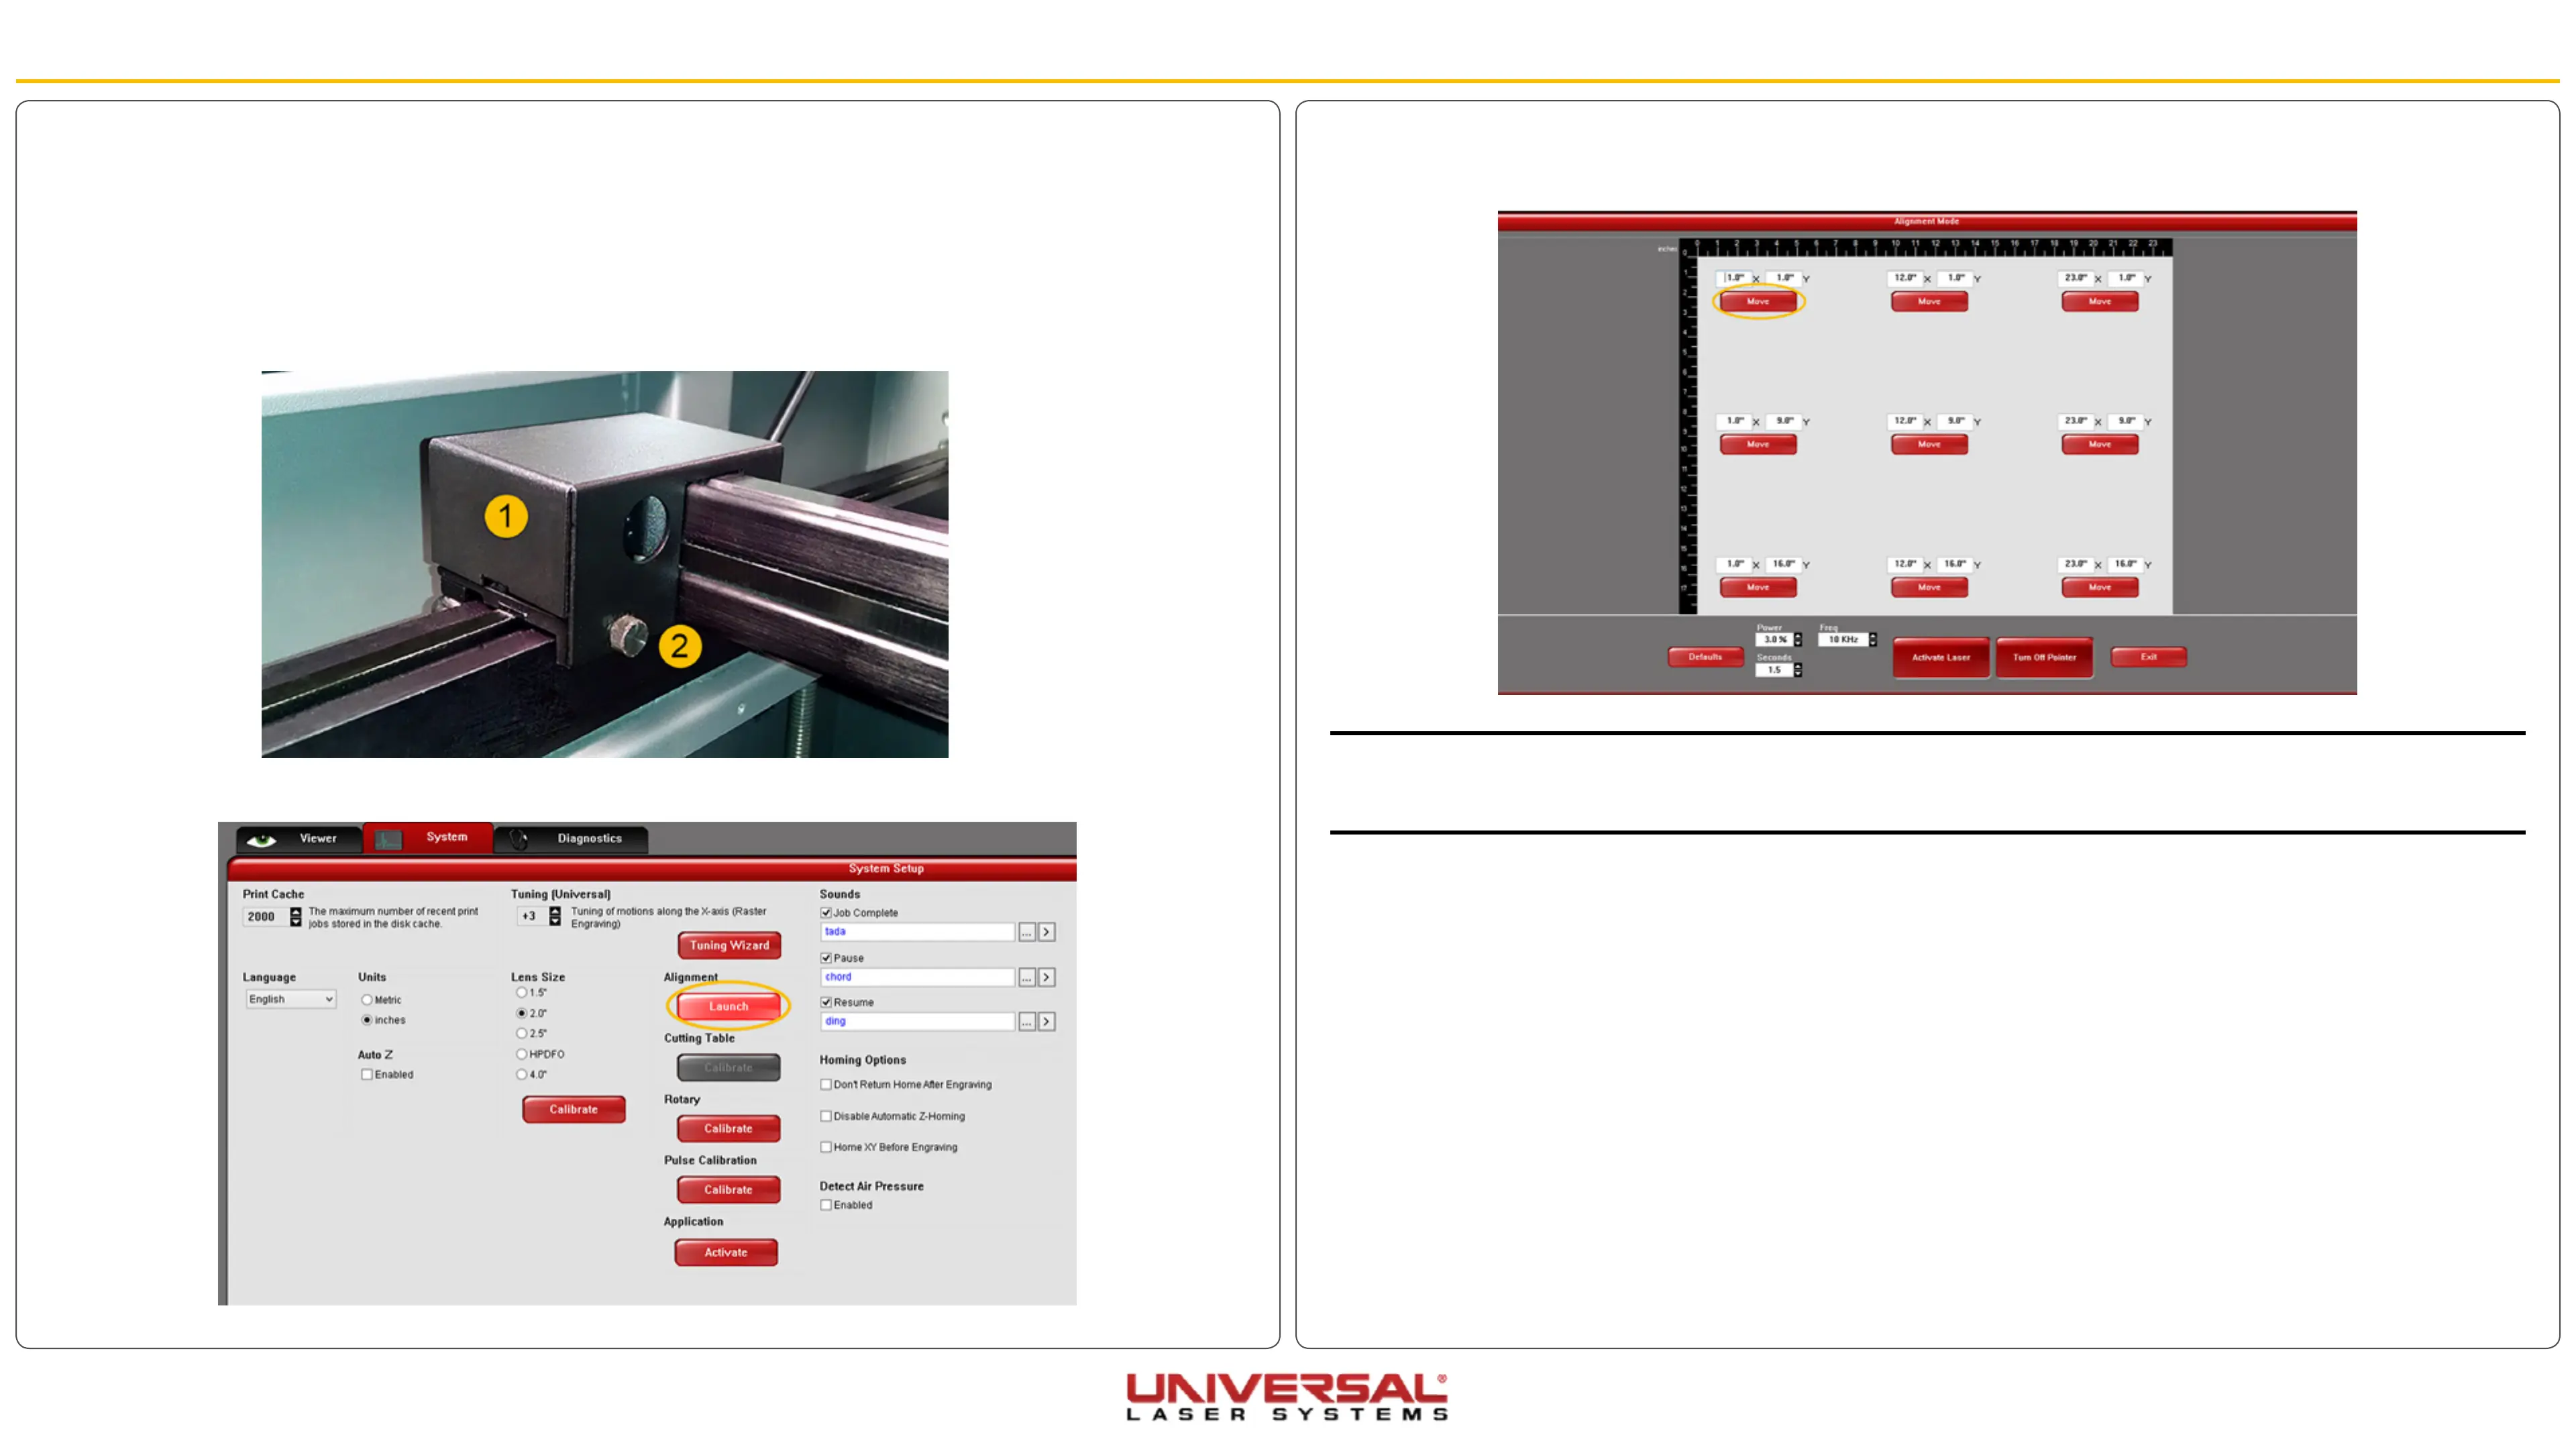
13. On the Alignment Mode Window, click on the Top Left button to move the carriage to the table position
closest to the beam window.
NOTE: To create a small burn mark on the tape in the next step, adjust the Power and Seconds settings in the
Alignment Mode screen (see picture). Lower power laser systems require higher power settings and higher
power laser systems require lower power settings to make the burn mark on the tape.
14. Adjust the Power and Seconds settings as indicated to 5% power and 1 second.
15. Close the top door if not already closed and click Activate Laser.
16. If a burn mark is not made continue to modify the Power settings, increasing in 1% increments for each
attempt.
17. With a burn mark now on the piece of tape, keep the piece of tape on the focus carriage.
18. Click on the lower right-hand Move button. The Focus Carriage will move to the indicated X, Y position
(point farthest from the Beam Window).
9. Plug the system to power and turn ON the VLS. Let the system Home.
10. On the Viewer Tab of the UCP select the Focus Feature. Move the carriage to the top left part of the
system (closest point to the beam window/collimator) and check that the red diode is fairly centered to
the hole in the focus carriage and continue to the next step. If the diode is still out of center, contact the
service department.
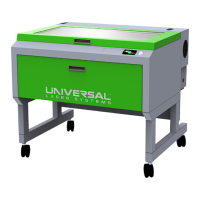
11. Remove the #2 mirror cover (1) by removing the thumbscrew (2), then sliding the cover to the right and
then off the rail.
12. On the System Tab click Alignment Launch. The Alignment Mode window will appear.