VLS Service Manual - REV2015.04
Table of Contents
X-Axis
Page | 48
X-Axis
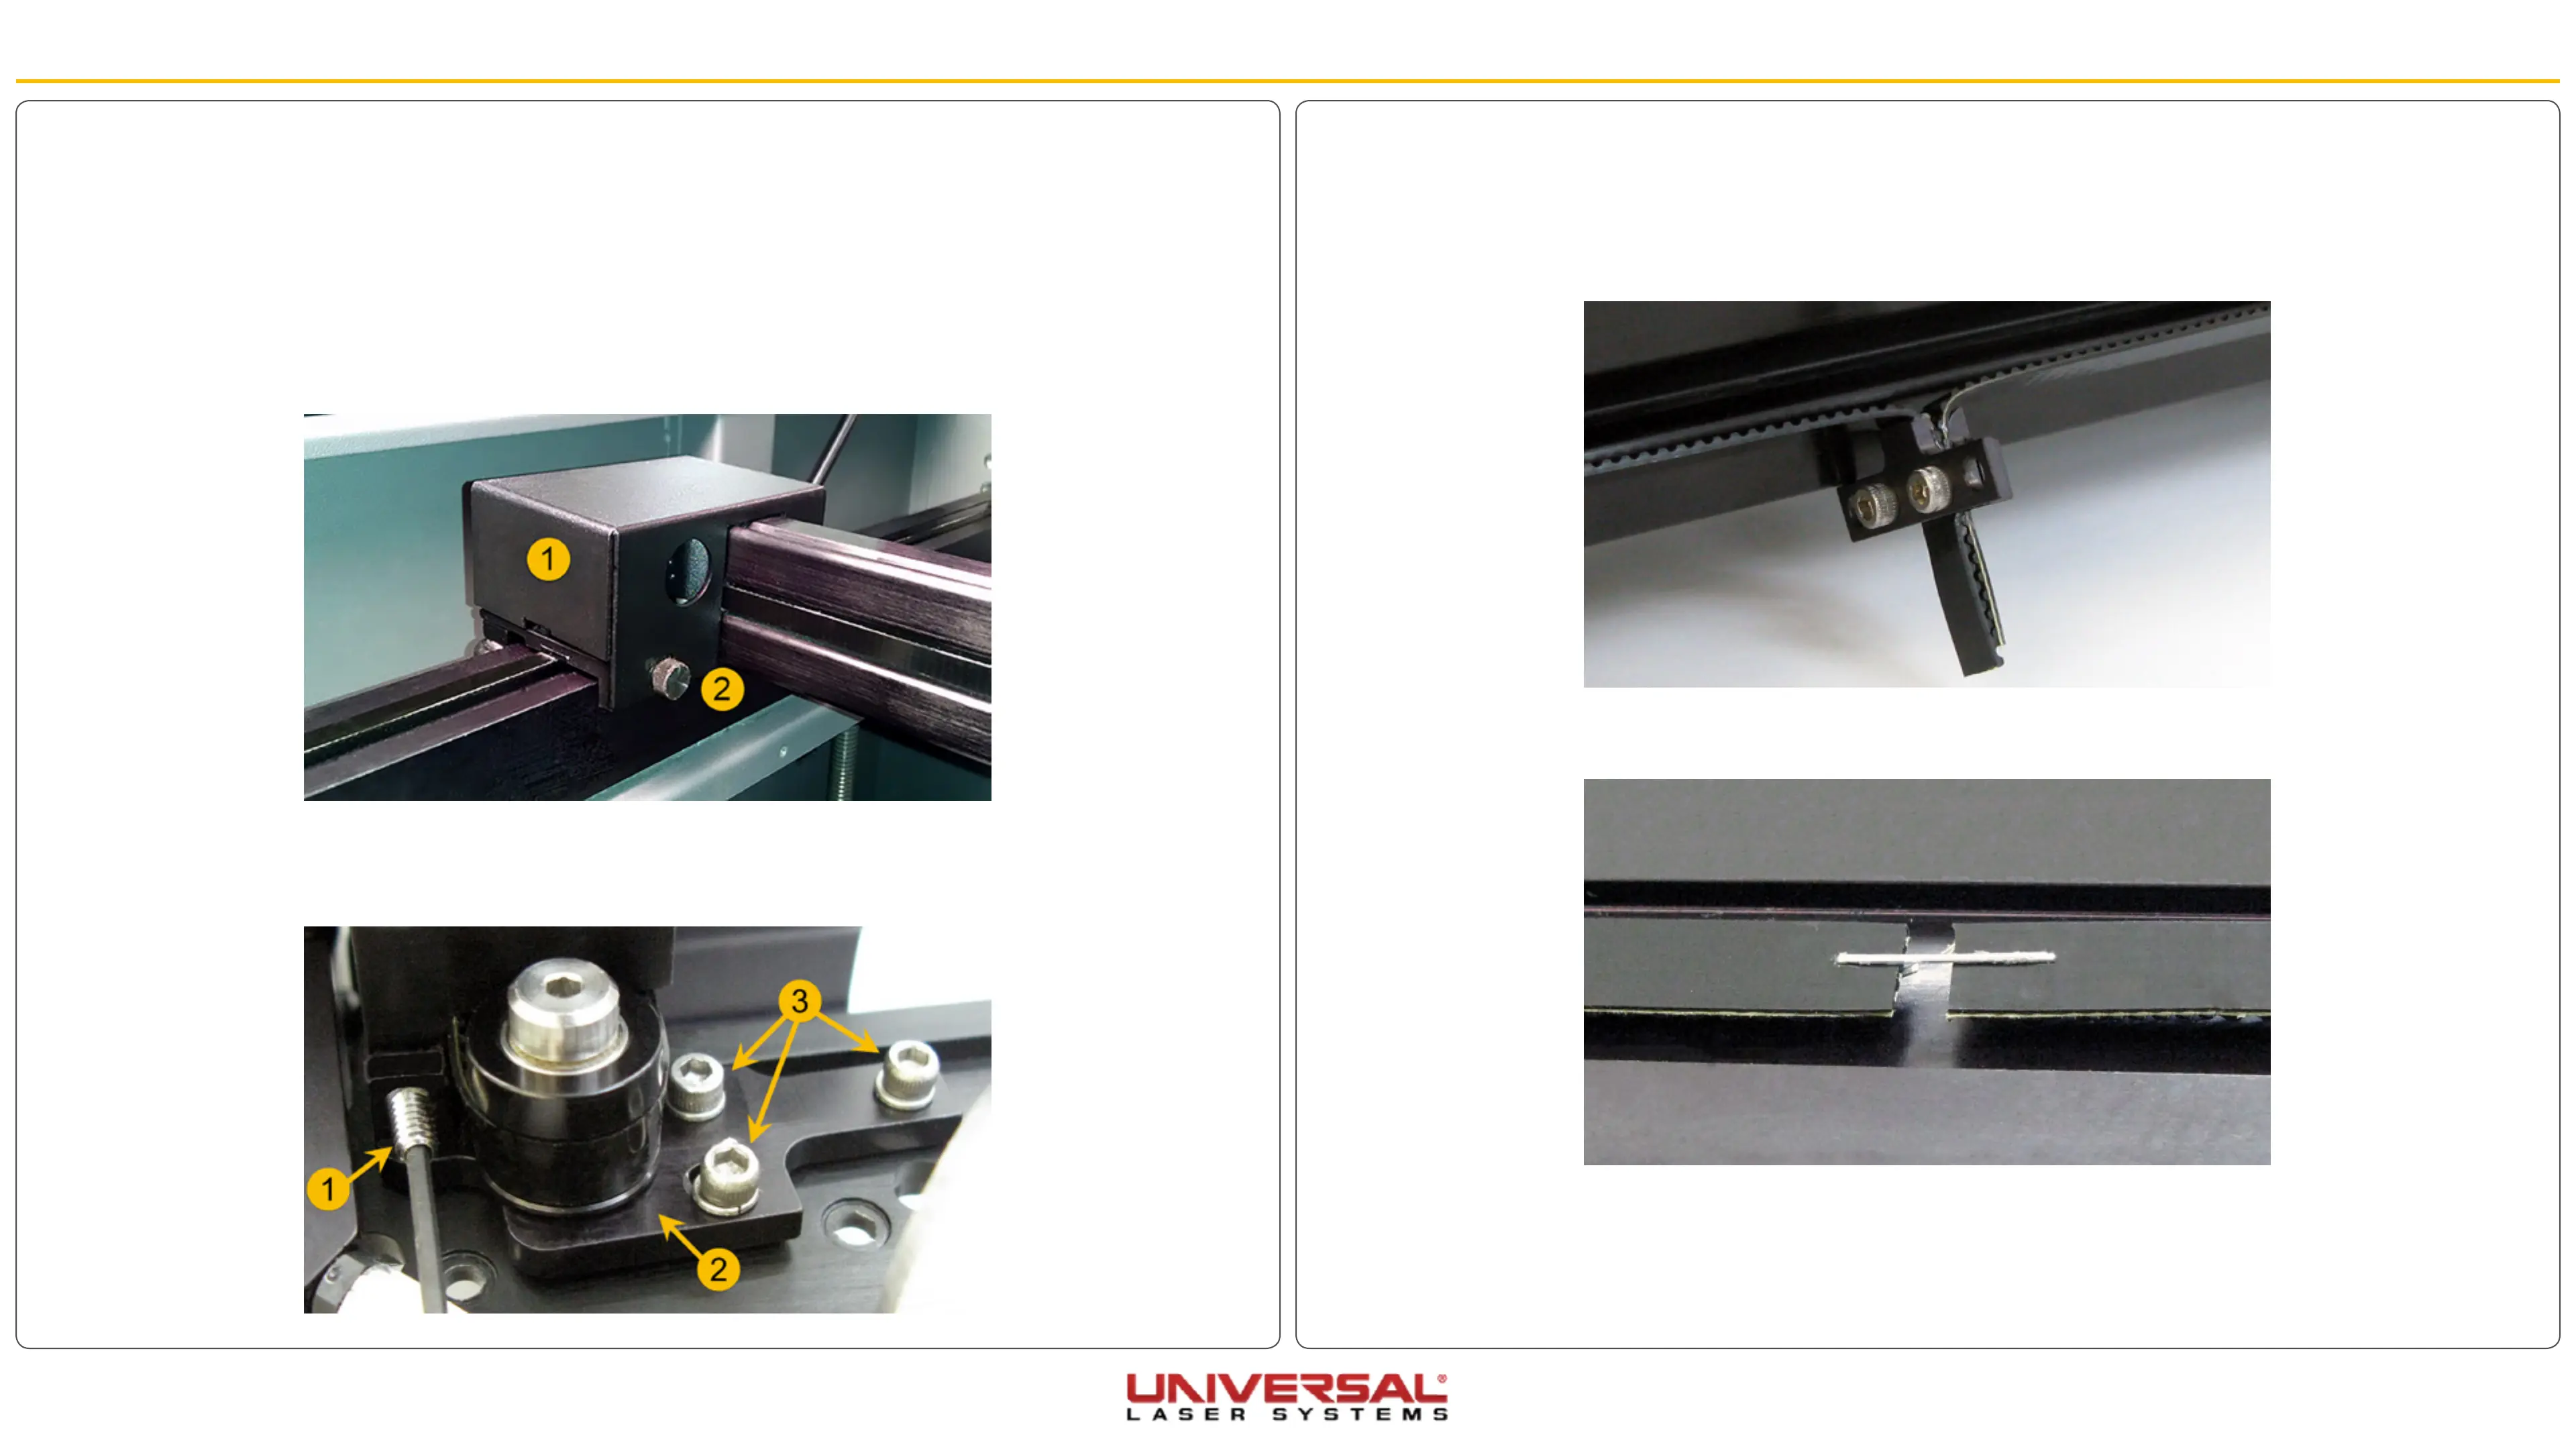
6. Remove the 2 screws located to the right of the Focus Carriage on the belt clamp. Be careful not to lose
the washers.
7. Loosen, but do not remove, the 2 screws that attach to the left of the bracket that holds the ends of the
belt together. Slide the bracket off the end of the belt. DO NOT PULL THE BELT OUT OF THE X-AXIS
RAIL AT THIS TIME. LEAVE IT HANGING LOOSE.
8. Using a stapler, attach one end of the old belt to one end of the new belt. Do not overlap the belt and
make sure that the teeth are in the same direction.
9. Slowly pull the other end of the old belt, allowing the new belt to be pulled through the inside of the
X-axis arm. Make sure that you do not twist the belt going through the rail. The teeth of the belt should
be facing the inside.
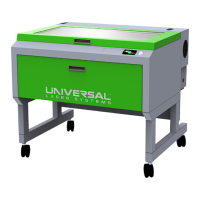
X-Axis Belt Replacement
1. Power OFF and unplug the VLS.
2. Open the Top Door and bring the X-axis Arm forward.
3. Bring the Focus Carriage to the middle of the X-axis Arm.
4. Remove the #2 mirror cover (1) by removing the thumbscrew (2), sliding the cover to the right and then
off the rail.
5. Loosen the three screws (3) (1/2 turn) that mount the tensioning bracket (2). Also, back off the setscrew
(1) until the tip does not make contact with the side of the arm (this will partially release the tension on
the belt) but do not remove the screw completely.