VLS Service Manual - REV2015.04
Table of Contents
Component Removal and Replacement
Page | 38
Component Removal and Replacement
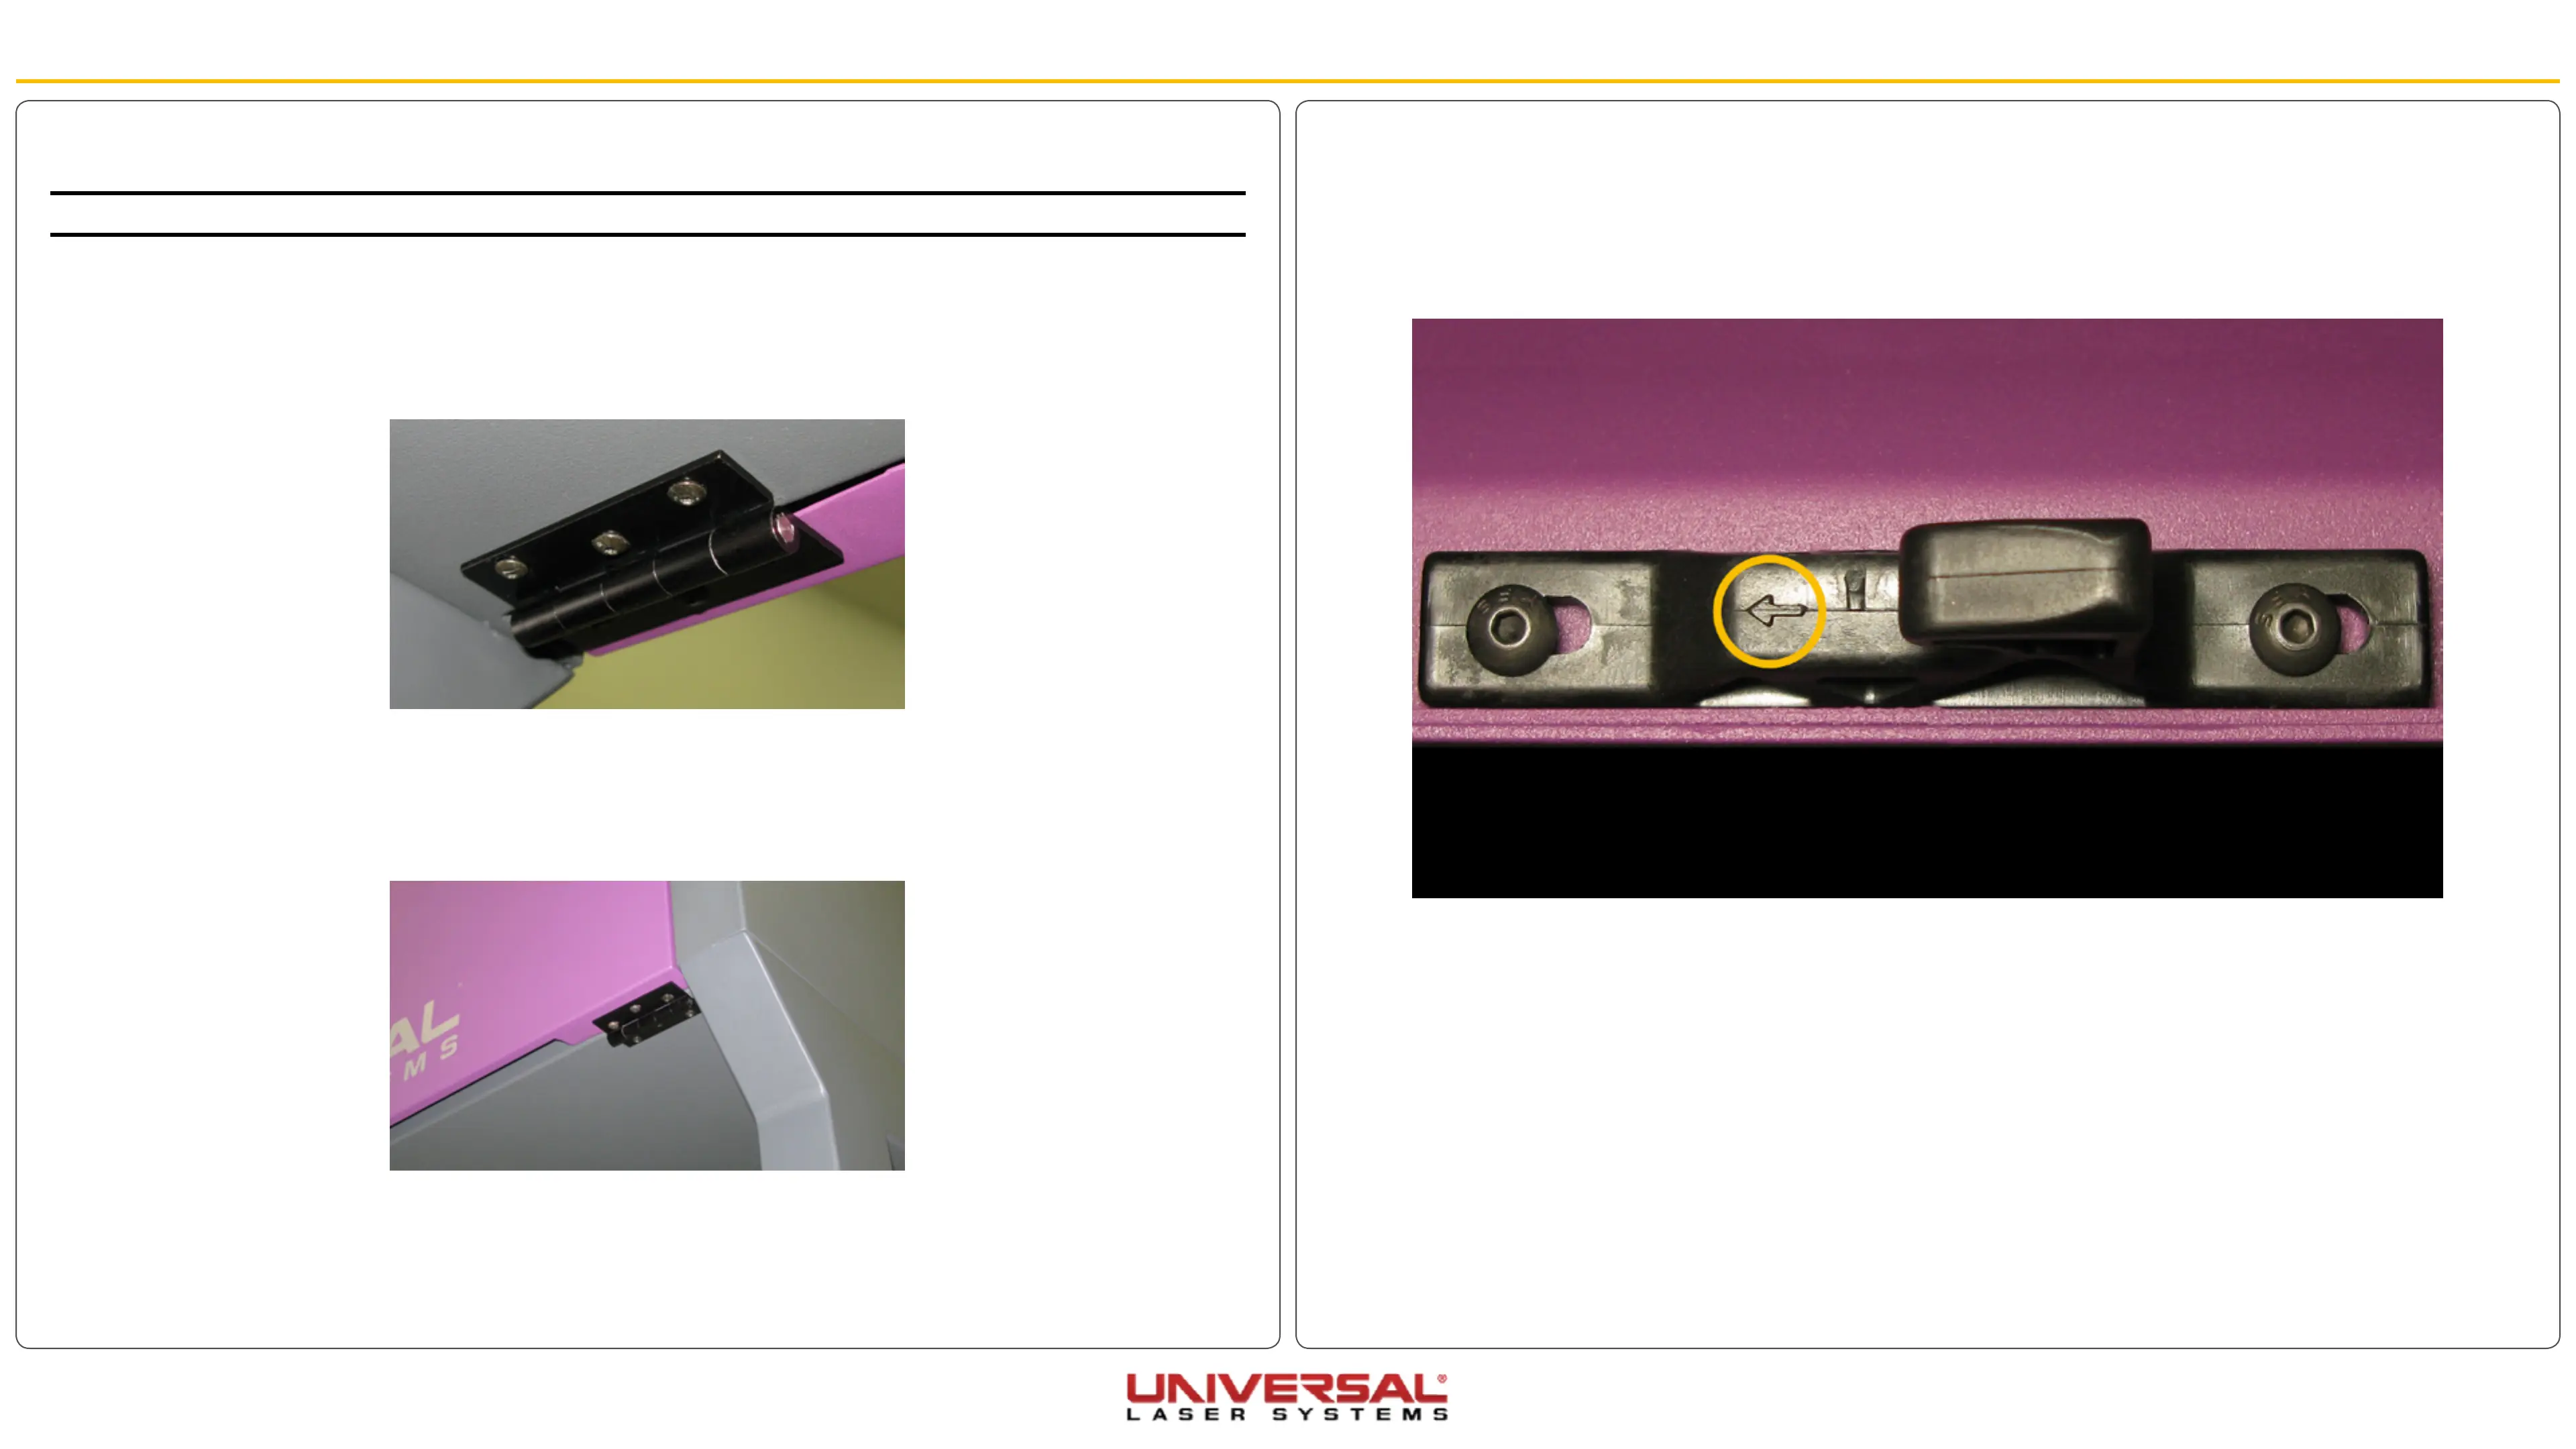
Front Door Latch
1. Make sure the VLS is turned OFF and unplugged.
2. Open the front door and locate the latch (VLS3.60 and VLS4.60) or the two latches (VLS6.60). Note the
direction of the imprinted arrows on the latch(es).
3. Remove the screws holding the latch(es) in position.
4. Installation is opposite of removal. Ensure that the imprinted arrows are pointing the same direction as
when they were removed.
Front Door Hinges
CAUTION: It is recommended that an additional person assist you with this process.
1. Make sure the VLS is turned OFF and unplugged.
2. Slightly open the door giving the person assisting you something to hold on to.
3. While one person holds the door, remove the three screws holding each of the two (VLS3.60 and
VLS4.60) or three (VLS6.60) hinges to the frame of the system at the bottom. Set the screws aside.
4. Set the door on a safe working surface.
5. Remove the remaining screws holding the hinges on the door.
6. Installation is opposite of removal. Leave the screws slightly loose when reattaching them to the frame.
Close the front door and ensure it is centered in its opening. Tighten the screws.
7. Plug in and power ON the VLS.Open and close the door. Check to see if the door open light on the
keypad turns on and off (red flashing light) when you open and close the door. Or check the UCP to see
if the system is indicating that a door is open.