VLS Service Manual - REV2015.04
Table of Contents
Component Removal and Replacement
Page | 26
Component Removal and Replacement
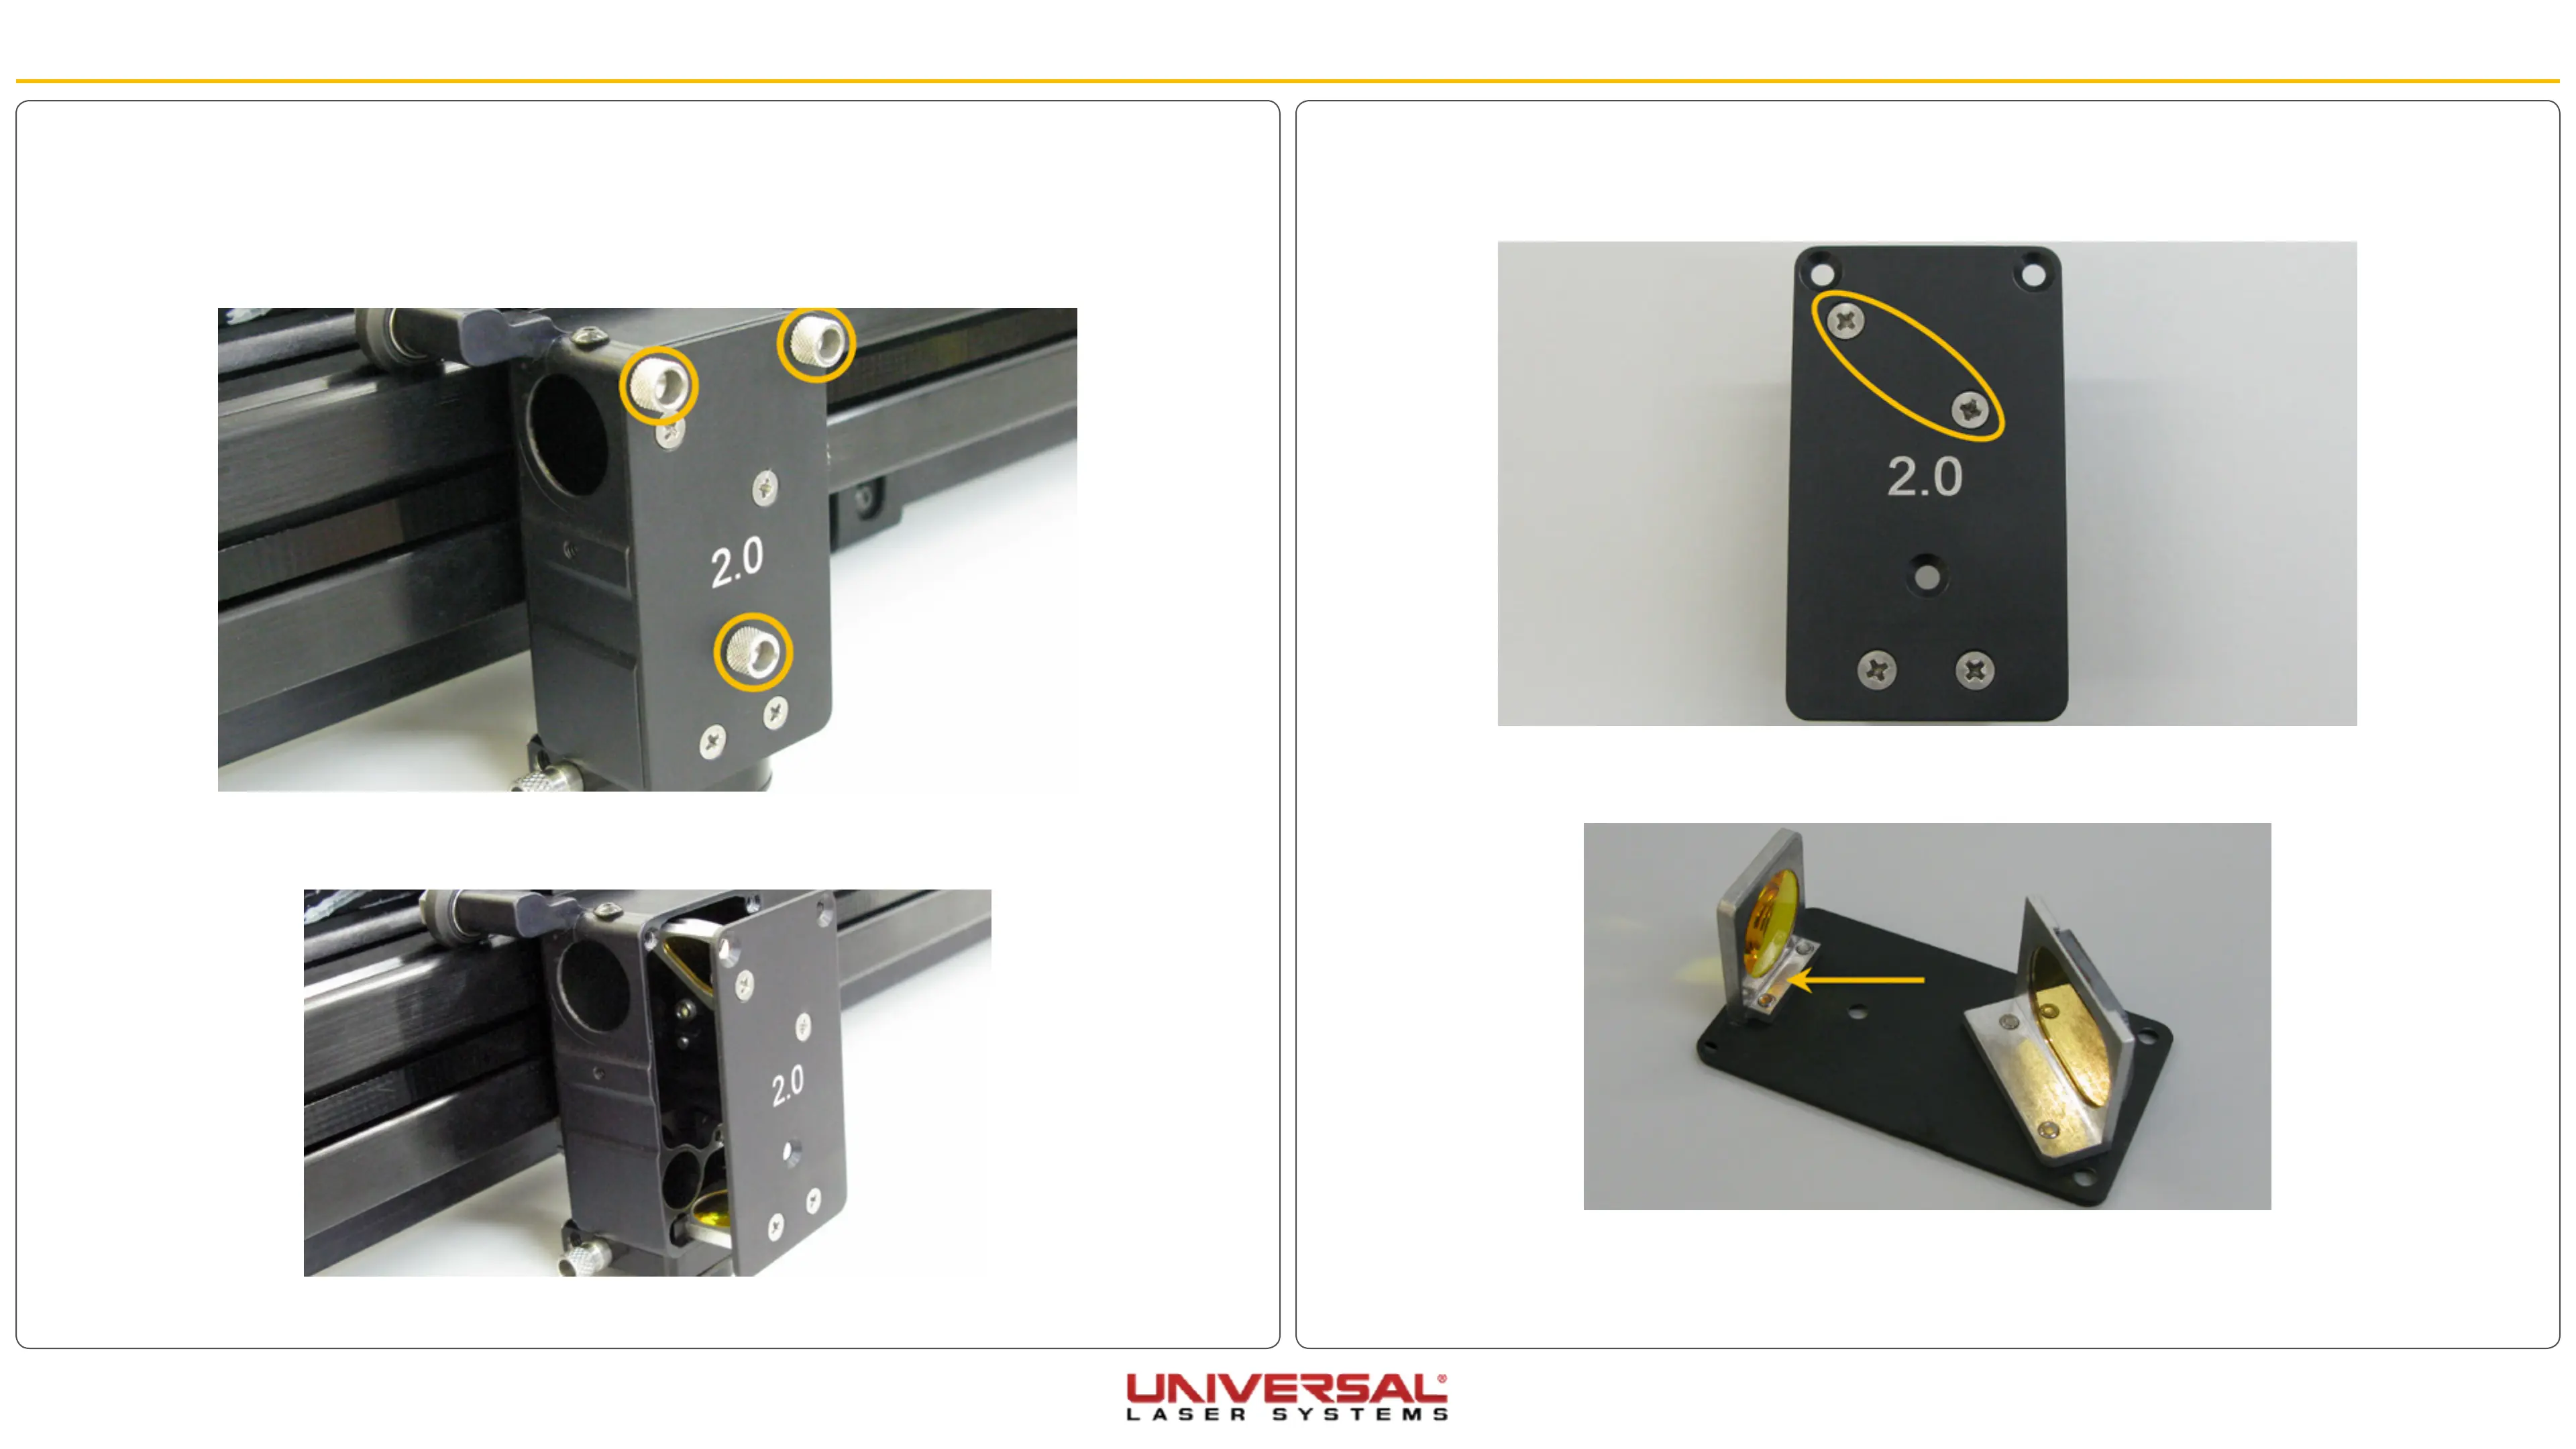
6. Set the Lens Kit on a soft, non-abrasive cloth.
7. Remove the two Phillips head screws that attach the #3 Mirror to the Front Cover Plate and remove the
optic.
8. Attach the new #3 Mirror to the Front Cover Plate. Leave the Phillips head screws slightly loose.
9. Clean the Focusing Lens and #3 Mirror if necessary.
10. Carefully reinstall the Lens Kit using the thumbscrews removed earlier.
11. Tighten the Phillips head screws to secure the #3 Mirror to the front cover plate.
Replace Mirror #3
1. Make sure the VLS is powered OFF and unplugged.
2. Open the Top Door and pull the X-axis Arm forward.
3. Locate the Focus Carriage.
4. Remove the three thumbscrews from the focus carriage. Set them aside in a safe place.
5. Slide the Lens Kit out of the Focus Carriage.