13
GB/IE/NI/CY/MT
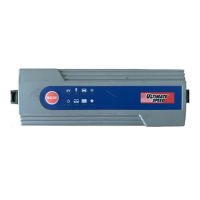
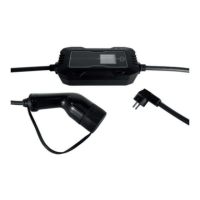
The left part of the LED strip
2
flashes and indicates that
charging is not taking place.
Remove the protective cap
8
from the plug
9
on the car side.
Plug the plug
9
into the car.
The digital charging display
3
indicates that a car is connected:
The left part of the LED strip
2
continues to flash.
Start the charging process on
the car, if you want to charge
immediately, without using the
car’s timer.
Selecting the charge current:
each time you press the button
4
a different charge current will
be displayed (charge current
10
on the display
3
). The following
charge currents can be selected:
6 A (approx. 1.4 kW at 230 V)
8 A (approx. 1.8 kW at 230 V)
10 A (approx. 2.3 kW at 230 V)
13 A (approx. 3.0 kW at 230 V)
16 A (approx. 3.7 kW at 230 V)
If the button
4
is not pressed for
5 seconds, the selection is con-
firmed. The last selected charge
current will always be stored.
The charging process will now
be activated as long as the car’s
charging timer is deactivated.
The digital charging display
3
indicates that the car is being
charged:
The LED strip
2
continually lights
up from left to right and this
indicates that current is flowing
into the car.
Otherwise the charging process
will start at the time programmed
in the car. In this case, the digital
charging display
3
indicates that
a car is connected:
The left part of the LED strip
2
continues to flash.
Some cars carry out a test charge
first for a few seconds. In this
case the digital charging display
3
indicates that the mobile
charging station is ready to
charge at the time programmed
in the car:
Other cars take a very low
 Loading...