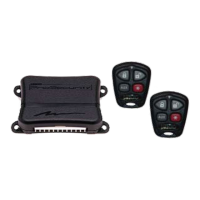
Ungo ProSecurity
Obtaining Optimal Range
Mounting the Extended Range Antenna
1. Clean the mounting area on the windshield with a
quality glass cleaner or alcohol to remove any dirt or
residue.
2. Plug the receiver/antenna cable into the
receiver/antenna.
3. Mount the receiver/antenna vertically using the
supplied double-sided tape.
4. Route the receiver/antenna cable to the control
module and plug it into the four-pin antenna connector.
IMPORTANT:
To achieve the best possible range, DO NOT leave
the antenna cable bundled up tightly underneath the
dash. Try to extend the cable to its full length during
installation.
DO NOT mount the control module to close to the
vehicle’s body control module and/or electronic control
modules.
Mounting the Standard Antenna
1. Route the antenna as high as possible, extending
the cable to its full length.
2. Secure the antenna cable in place with cable ties.
IMPORTANT:
To achieve the best possible range, DO NOT leave
the antenna cable bundled up tightly underneath the
dash. Try to extend the cable to its full length during
installation.
DO NOT mount the control module to close to the
vehicle’s body control module and/or electronic control
modules.
Mounting the Control Unit
Do not mount or secure the control unit to close to
the vehicle’s body control module and/or electronic
control modules.
Do not mount or secure the control unit to close to
sources of heat, such as the heater core and/or air
ducts.
Ground the control unit to a clean, paint-free sheet
metal location using a factory bolt that DOES NOT
have any vehicle components grounds attached to it.
A screw should only be used when in conjunction with
a two-sided lock washer. Under dash brackets and
door sheet metal are not acceptable ground points.
It is recommended that all security components be
grounded at the same location.
Turning OFF the Anti-Code Grabbing Technology
(a.k.a. Code Hopping)
Although this is a feature designed to prevent the remote
transmitters from being cloned and re-transmitted to the
control unit, it is virtually impossible to do. “Code Grab-
bers” have a very limited range, usually required to be
within 5 feet of the remote transmitter while the button is
being depressed. By turning off the Anti-Code Grabbing
feature, it can increase the receiving/transmitting range
by 30-35%.
Refer to the “System Features Menu” for the feature
number and programming instructions.
Double Stacking (2) CR2016 Batteries
The CR2032 3-volt micro lithium coin cell battery inside
the SAA474U (4-button) remote transmitter can be
substituted with (2) CR2016 3-volt batteries. This can
increase the range between 65-75% depending on the
surroundings.
Procedure:
1. Insert a small flat head screwdriver into the notch on
the bottom of the SAA474U remote transmitter.
2. Gently twist the screwdriver to spreading apart the two
halves of the remote transmitter.
3. Open up the remote transmitter exposing the CR2032
battery and slide it out.
4. Slide (2) CR2016 batteries into the battery holder with
the “+” facing upwards. (It may be easier to slide one
battery in at a time. With the first battery in place, slide
the second battery between the PC board and battery.)
5. Prior to closing the two halves of the remote transmit-
ter, verify the batteries are installed correctly by pressing
any of the buttons. The green LED indicator should
illuminate while a button is depressed. If the LED does
not illuminate, double-check the direction of the batteries.
The “+” should be facing upwards matching the “+” on the
battery retaining clip.
6. Snap together the two halves of the remote transmit-
ter.
Obtaining a Tachometer Refer-
ence Signal
The tachometer reference signal is an essential signal for
the safe operation of a remote start system. The signal
informs the remote start module that the vehicle has
successfully started and is running. It can also deter-
mine whether the vehicle is idling at a safe RPM level. In
the event the vehicle’s idle is racing or below safer
operation level, the remote start module will shut down.
To test for a tachometer wire, a multi-meter capable of
testing AC voltage must be used. The tachometer wire
127
 Loading...