14
DO NOT TAKE or SEND PRODUCT BACK to where this product was purchased. Please contact Universal Fitness/FFA Corp.
for missing or defective parts at one of the following: Phone 1-800-521-6233 or Fax 1-662-495-5038 or E-mail at
customerservice@universal-fitness.com. Mailing address: Universal Fitness/FFA Corp. - 100 Tubb Ave. West
Point MS 39773. Web sight www.universal-fitness.com
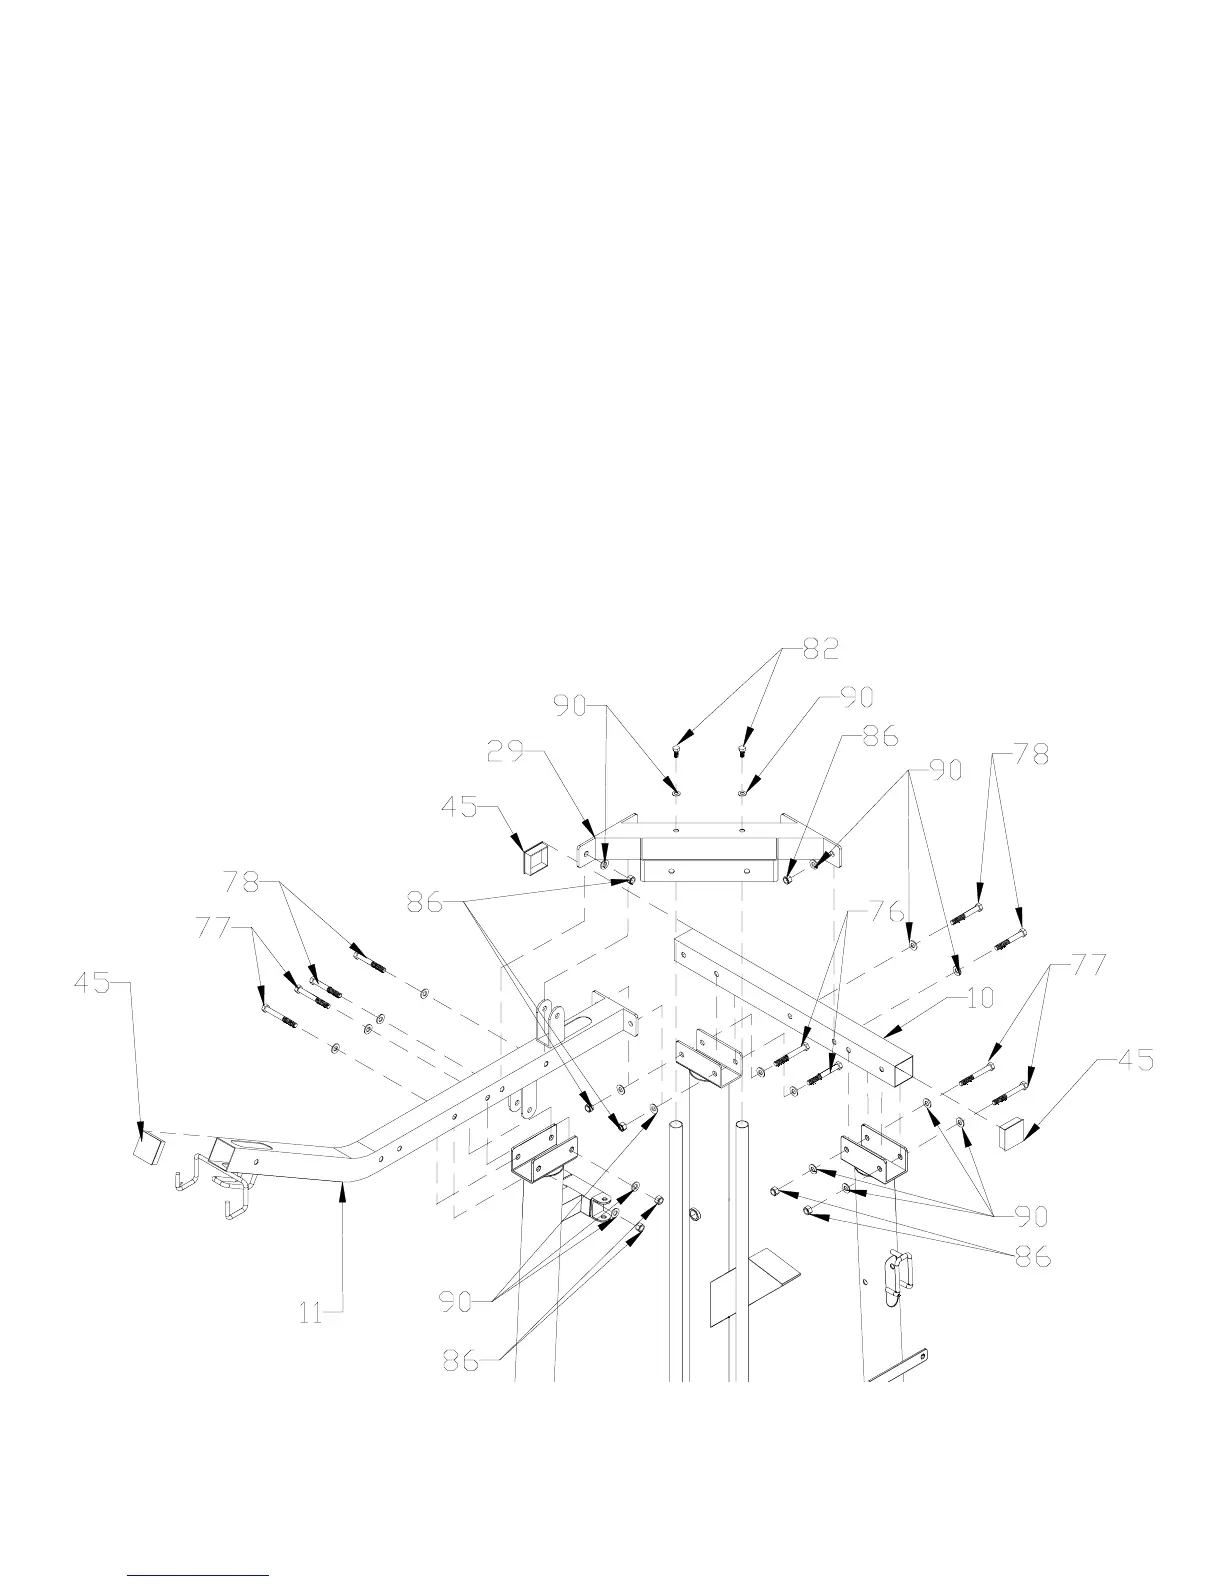
FIGURE 4
FIGURE 4
Step 14.
Step 15.
Step 16.
Step 17.
Step 18.
Step 19.
Push 50mm SQUARE END PLUGS (45) into ends of LEFT TOP CROSS FRAME (10) and RIGHT TOP CROSS
FRAME (11).
Attach LEFT TOP CROSS FRAME (10) to LEFT VERTICAL FRAME (7) with 3/8” x 3” HEX BOLTS (77), 3/8” WASH-
ERS (90) and 3/8” LOCKNUTS (86).
Attach RIGHT TOP CROSS FRAME (11) to RIGHT VERTICAL FRAME (5) with 3/8” x 3” HEX BOLTS (77), 3/8”
WASHERS (90) and 3/8” LOCKNUTS (86).
Attach TOP CROSS FRAMES (10 LEFT & 11 RIGHT) to CENTER VERTICAL FRAME (6) with 3/8” x 3-1/4” HEX
BOLTS (76), 3/8” WASHERS (90) and 3/8” LOCKNUTS (86).
Slide the TOP CENTER FRAME (29) down over the GUIDE RODS (8) and fasten with 3/8” x 3/4” HEX BOLTS (82) and
3/8” WASHERS (90).
Attach TOP CENTER FRAME (29) to the LEFT TOP CROSS FRAME (10) and the RIGHT TOP CROSS FRAME (11)
with 3/8” x 2-3/4” HEX BOLTS (78), 3/8” WASHERS (90) and 3/8” LOCKNUTS (86).