16
DO NOT TAKE or SEND PRODUCT BACK to where this product was purchased. Please contact Universal Fitness/FFA Corp.
for missing or defective parts at one of the following: Phone 1-800-521-6233 or Fax 1-662-495-5038 or E-mail at
customerservice@universal-fitness.com. Mailing address: Universal Fitness/FFA Corp. - 100 Tubb Ave. West
Point MS 39773. Web sight www.universal-fitness.com
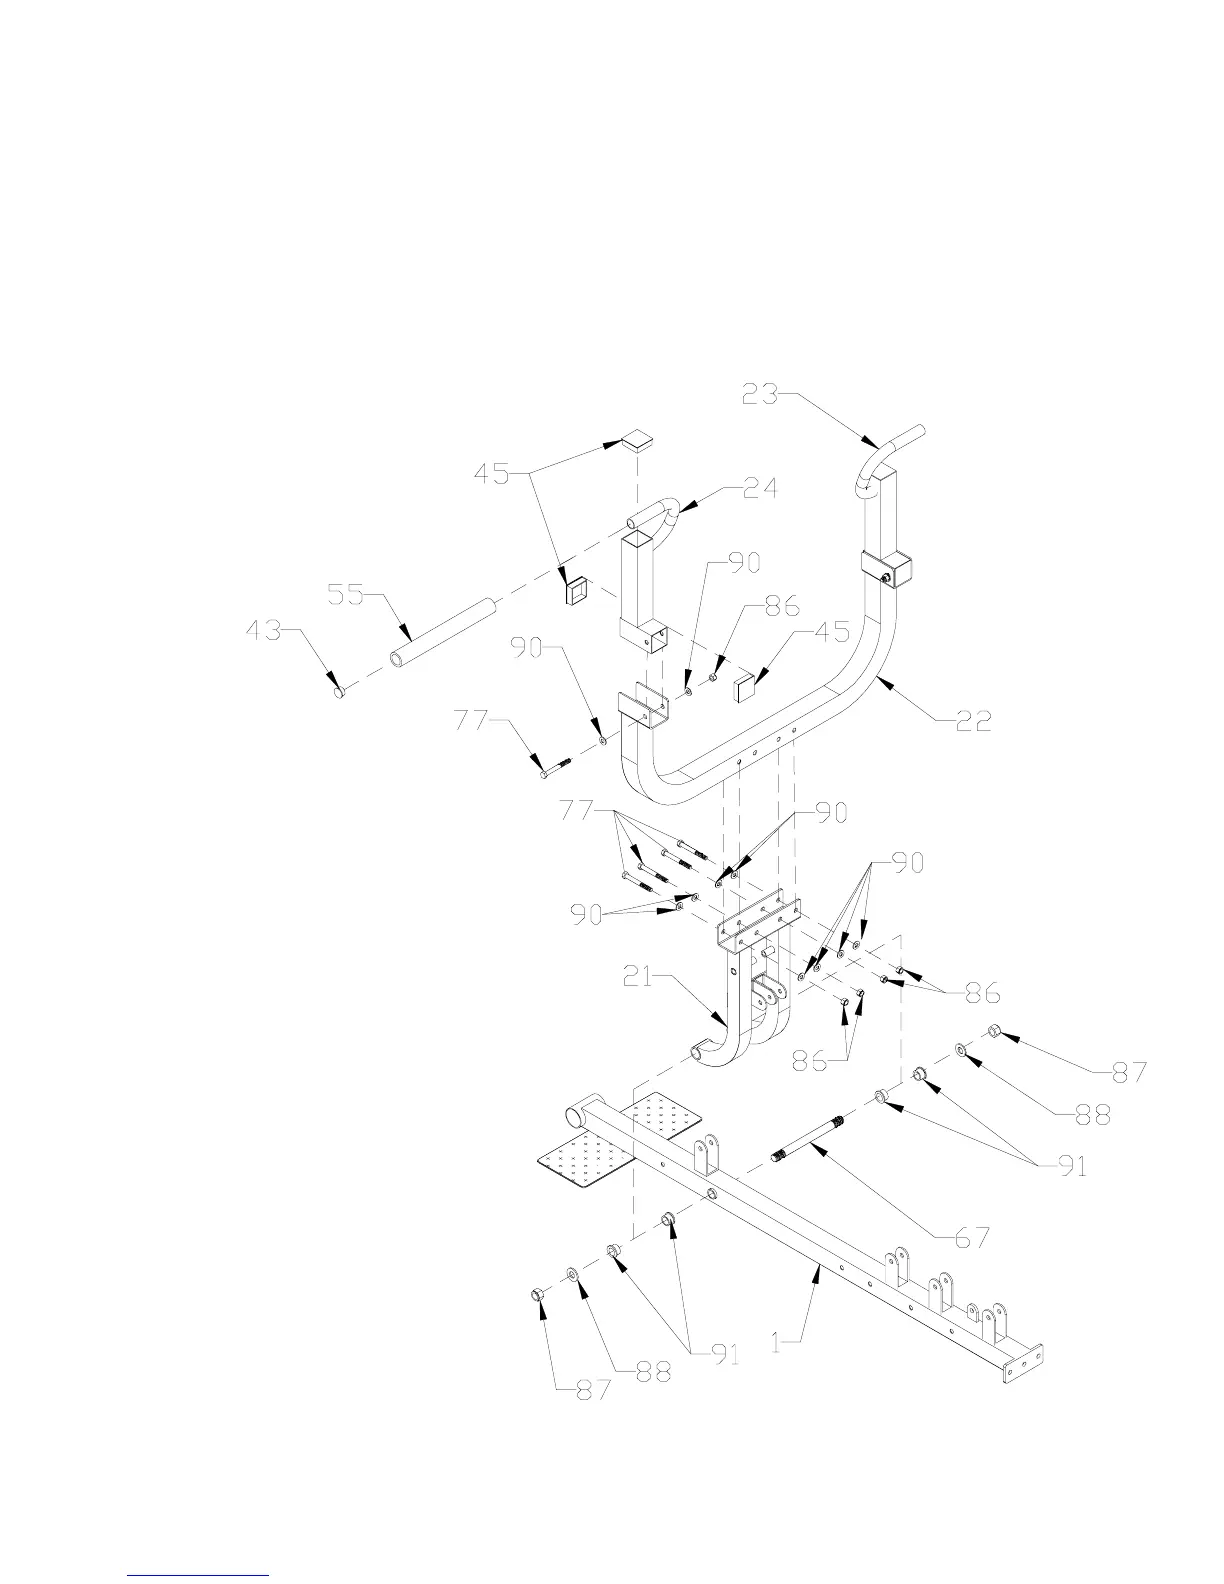
FIGURE 6
Step 26.
Step 27.
Step 28.
Step 29.
Step 30.
Step 31.
Step 32.
Step 33.
Step 34.
Thread a 5/8” LOCKNUT (87) onto one end only of 19 x 215 PRESS BAR SHAFT (67) until flush with end.
Push four 3/4” OIL BUSHINGS (91) into PRESS COLUMN (21).
Place a 5/8” WASHER (88) onto 19 x 215 PRESS BAR SHAFT (67) and slide up against 5/8” LOCKNUT (87).
Insert 19 x 215 PRESS BAR SHAFT (67) through PRESS COLUMN (21) and RIGHT BASE BEAM (1) and fasten with
5/8” WASHER (88) and 5/8” LOCKNUT (87).
Attach PRESS ARM (22), with brackets facing inward as shown, to PRESS COLUMN (21) using 3/8” x 3” HEX BOLTS
(77), 3/8” WASHERS (90) and 3/8” LOCKNUTS (86).
Push three 50mm SQUARE END PLUGS (45)
into PRESS HANDLES (23 RIGHT & 24 LEFT).
FIGURE 6
Push 1” ROUND END PLUGS (43) into
PRESS HANDLES (23 RIGHT & 24 LEFT).
Attach PRESS HANDLES (23 RIGHT & 24
LEFT) to PRESS ARM (22) with 3/8” x 3”
HEX BOLTS (77), 3/8” WASHERS (90) and
3/8” LOCKNUTS (86).
Using liquid soap, slide LONG FOAM
GRIPS (55) onto PRESS HANDLES (23
RIGHT & 24 LEFT) until flush with end.