© UPLIFT Desk • 1-800-349-3839 • 1-512-614-3152 • info@upliftdesk.com • upliftdesk.com
4
C3
C1
H1
H1
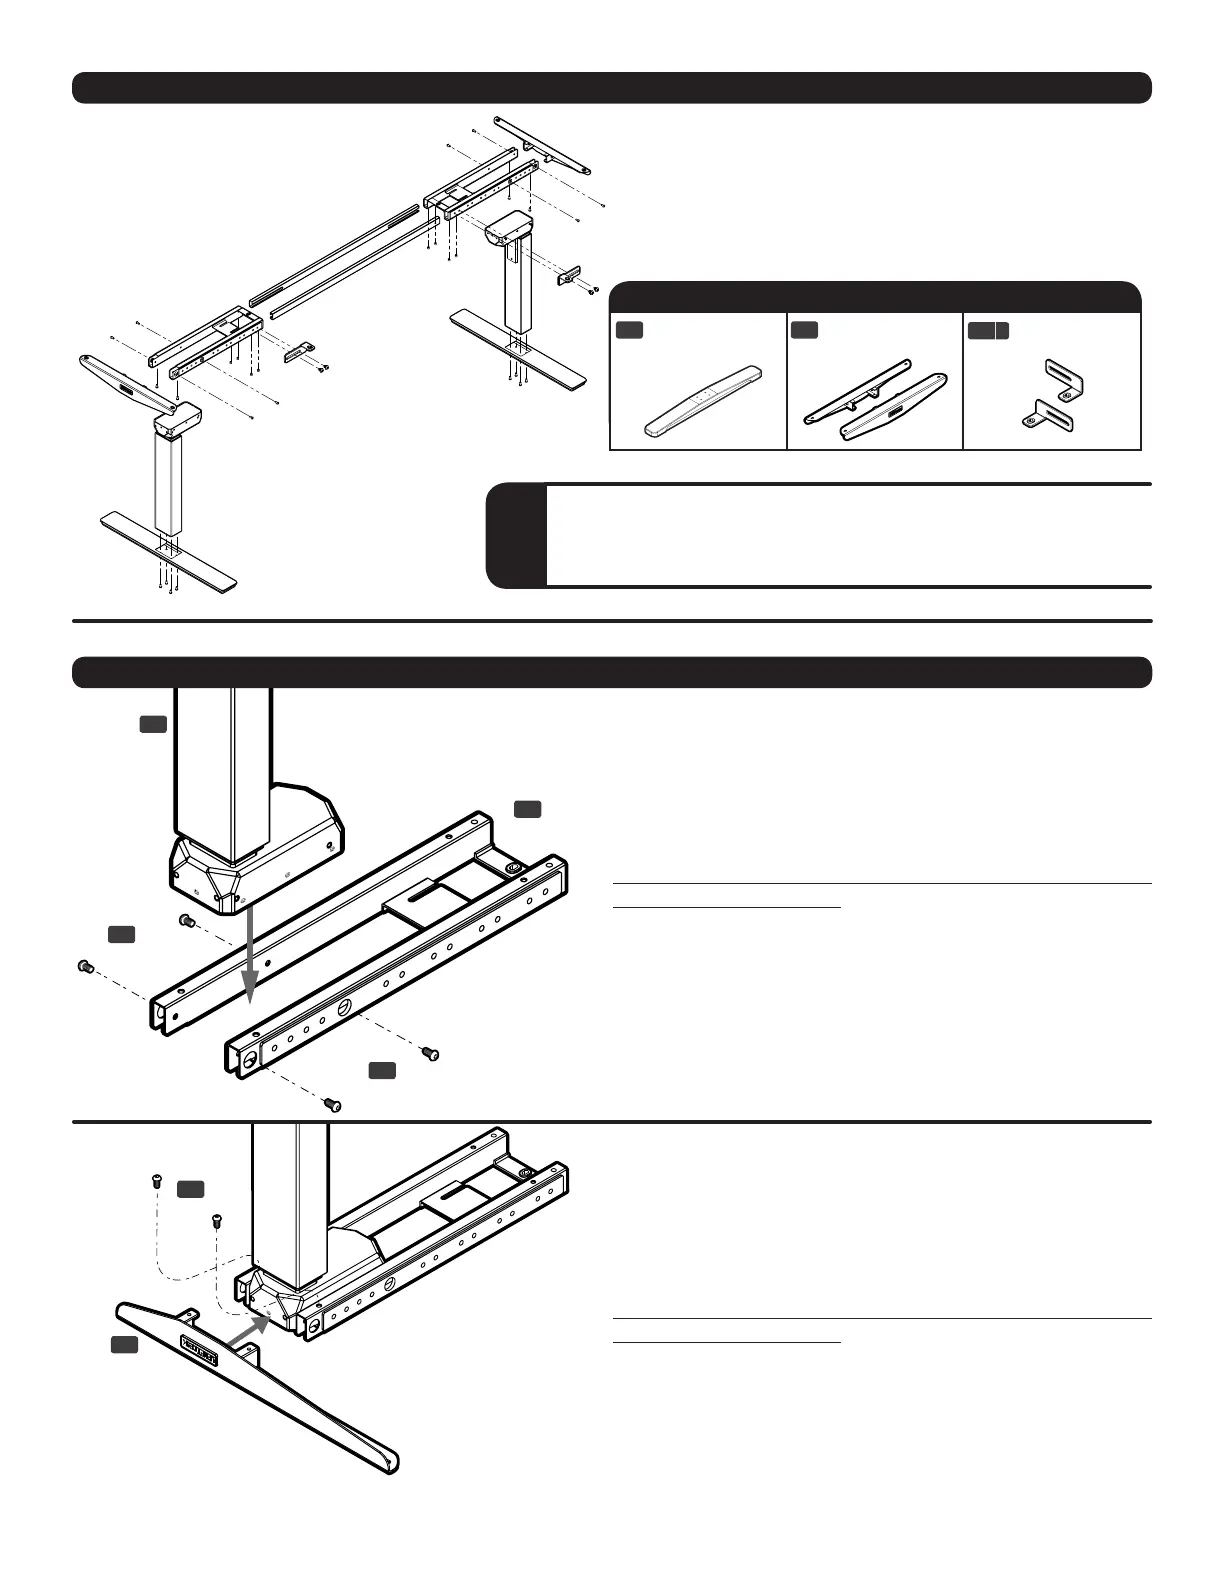
Step 2
With the Leg assembly upside down, slide a Side
bracket (C5) into place, as shown. Then insert the tabs
on the Side bracket inside the Frame end, and attach
using two (2) M6x14 screws (H1).
Rotate each screw by hand for only a few turns to
avoid cross-threading.
Do not tighten fully until step 3.
H1
C5
PACKAGE CONTENTS (continued) the Commercial-Grade T-Frame
Side bracket
(qty 2)
L-bracket
(qty 2)
C5
The Commercial-Grade Desk is also available as a T-Frame.
The details in this section only apply to the T-Frame.
This conguration assembles in the same way as the
C-Frame, just with slightly different parts, which are
pictured in the table below.
Standard T-Frame Components
Foot
(includes leveling pads, qty 2)
C2
C9 b
C3
C4 C5
C9
H4a
H7
C6
H1 H2 H3
H5
H4b
H6
C7
C3
C4 C5
C9
H4a
H7
C6
H1 H2 H3
H5
H4b
H6
C7
C3
C4 C5
C9
H4a
H7
C6
H1 H2 H3
H5
H4b
H6
C7
T
If you are assembling the T-Frame model, keep an eye out for
this “T” icon for instructions specic to this model.
Step 1
Place Frame ends (C3) upside down, as shown. In-
sert the Leg (C1) so the back of the Leg and the back
edge of the Frame end are ush. Attach using four (4)
M6x14 screws (H1).
Rotate each screw by hand for only a few turns to
avoid cross-threading.
Do not tighten fully until step 3.
Repeat this step for the second leg.
ASSEMBLY INSTRUCTIONS