© UPLIFT Desk • 1-800-349-3839 • 1-512-614-3152 • info@upliftdesk.com • upliftdesk.com
5
C
Step 3
With each Leg assembly (C1) facing UP, screw on
the feet (C2) using four (4) M6x14 (H1) screws each.
Rotate each screw by hand for a few turns (to avoid
cross-threading) until all four screws are in place.
Make sure the long end of the C-Frame foot
is facing the same direction as the long end
of the Side bracket (C5).
Once all M6x14 screws (H1) are inserted and hold-
ing the Leg assemblies together, tighten down all of
the screws fully from steps 1, 2, and 3 using the 4mm
Allen wrench (H6).
H1
C2
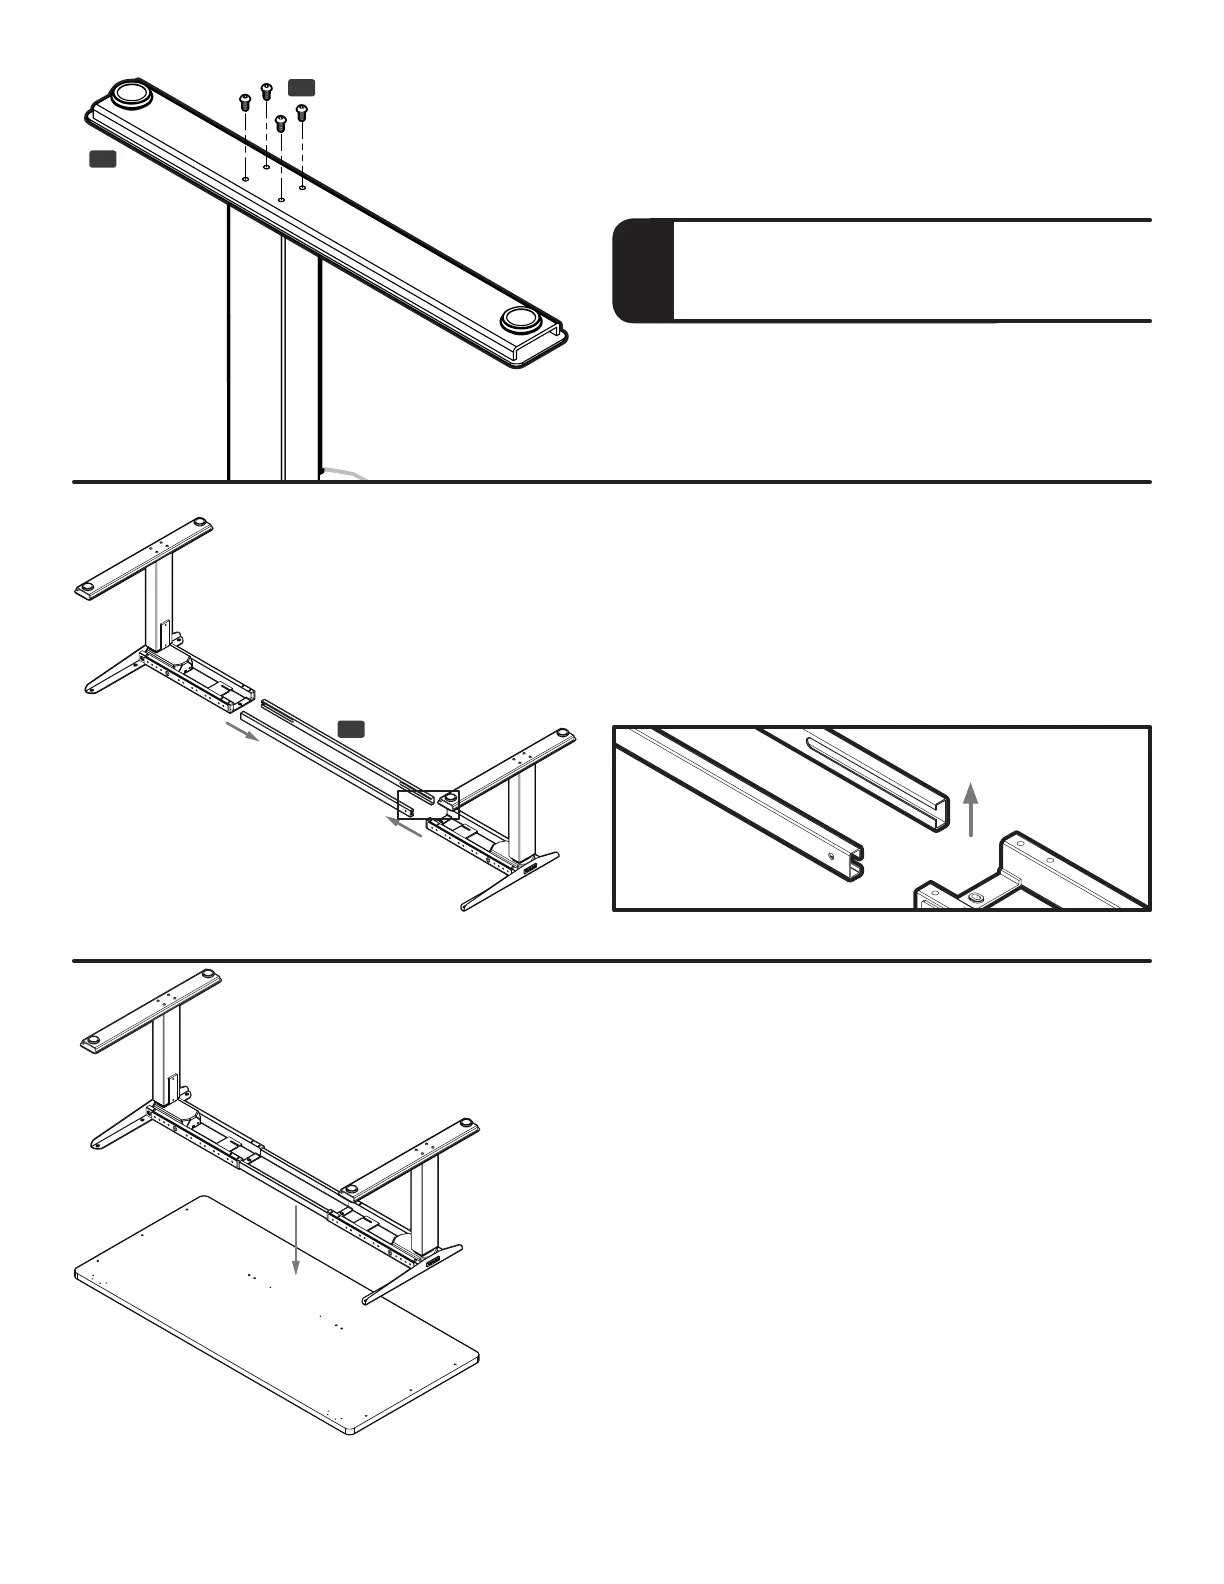
Step 4
When the Leg assemblies are complete, lay down
both Center rails (C4) and slide the Leg assemblies
onto them.
Note: Center rails should be aligned as shown. If the
leg assemblies do not slide in all the way, ip the Cen-
ter rails over and reinsert them the correct way.
Step 5
To protect your desktop, lay down a blanket or towel,
and put the desktop on top. Make sure the desktop is
upside down, with the pre-drilled holes facing UP.
Line up your Frame assembly with the pre-drilled holes
on the desktop. Note: if holes on the Frame ends do not
perfectly align, see Step 6.1 and 6.2.
If you’re using your own desktop, move the desk around
until you nd the placement you want, and make a pencil
mark at each hole’s location. Using a drill with a 1/8’’ di-
ameter drill bit, drill pilot holes where you’ve made your
marks. Drill no deeper than 1/2’’ deep.
Note: Lift the frame, DO NOT SLIDE IT, when lining
up the frame for placement. Rubber grommets are
inserted inside each slot, and sliding the frame may
dislodge them. If a rubber grommet does come out,
they can be easily inserted back in the slot.
C4
The slots on the Center rails are offset, and should be further from the oor.