Page: 14
INTERNAL FUNCTIONS
c) After Baud rate is selected, press MODE/RANGE, and the
display will show “P=XXX”. Select Parity Setting by
pressing SAMPLE.
P=n81 no Parity bit, data = 8 bit, stop bit = 1 bit
P=E71 Even Parity bit, data = 7 bit, stop bit = 1 bit
d) Press TARE to confirm.
e) Enter function F7 to select RS-232 transmission mode
f) Start RS-232 software on the PC.
g) When placing an item on the platter, after weight becomes
stable, the computer display will show a line of RS-232
data.
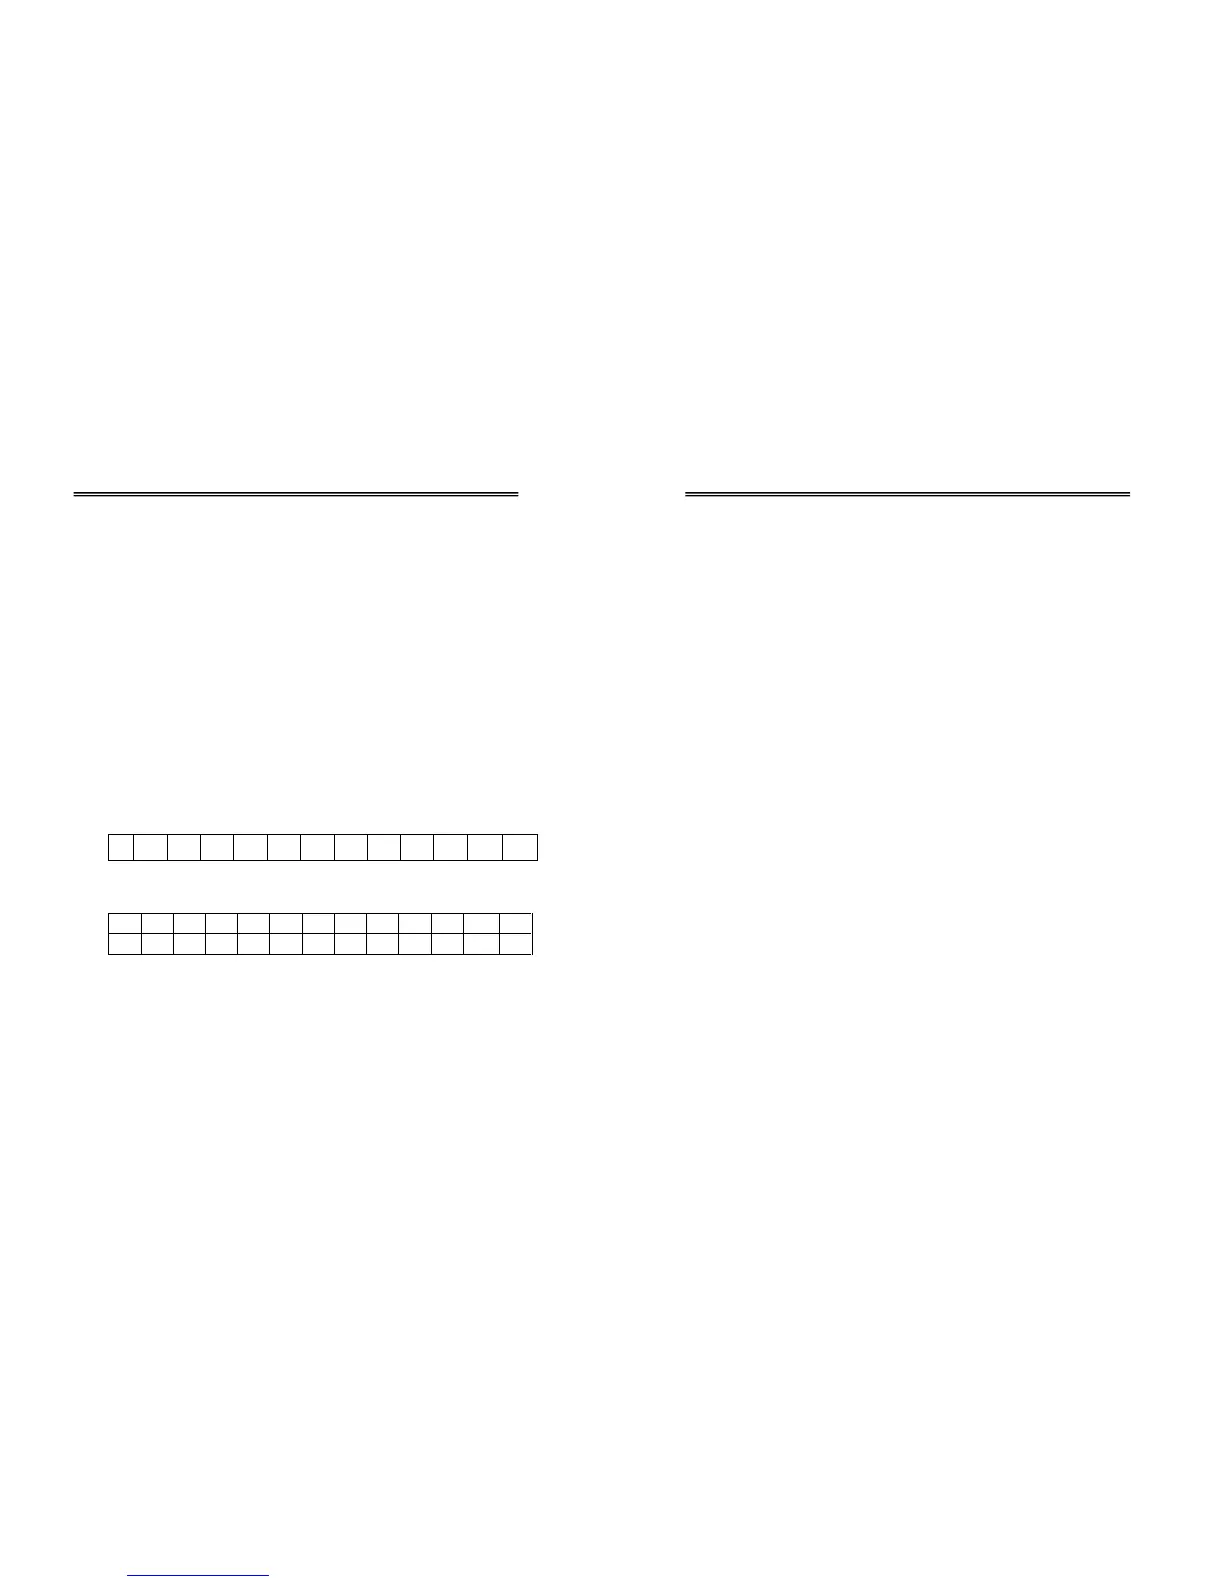
S W W W . W W U U CR LF
Blank Blank
eg. - 3 0 0 0 . 1 g CR LF
6 1 3 . 5 1 b CR LF
(F6) Enable/Disable Digital Filter
Digital Filter can be enabled when weighing in environment
with external interferences, such as wind, vibration or other
unknown interference. The scale will have a more stable reading;
however, the speed response will be decreased.
Page: 15
INTERNAL FUNCTIONS
a) Use the procedure described above to reach Function F6.
b) Press MODE/RANGE and display will show “FiLt_X” (X
being the number selected from previously)
c) Press MODE/RANGE to select the Digital Filter number
required.
FiLt_0 Disable Digital Filter
FiLt_1~5 Enable Digital Filter.
(Higher number represents a stronger filter with more weighing
stability but with slower weighing response speed)
d) Press TARE to confirm, then press ON/ZERO to return to
normal weighing mode.
(F7) RS-232 Transmission Mode
a) Use the procedure described above to reach Function F7.
b) Press MODE/RANGE, and the display will show “XXXX”
(XXXX being the setting from the previous selection)
c) Select RS-232 Transmission mode by pressing MODE.
Auto Send data once after weight stabilization
P-Out Printer Output (**Reserved)
Conti Send data continuously after weight
stabilization
d) Press TARE to confirm, then press ON/ZERO to return to
normal operation.