Seite 12 von 72 // page 12 of 72
Das Dokument darf nur vollständig und unverändert verwendet und weitergegeben werden. Es liegt in der Verantwortung des
Anwenders, die Gültigkeit dieses Dokumentes bezüglich seines Produktes sicher zu stellen.
Documents are only to be used and distributed completely and unchanged. It is strictly the users´ responsibility to check carefully
the validity of this document with respect to his product.
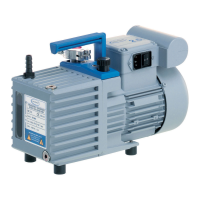
Repair RE/Z 2 / 5
Before starting repair, isolate the pump and other components from the vacuum sys-
tem and the electrical supply so that they cannot be operated accidentally. Allow the
pump to cool, so that it is at safe temperature for skin contact.
Before starting maintenance, wait two minutes after isolating the equipment from
mains to allow the capacitors to discharge.
Cleaning of components
☞ Observe applicable regulations when disposing of used oil and solvents which may be contaminated
by chemicals.
☞ Avoid damage of bearing and sealing surfaces!
☞ Seal rings: Use only clean oil and lint-free cloths. Replace seals rings if necessary.
☞ Silencer nozzle: Clean with length of thin wire (0.2 mm) and compressed air.
☞ All other components: Clean with petroleum or suitable solvent. Follow manufacturer`s instruction.
☞ After cleaning, dry all components with compressed air.
Tools
Hex key SW 3/4/5
Open-ended wrench SW 14
Phillips screw driver size 2 and 3
Flat-bladed screw driver size 2
Screw driver for stud bolt size M4 and M5
Disassembly of the pump
- Drain oil (see ”Oil change” in the instructions for use).
- Position pump so that it rests on the face of the oil reservoir (on rating plate).
- Unscrew screws at the fan cover and remove fan cover.
- Unscrew screws at the motor and remove pump from the housing.
Changing the coupling
- If the coupling is visibly worn, check for grooves (e. g. by feeling with finger nails). In case of depres-
sions, replace coupling. Do not polish coupling as thin hardened layer may be damaged and micro-
scopic grooves will cause oil leaks.
- Remove coupling. Put on new spring ring on the motor shaft. Assemble the spring ring dry, oil and
grease free.
- Press in new coupling by using an appropriate device. Make sure that the motor shaft is supported
(through centre hole in fan cover), otherwise the ball bearing will be damaged. When pressing in the
coupling, do not apply pressure to the impeller.
Disassembling the pump unit
- Remove cover plate together with O-ring.
- Unscrew screws at the removable sleeve and remove sleeve.
- Unscrew screws at the rear side of the pump housing.
- Remove housing with pump unit from the oil reservoir and position it on the housing.
- Unscrew pump unit securing screws.
- Remove bearing cover.
- Remove rotor.
 Loading...