Start-up 6
0020244064_00 Installation and maintenance instructions 69
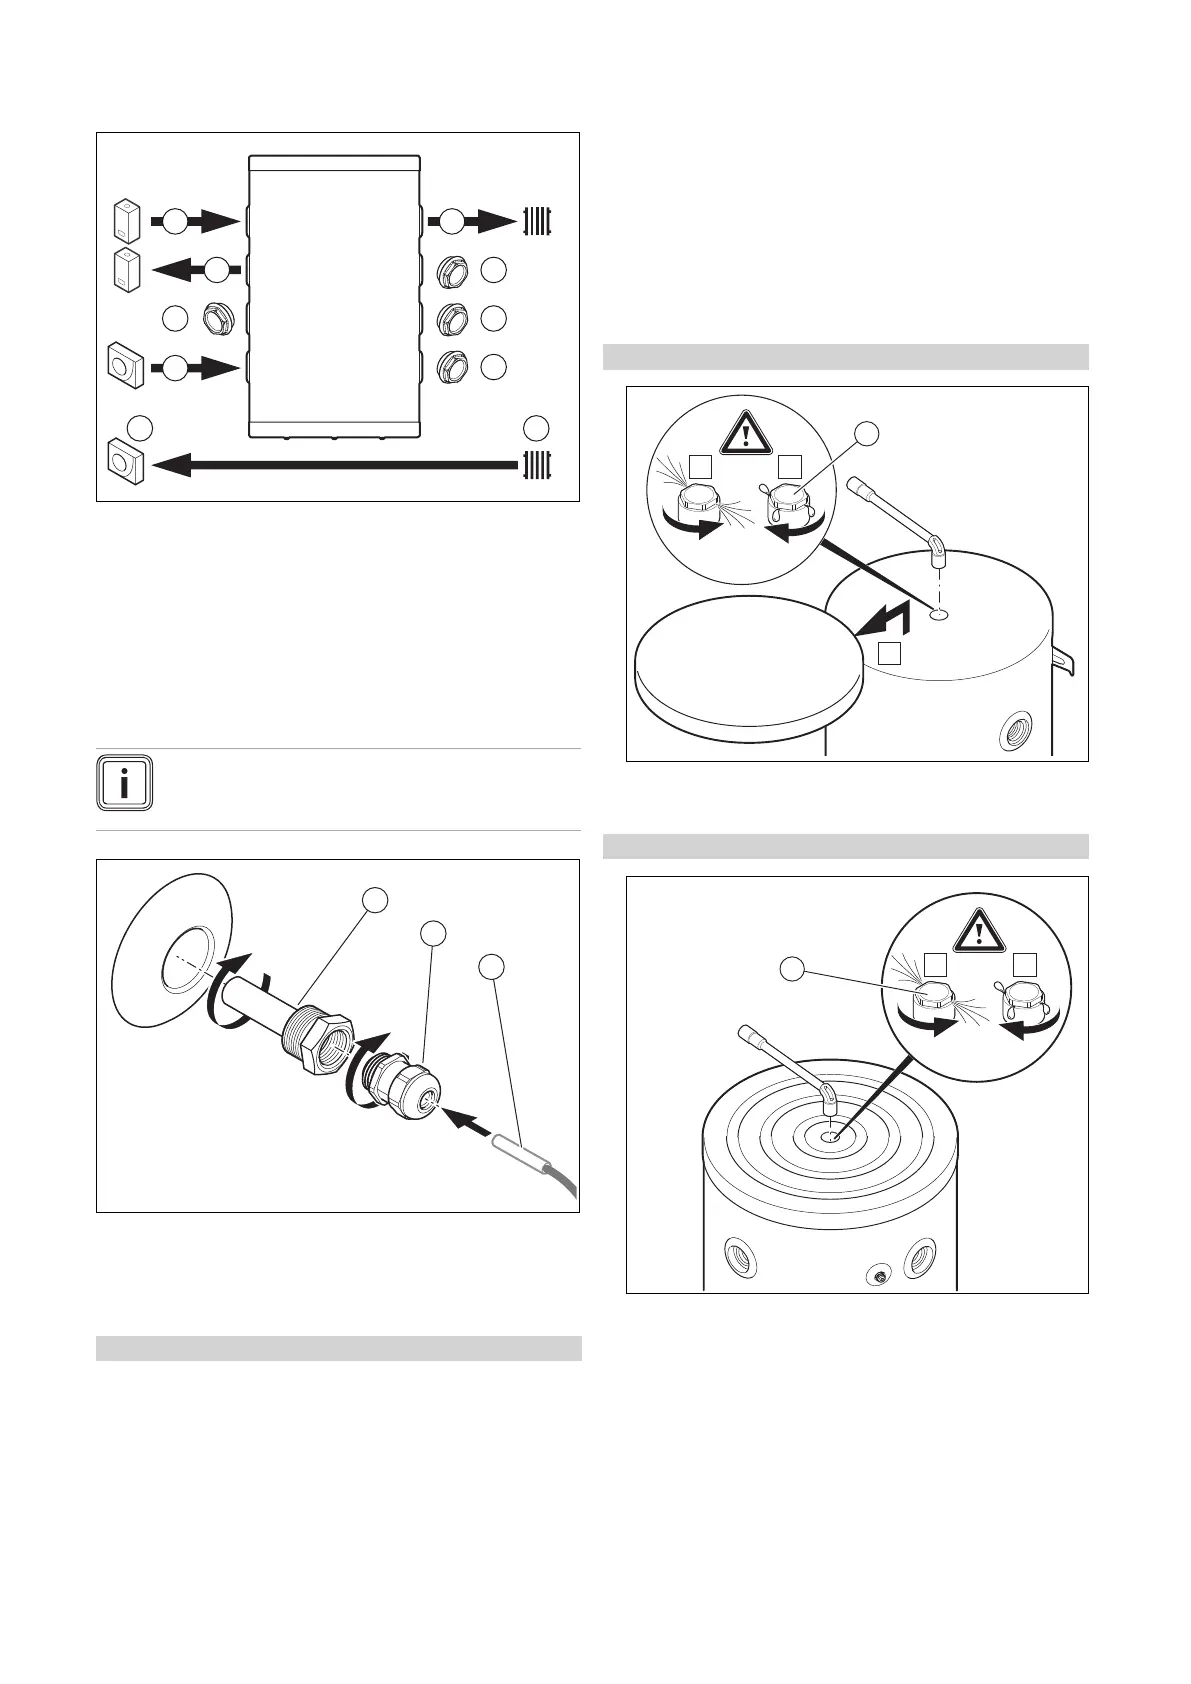
5.1.2.4 Case no. 4
1 Heat pump
2 Boiler
3 Heating circuit
4 Plug
5.2 Wiring
Note
If the temperature sensor is not enclosed, this
must be ordered separately.
1. Screw the sensor pocket (1) into the cylinder.
2. Screw the stuffing box (2) into the sensor pocket (1).
3. Use a thermal conductivity lubricant to insert the tem-
perature sensor (3) into the sensor pocket (1).
Applicability: VPS R 200/1 B
▶ To guarantee the leak-tightness of the cylinder, always
install the two sensor pockets, even if only one tem-
perature sensor is used.
6 Start-up
1. When filling the product, observe the installation instruc-
tions for the heating generators.
2. Check that the hydraulic and electric connections are
correctly designed.
3. Check whether the connections are leak-tight.
4. Purge your heating installation.
6.1 Purging the product
Applicability: VPS R 100/1 M
▶ Open the purging valve (1) when filling the heating
circuit with water.
Applicability: VPS R 200/1 B
▶ Open the purging valve (1) when filling the heating
circuit with water.
1. Close the purging valve as soon as water flows out (re-
peat this measure several times, if required).
2. Check whether the air separator connection is leak-
tight.
 Loading...