516
Thermo plus 160/230/300/350 5 Troubleshooting
• Install ignition electrode (see 8.6).
• Install burner head (see 8.2).
5.6.11 Solenoid valve inspection
The coil of the solenoid valve can heat up in switched-
on condition.
The solenoid valve must only be completely replaced.
In case of replacement or assembly a new gasket ring
must be used.
NOTE:
Due to system characteristics draining the space between
solenoid valve and nozzle may cause fuel dripping from
the atomizer nozzle for a short period of time.
A leaking valve seat of the solenoid valve can be indicated
by smoke development in the heater during the purge
cycle. Fuel drips from the atomizer nozzle. A not closing
solenoid valve can lead to a heater shut-down during
purge cycle and a heater lock-out.
It is possible to manually test the electrical functionality of
the solenoid valve, and using the Component Test menu
of the STT diagnosis.
Inspection using the STT diagnosis
• Remove the burner head (see 8.2).
• Connect the test plug instead of the temperature
sensor plug to the control device.
• Reconnect the heater with the vehicle electrical
system.
• Connect the STT diagnosis to the heater.
• Start STT diagnosis, establish connection to the
heater and open the Component Test menu.
• Select and start the solenoid valve in the Component
Test menu.
• The solenoid valve must audibly open.
• After the test is completed, exit STT diagnosis as
needed.
• Disconnect the heater from the vehicle electrical
system (Observe 5.2 !).
• Remove the test plug.
• Install burner head (see 8.2).
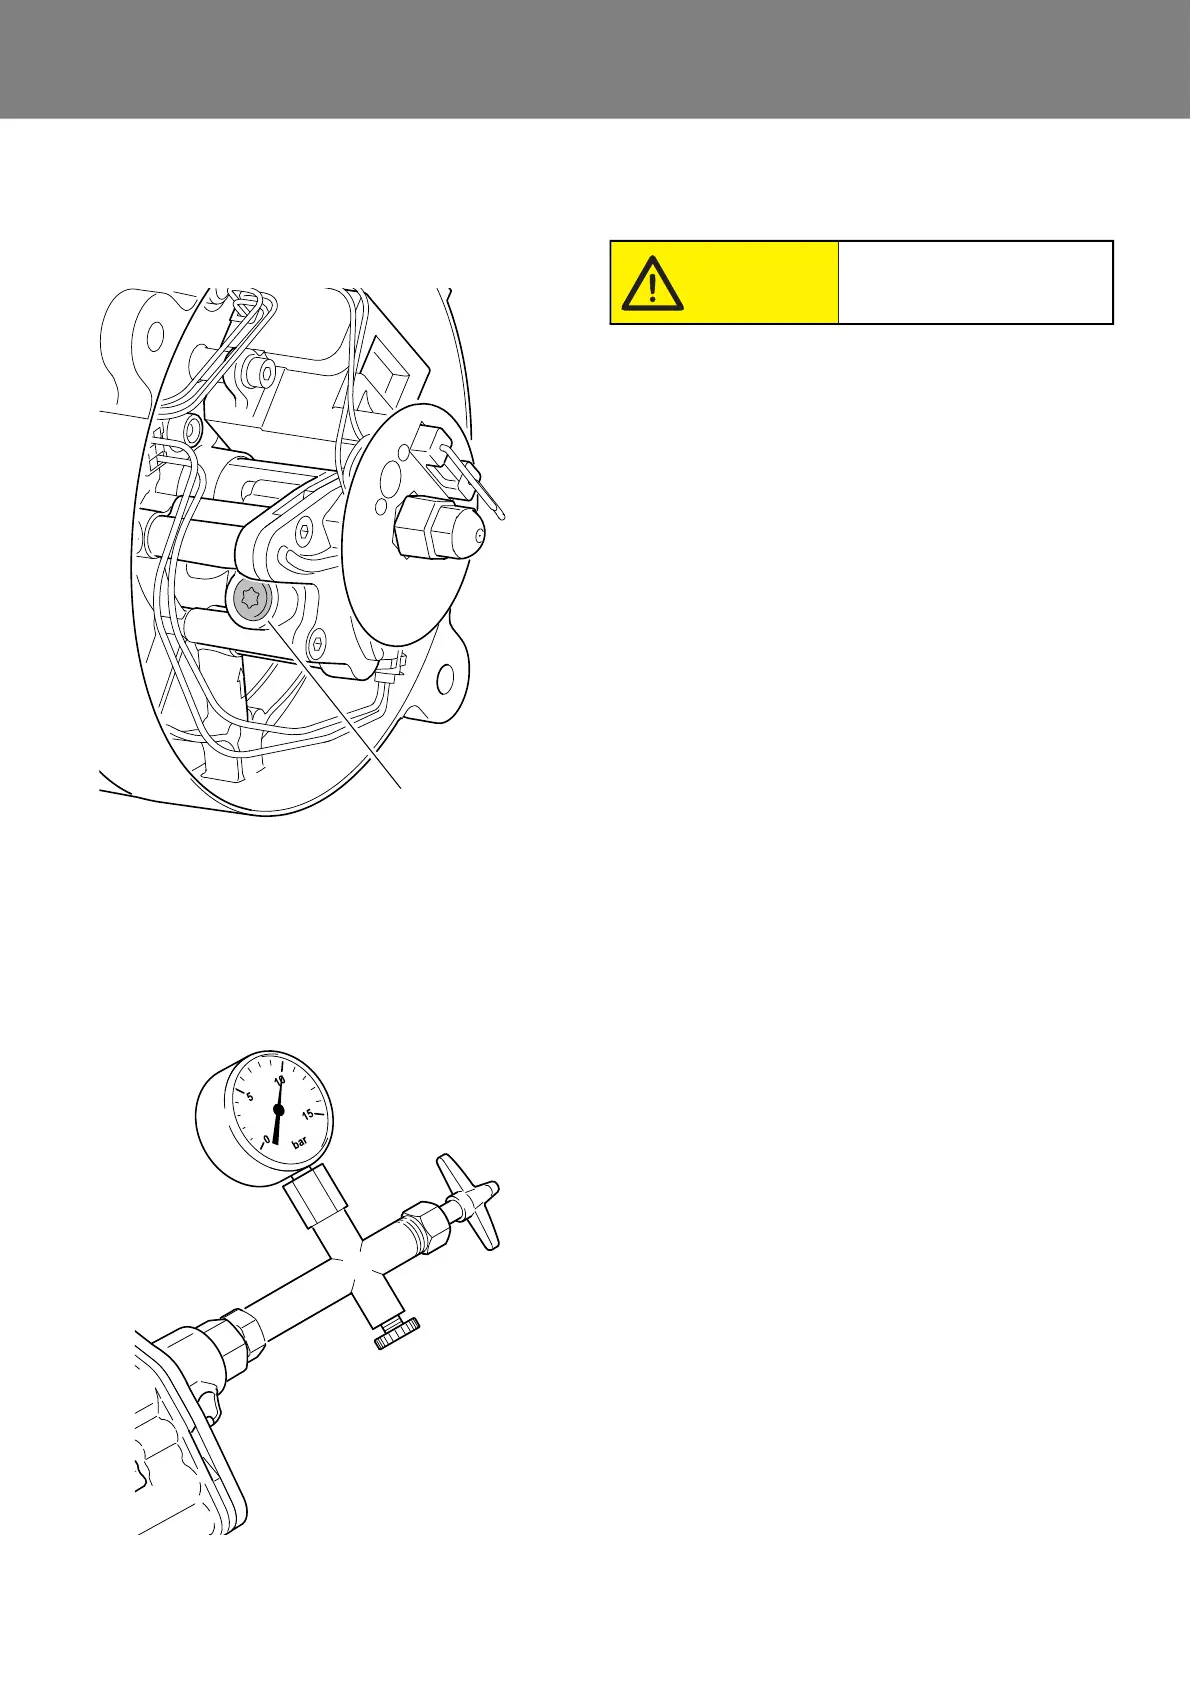
Fig. 510
Fig. 511
Pump pressure
adjusting screw
Pump pressure test gauge
with bleeding feature
Risk of burns!
Caution!
 Loading...