804
Thermo plus 160/230/300/350 8 Repairs
8.6 Electronic ignition unit and ignition
electrode removal and installation
Removal
1. Remove burner head (see 8.2).
2. Lift off ignition electrode from the electronic ignition
unit by twisting a screwdriver sideways (see Fig. 804)
and remove it.
3. Remove the disc (3) from the nozzle holder.
4. Disconnect the electronic ignition unit plug from the
control device.
5. Remove the combination screws (4).
6. Pull electronic ignition unit (1) off and remove it.
7. If necessary, perform a general visual inspection (see
5.6.1) or test (see 5.6.7).
Installation
1. Bring electronic ignition unit (1, Fig. 804) into installa-
tion position and secure with combination screws (4).
2. Reconnect the electronic ignition unit plug to the con-
trol device.
3. Fit the disc (3) onto the nozzle holder of the fuel pump
(9, Fig. 805) and align it so, the ignition electrode (2,
Fig. 804) may inserted into the electronic ignition unit.
4. Insert ignition electrode (2, Fig. 804) into the electro-
nic ignition unit.
5. Install burner head (see 8.2).
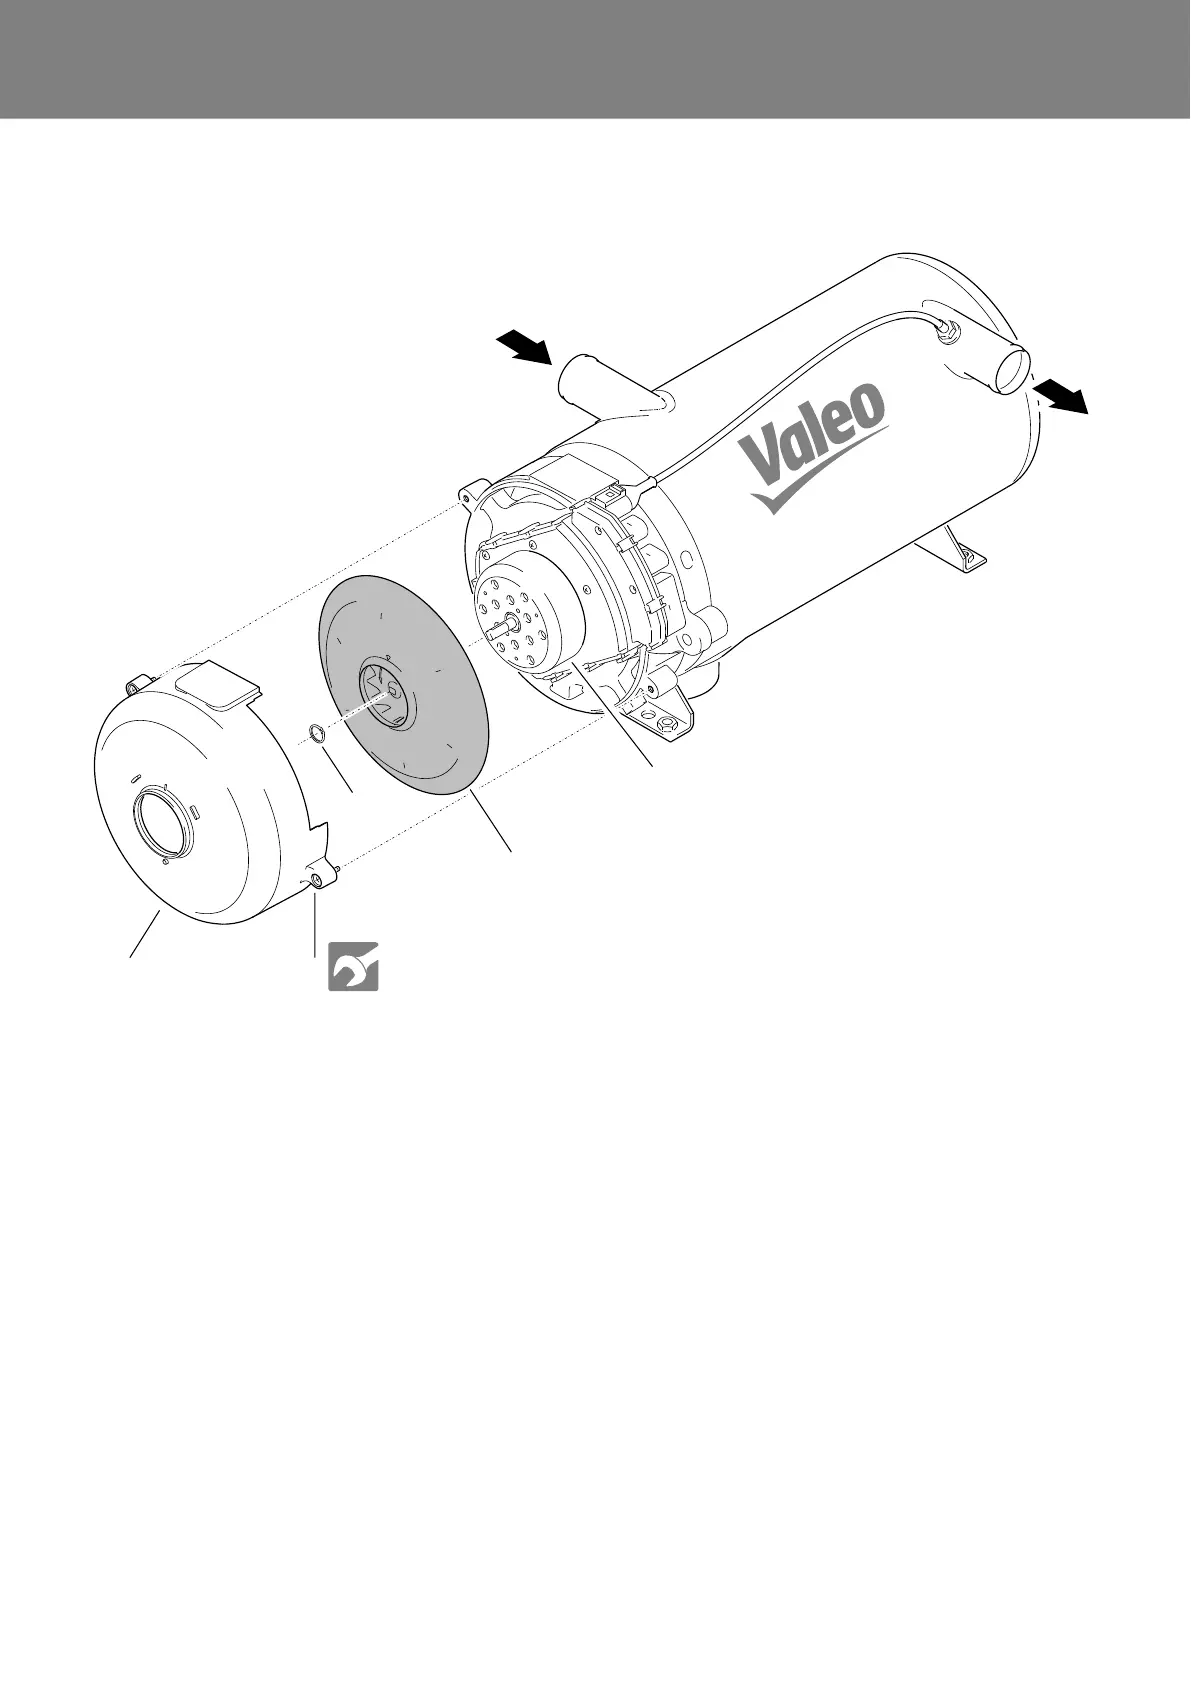
Fig. 803 Fan wheel removal and installation
1 Hood
2 Screws (2)(not removable)
3 Circlip
4 Fan wheel
5 Burner motor
1
2
4
5
3
2 Nm +0.5 Nm
 Loading...