29
© Vallox Oy - All rights reserved
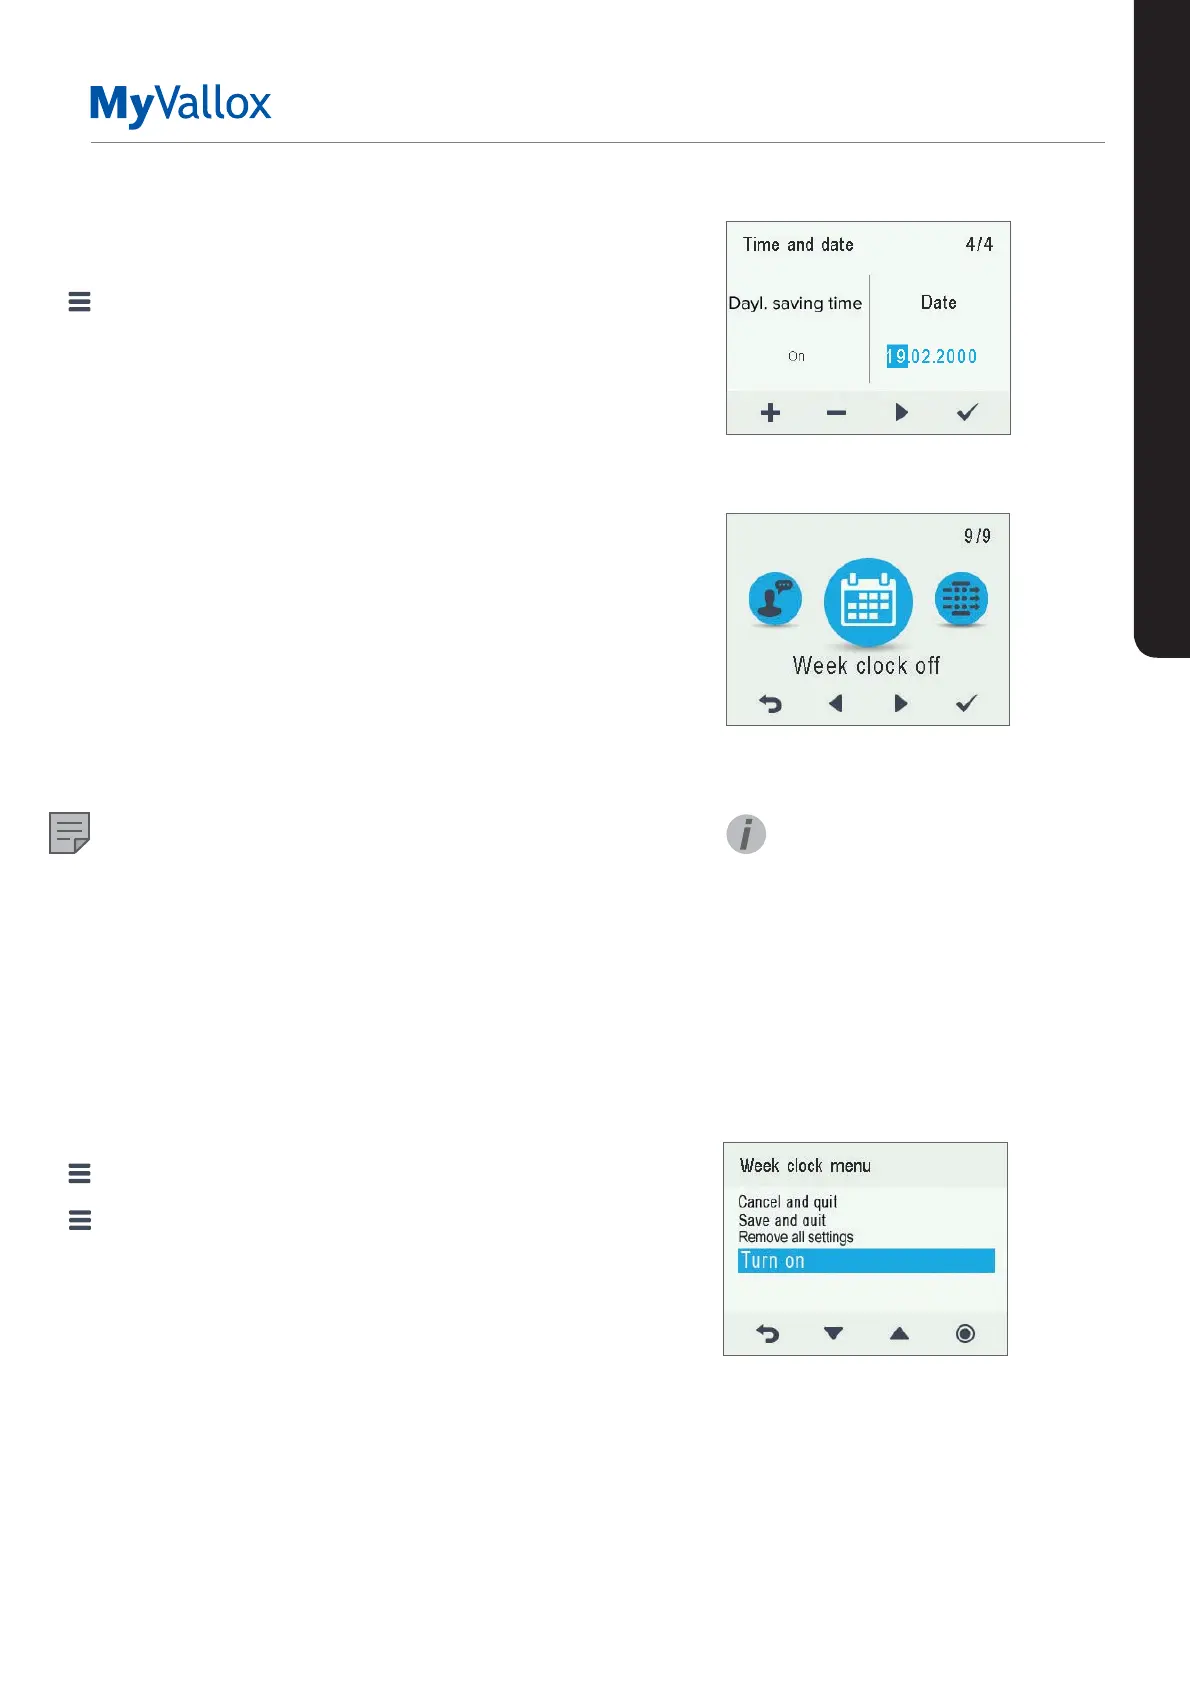
Setting the date
1. Select Settings > Time and date.
2. Select OK.
3. Select Right arrow until the 4/4 display opens.
4. Use the Plus and Minus buttons to set the date.
5. Select Right arrow.
6. Use the Plus and Minus buttons to set the month.
7. Select Right arrow.
8. Use the Plus and Minus buttons to set the year.
9. Select OK.
WEEK CLOCK
The week clock allows you to pre-set a weekly ventilation
program for the ventilation unit. For each hour of the week,
one of the following profiles can be configured:
• At home — The At home profile is used.
• Away — The Away profile is used.
• Boost — The Boost profile is used.
• Blank — Do not change the profile.
NOTE
If you change the profile manually when the week clock is
on, the selected profile will be active until the week clock
switches to the next profile in the program.
If the humidity or carbon dioxide sensors control the
ventilation, they will adjust the fan speed, regardless of
whether the profile has been manually selected or selected
by the week clock.
Turning the week clock on
1. Select Settings > Week clock o.
2. Select OK.
3. Select Settings.
4. Select Turn on.
5. Select Select.
6. The control panel confirms that the week clock is turned
on.
USING THE UNIT
SETTINGS
TIP
You can turn the week clock on
or o by pressing the OK button
on the Week clock display for a
few seconds.