B
C
D
E
F
A
G
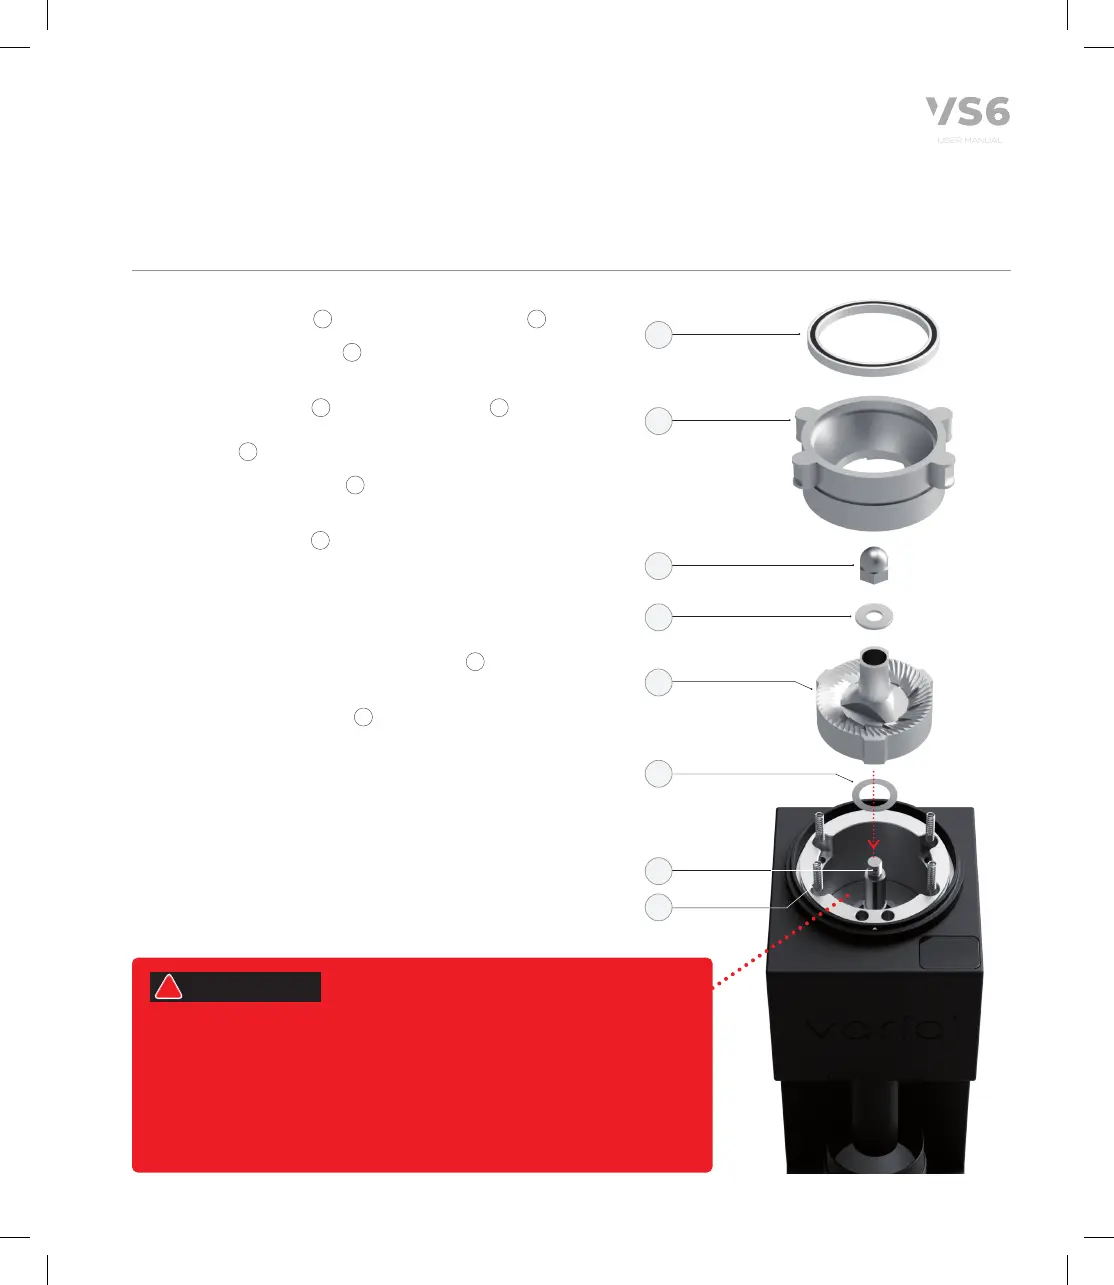
1. Place a thin washer
F
on top of the driveshaft
G
.
Replace the 4 x springs
back into the burr
chamber.
2. Slide the lower burr
E
onto the driveshaft
G
,
lining up with the corresponding flat side on the
driveshaft
G
.
3. Replace the flat washer
D
on top of the lower
burr.
4. Replace the set nut
C
onto the driveshaft
thread and use the locking nut wrench (in an
anti-clockwise direction) while restraining the
driveshaft with the open wrench, to securely
tighten (see instructions on page 16).
5. Replace the new or cleaned upper burr
B
into the
burr chamber.
6. Replace the ring bearing
A
on top of the upper
burr housing - ensuring this ring bearing fits inside
the cavity before the next step.
7. Replace the adjustment collar and hopper and
tighten the hopper (in a clockwise direction) to
“0” zero point.
8. Now, dial in your required grind setting.
9. Lastly, replace your lid and power supply and you
are ready to grind.
While CHANGING or CLEANING BURRS, make sure the following
parts are completely brushed/wiped clean of ground coffee:
Grind chamber, burrs, bearing, upper burr chamber, flat washer
and threads on the set nut, driveshaft, body, and hopper.
If NOT brushed clean, an actual 'zero point' may not be attained
upon reassembly, resulting in an inaccurate calibration.
WARNING!
!
3.9 Flat Burr Reassembly
17