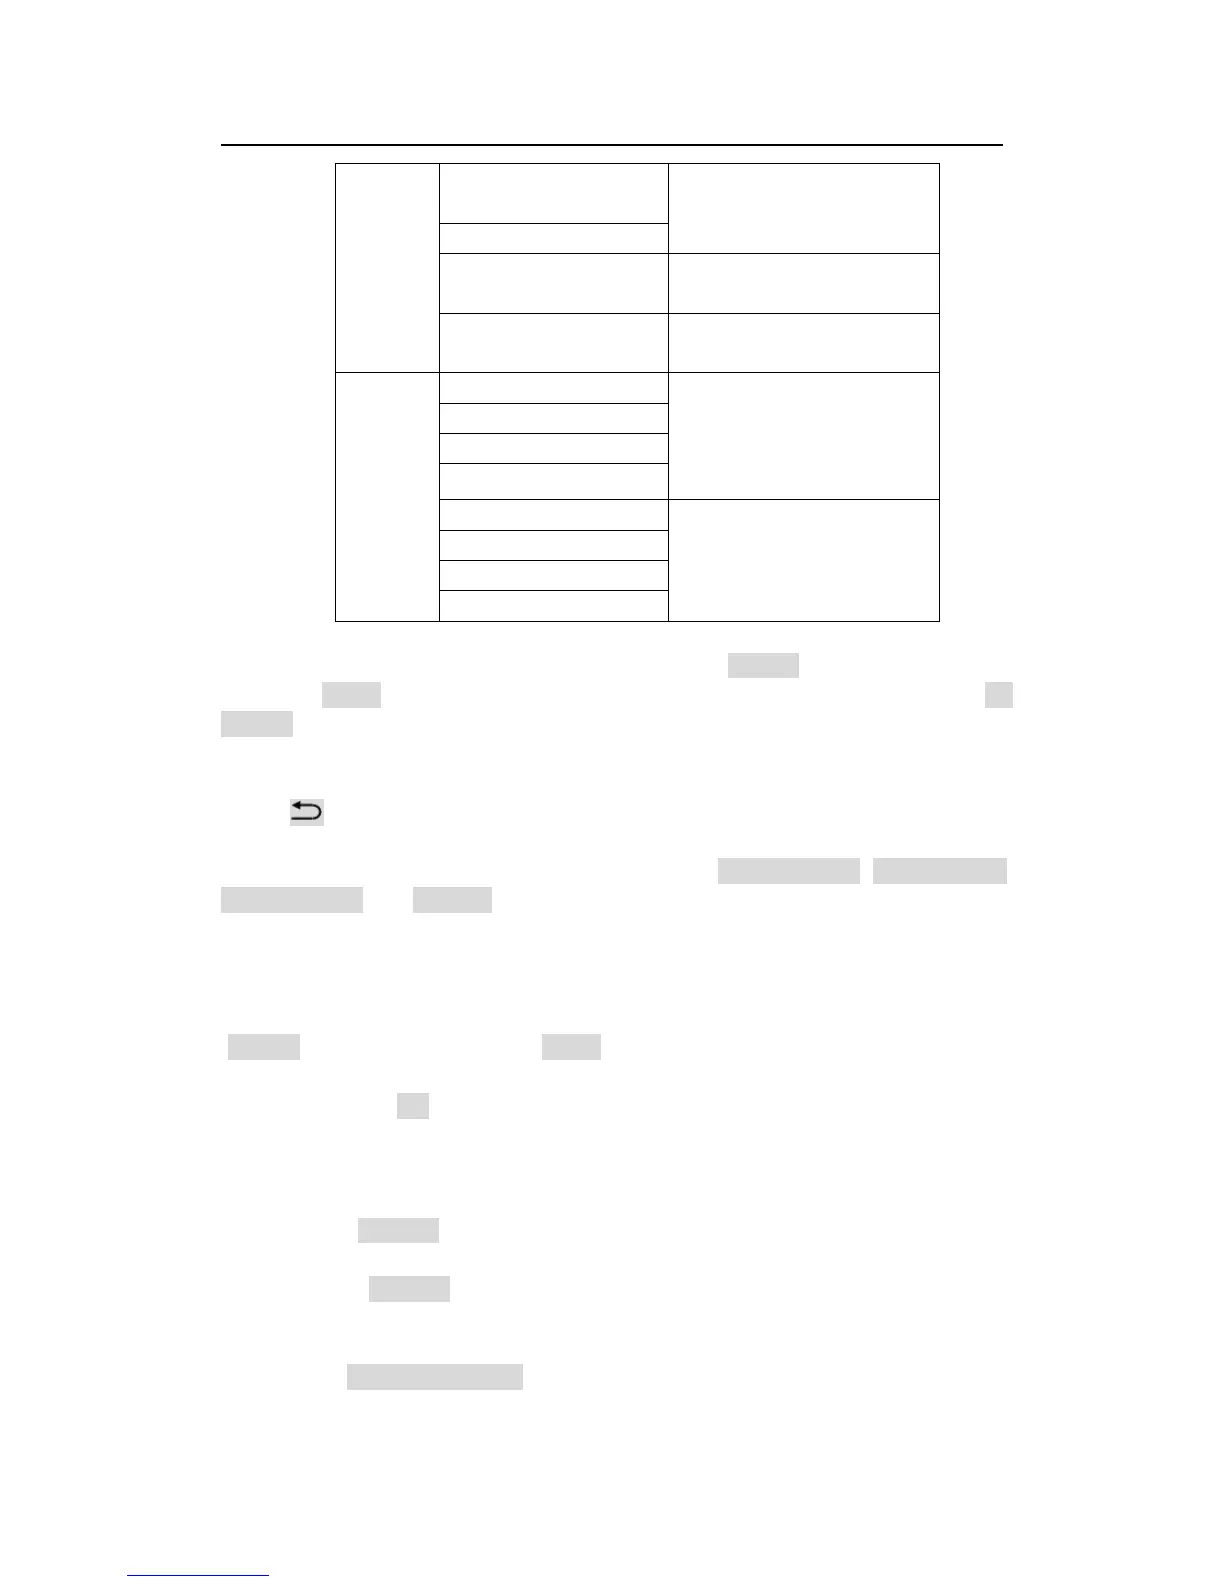
Enter adjustment setup: under splicing mode (Mosaic indicator lit up), by
pressing “Setup” button, LVP615U enters splicing adjustment setup menu “E.
Mosaic”
Return to upper level setup menu: under the mode of adjustment setup,
press “ ” button, LVP615U exits adjustment setup.
Note: when use multiple LVP615U cascading splicing, to make sure the output
image have uniformity, every unit’s parameters of 4.3 brightness, 4.1 inpu color,
4.2 sharpness and 8.2 bias must be same.
Operation is as below:
When the input signal of LVP615U is DVI format and the splicing mode is open
(Mosaic indicator lit up), press Setup, LVP615U enters splicing menu. Press
↓button to select setup option needed to adjust, rotate knob to change
parameter, press OK button to save.
Operation is as below :
In the menus E.1~E.2, input parameters of whole splicing screen;
In the menus E.3~E.4,input the size and location (relative to whole splicing
screen) of LED screen the LVP615U drives;
In the menu E.7 sync. Mosaic menu, select to turn the function on or off;
 Loading...