16 – Part 3: Solar water heater system installation – Collector installation
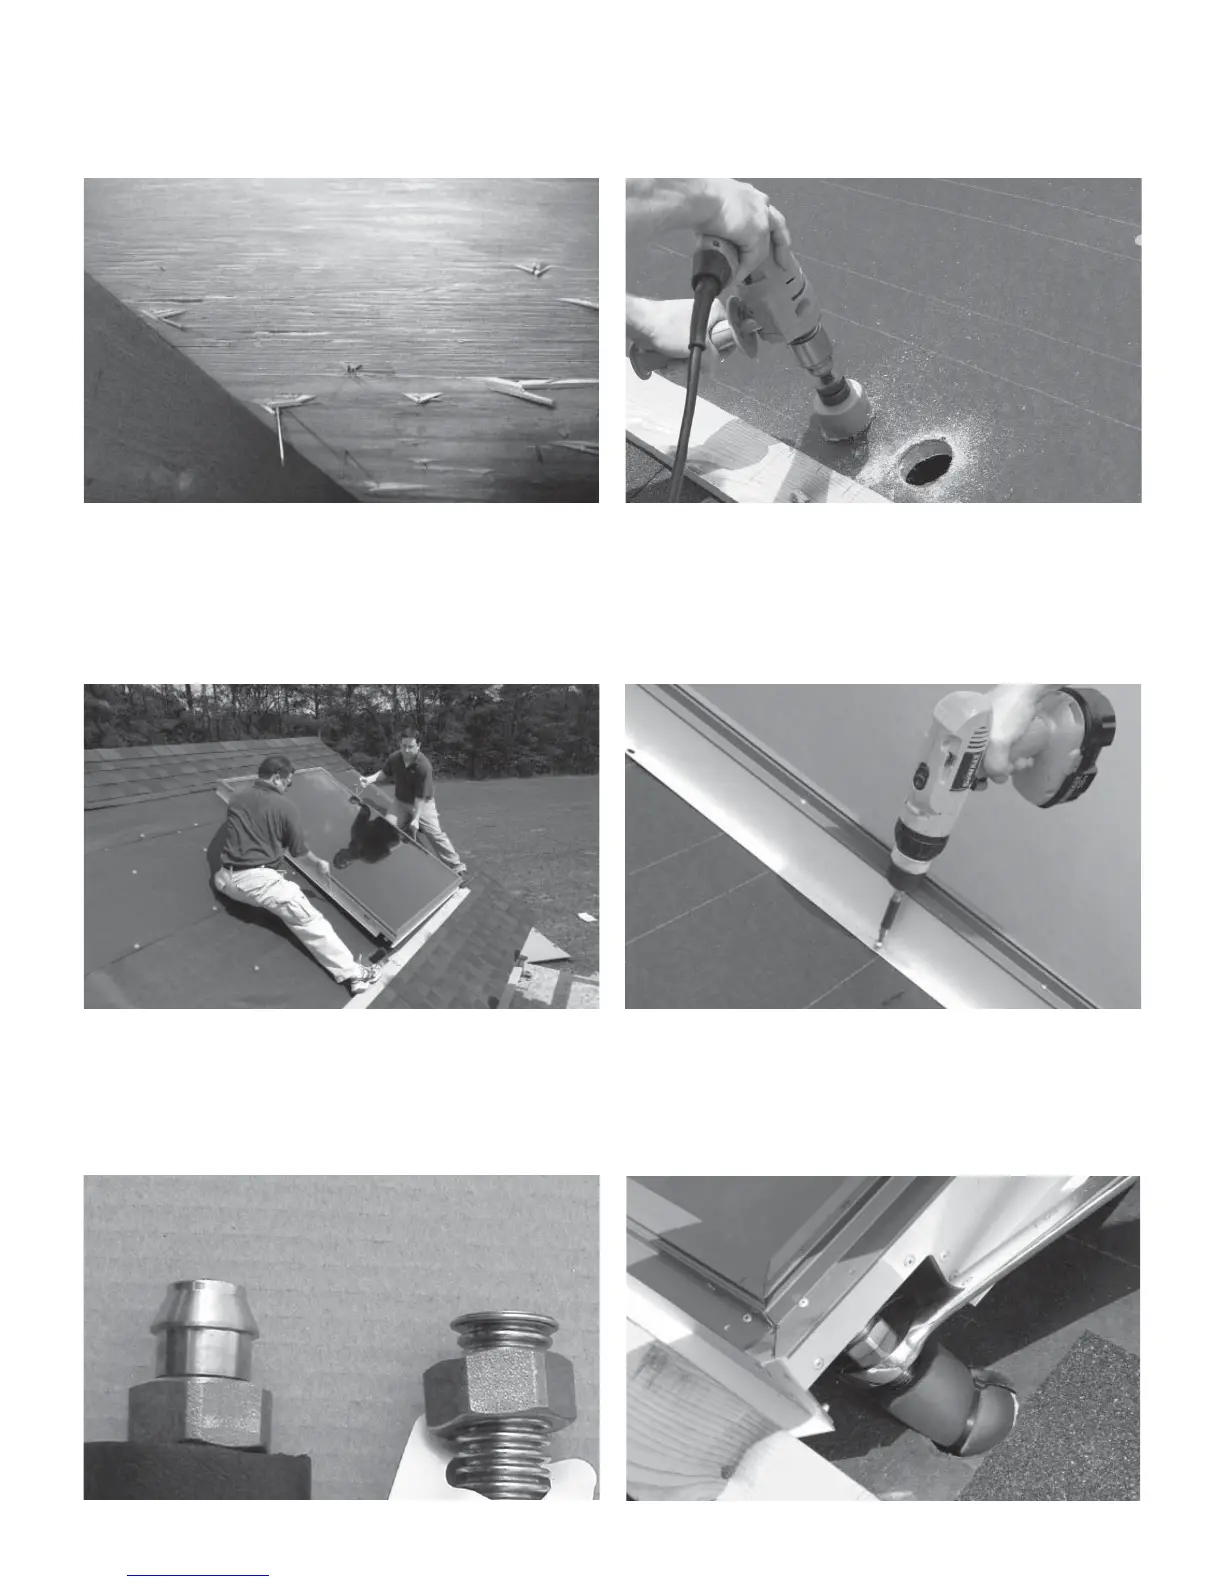
3. Mark o the location for the fl exible piping penetration locations. Verify that there are no roof joists or obstructions
prior to drilling, then drill, or cut openings for piping penetrations.
4. Carefully place collectors on roof. Place collector against temporary support and align them so that the fl exible
piping connections align with the openings cut into the roof deck. Ensure that there is 4” of space between
collectors (measured to the vertical wall casing). Secure collector top support fl ange to roof deck using four self-
tapping stainless steel mounting screws (provided). When possible, screws shall be located to secure the collectors
to the roof trusses below.
5. Open the packaging for the ZFM fl exible pipes (to be used to connect the collectors to the pump station). Identify
ZFM fl exible pipe connection end for connection to the pump station (end with red/blue tabs) and the connection
end for connection to the collector (end with cone shape). Route the collector ends up through the roof and attach
fl exible piping to collectors. Secure fl exible piping nuts securely using wrench.
 Loading...