Flashing installation – Part 3: Solar water heater system installation – 19
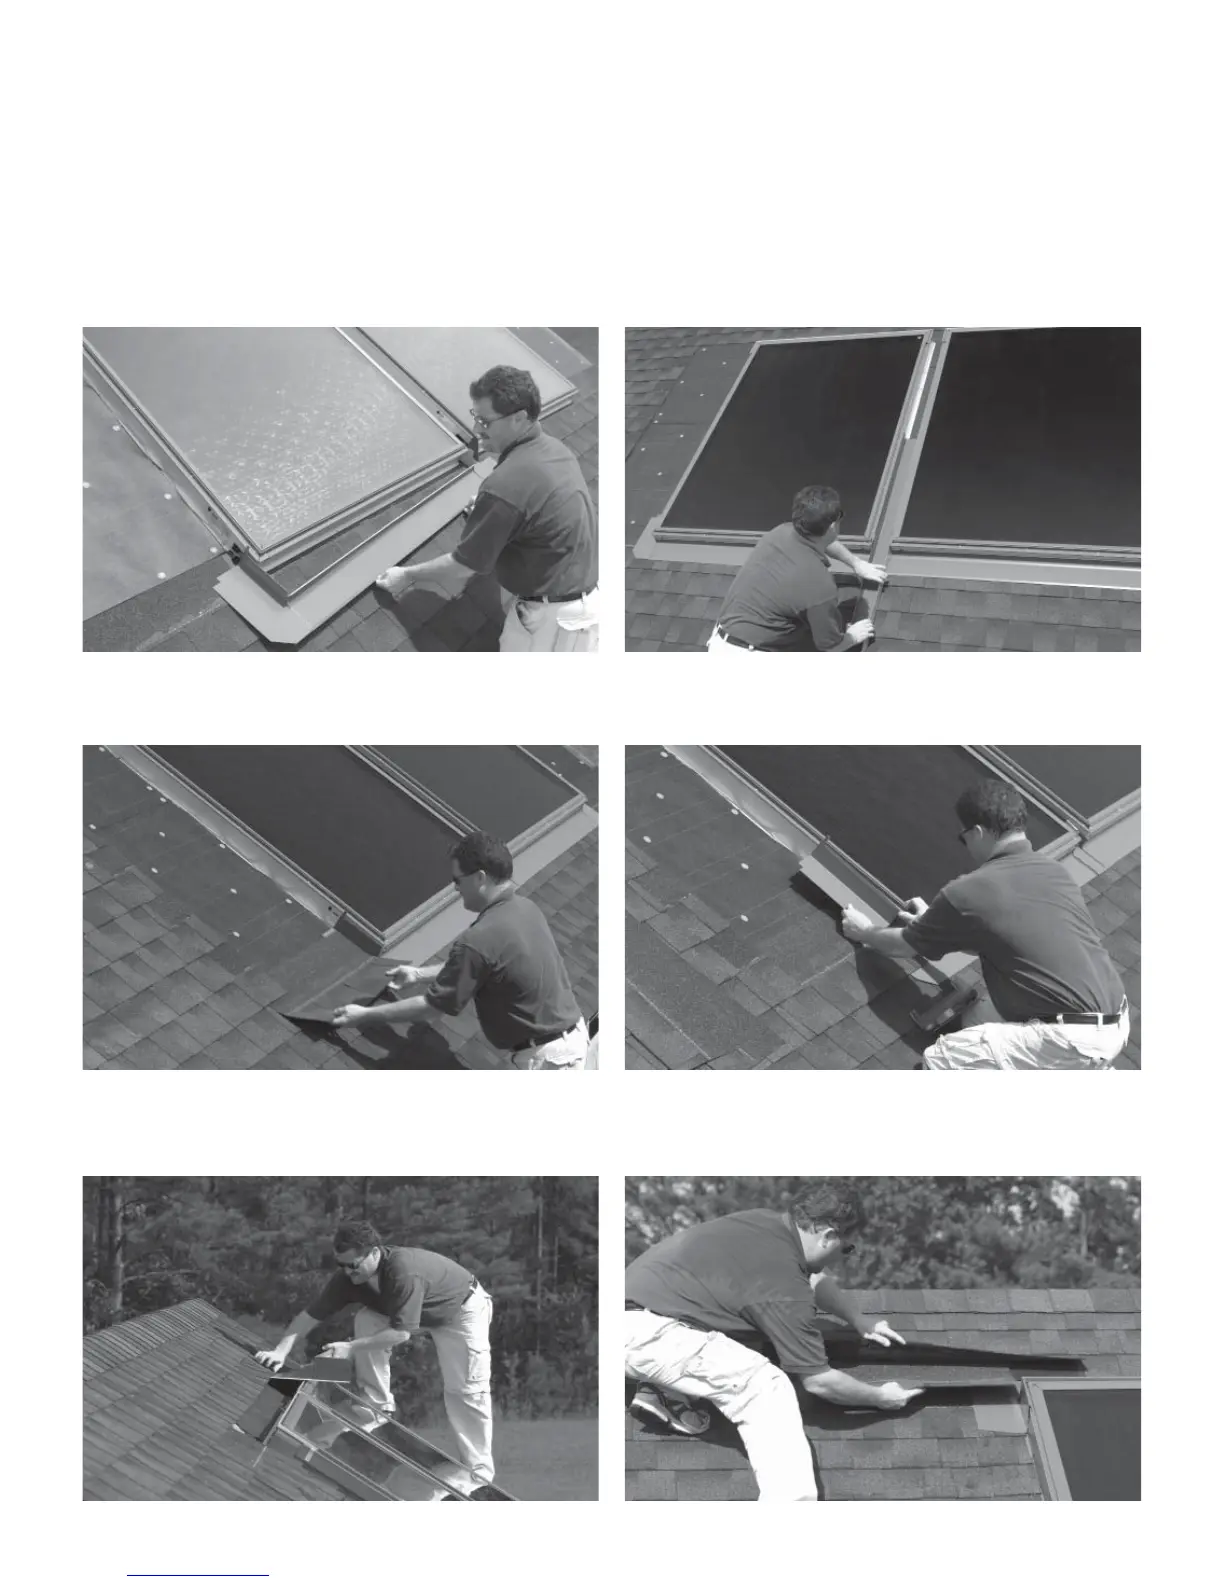
Flashing installation
Install the VELUX fl ashings ensuring that the collectors are properly fl ashed and sealed in accordance with standard roofi ng
practices and the VELUX fl ashing instructions. Reference your VELUX collector installation manual for proper guidelines in
your application. All equipment should be installed in accordance with all local codes and best practices as identifi ed with
National Roofi ng Contractors Association (NRCA) or other qualifi ed body.
1. Install the bottom pan fl ashings and gutters and secure in place using metal tabs as referenced in the VELUX
fl ashing instructions. Do not drive roofi ng nails, screws, or other fasteners, through the fl ashings to secure.
2. Install the fi rst course of roofi ng material and VELUX fl ashings along left side of collector bank. Repeat procedure
along right side of collector bank.
3. Install the top pan fl ashings and secure in place using metal tabs as referenced in the VELUX fl ashing instructions.
Finish the fl ashing installation by installing the collector cladding and the last course of roofi ng material.
 Loading...