18 – Part 3: Solar water heater system installation – Collector installation
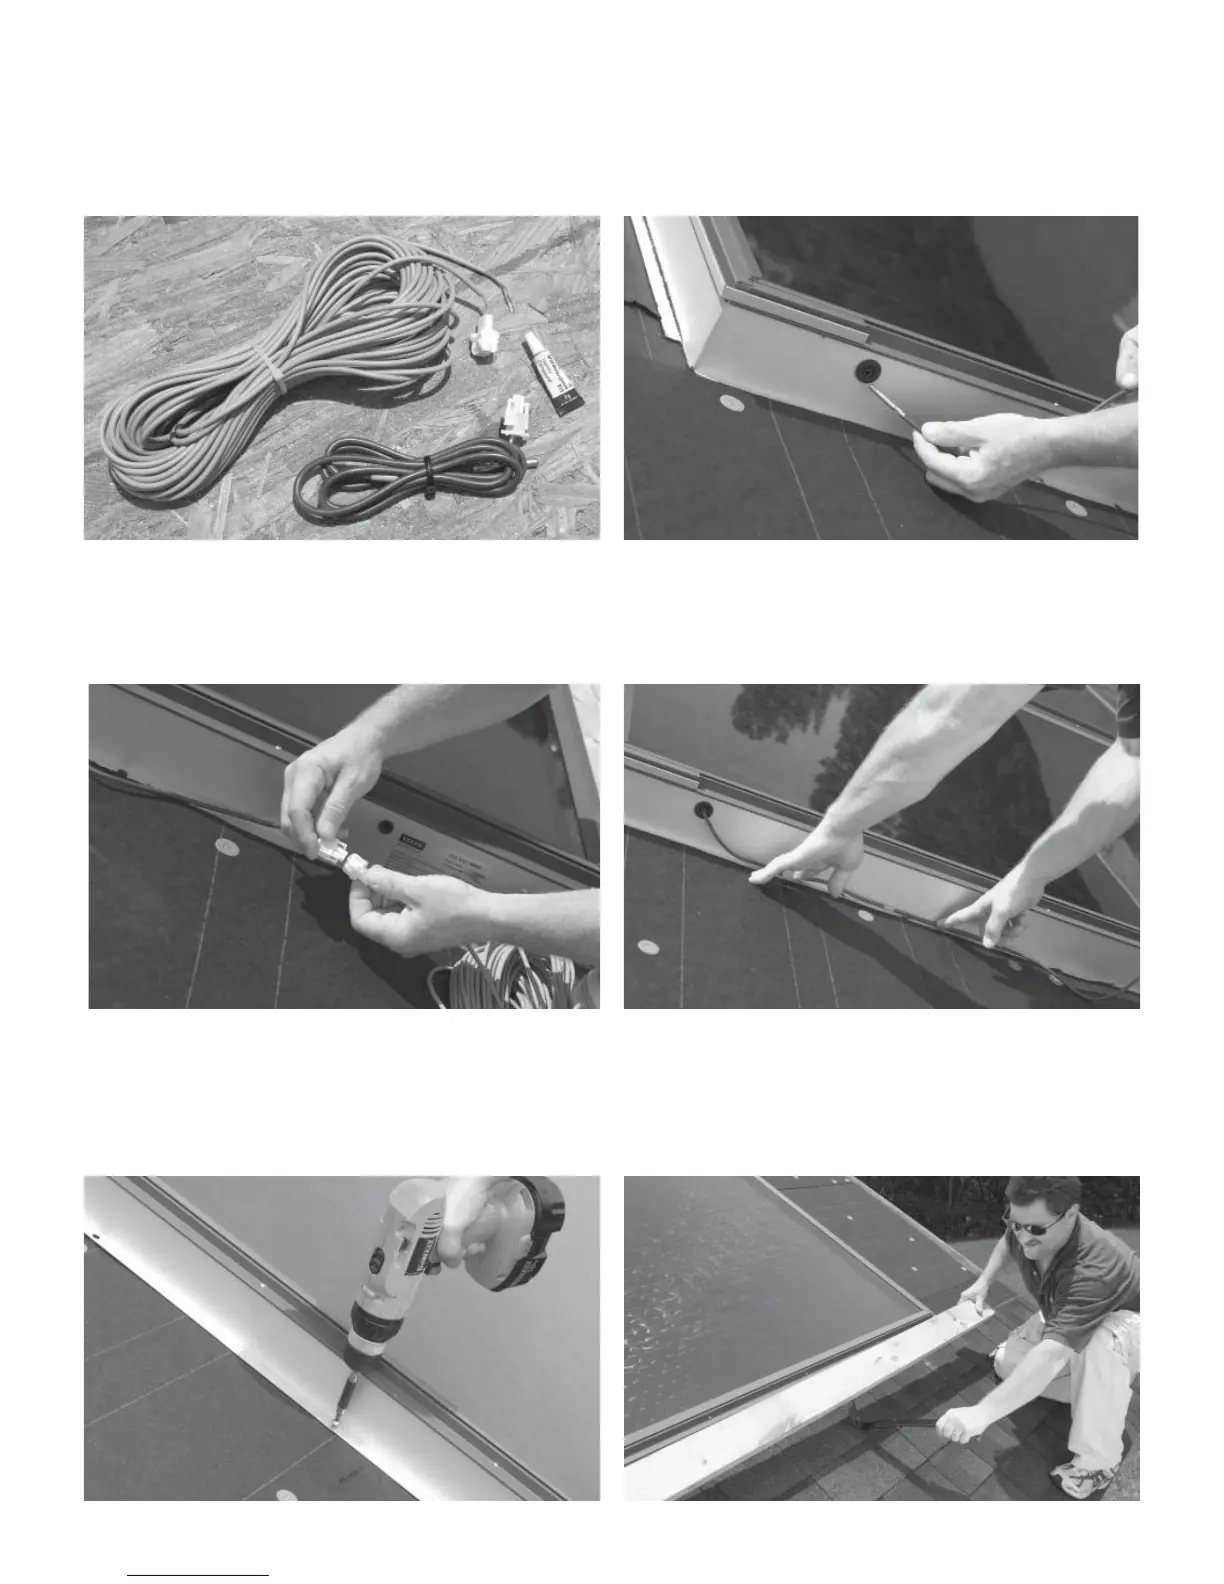
9. Locate the collector temperature sensor, couplant tube, and extension cable. Locate the collector temperature sensor
well in the top left corner of the collector bank (collector with “hot” pipe connected). Fill the collector sensor port with
couplant and then insert sensor into the sensor well. Secure the sensor in place with insulating tape.
10. Connect the extension cable to the collector temperature sensor and route sensor cable along side of collector through
the roof opening for the “hot” pipe. Drill a 1” hole alongside the collector fl ange between the sensor port and the hot pipe.
Route the cable through the 1” hole and align along collector fl ange.
11. Secure the side fl anges of the collectors to the roof structure using four self-tapping stainless steel mounting screws
per side. When possible, screws shall be located to secure the collectors to the roof trusses below. Carefully remove
the temporary support from the bottom edge of the collectors and secure the bottom fl ange of all collectors to the roof
structure using the remaining self-tapping stainless steel mounting screws.
 Loading...