EVX-534/-539 VHF Service Manual 12
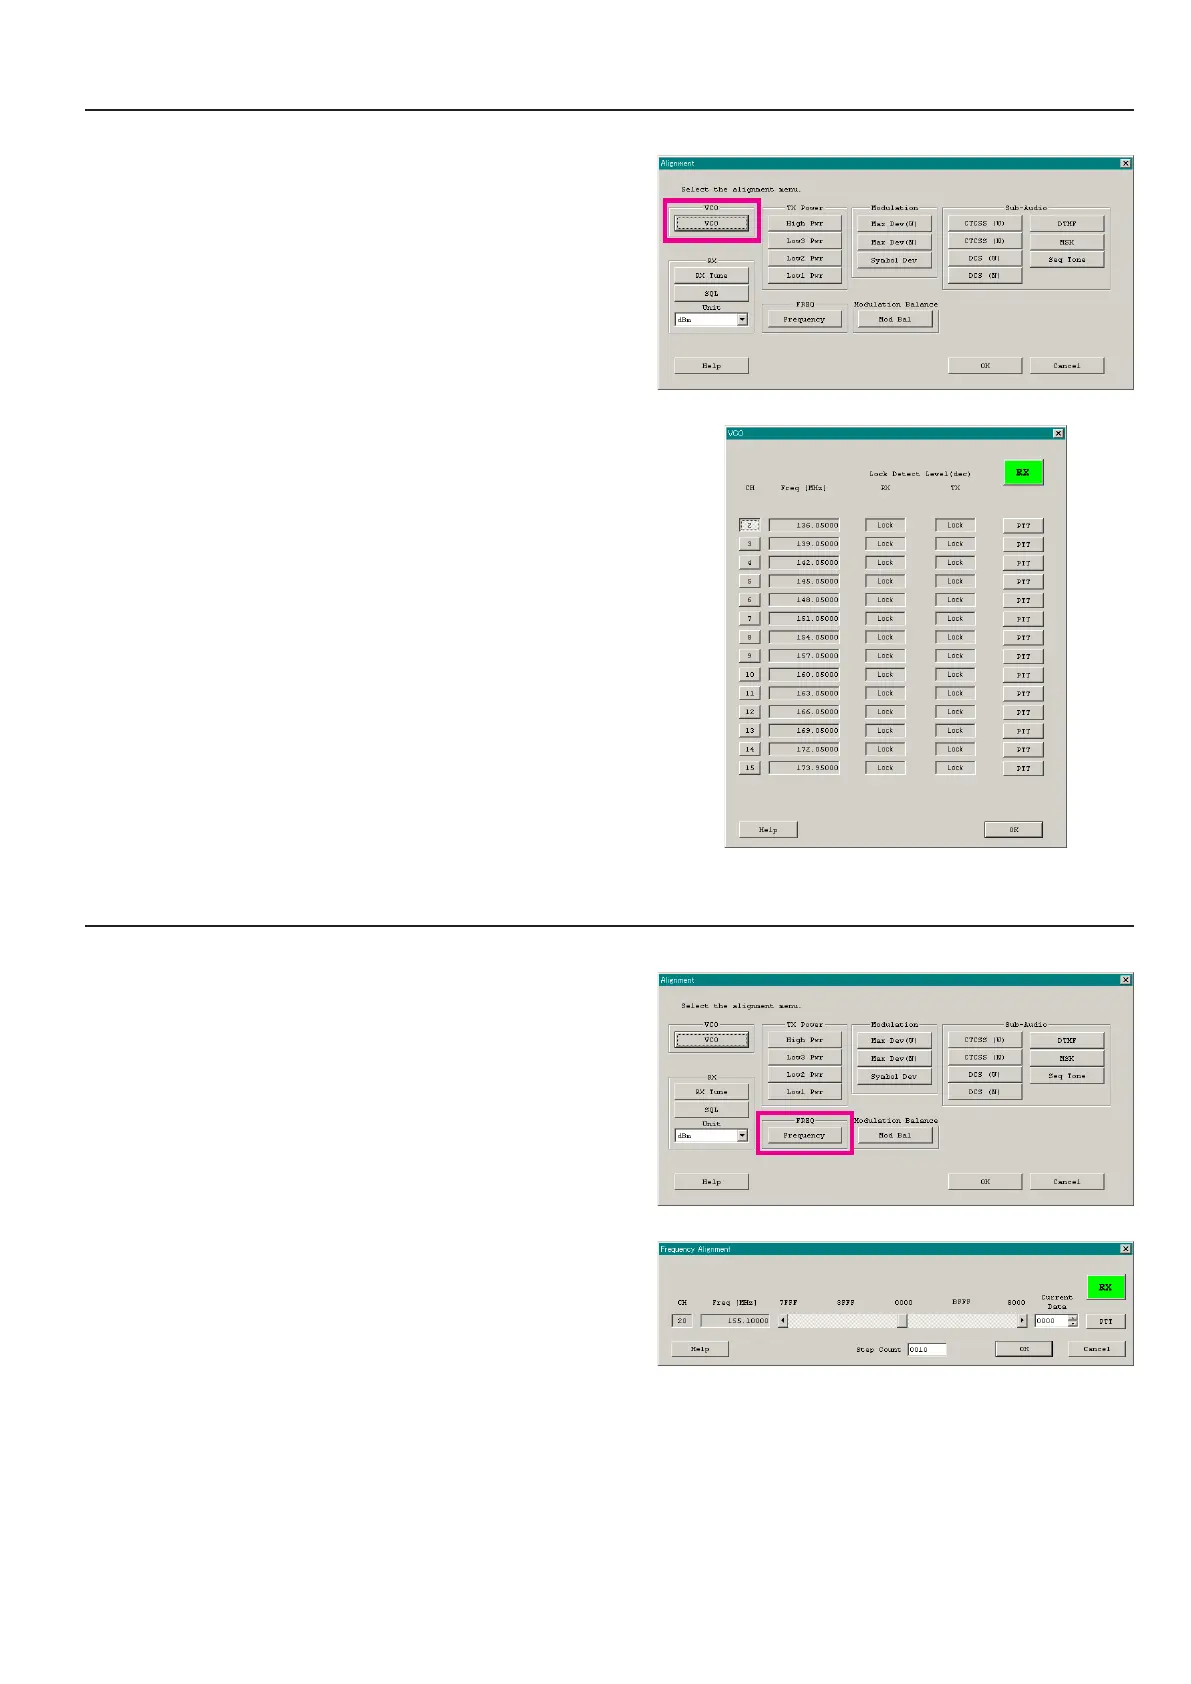
1. vCo (rx vCo/tx vCo) - This parameter is for conrmation only and cannot align -
This parameter is to conrm whether the VCO status shall be “Lock” or “Unlock”.
1. Click the “VCO” button to open the “VCO” window.
2. Click the “CH” button on the desired channel. The RX VCO
status (“Lock” or “Unlock”) will appear in the “RX” box.
3. Click the “PTT” button. The radio starts to transmit on the se-
lected channel, and the TX VCO status (“Lock” or “Unlock”)
will appear in the “TX” box.
4. Click the “PTT” button again to stop transmitting.
5. Click the “OK” button to nish the conrmation of the VCO
status.
Alignment
2. pll reFerenCe FrequenCy (FrequenCy)
This parameter is to align the reference frequency for PLL.
1. Click the “Frequency” button to open the “Frequency Align-
ment” window.
2. Click the “PTT” button or press the “SPACE” bar of the com-
puter’s keyboard, the radio will start to transmit on the center
frequency channel.
3. Set the value to get the desired frequency according to the fol-
lowing ways:
l
Dragging the slide bar
l
Clicking the arrow buttons
l
Pressing the left/right arrow key of the computer’s keyboard
l
Entering the value (“0000” - “FFFF”) in the “Current Data”
box from the computer’s keyboard
4. After getting the desired frequency, click the “PTT” button or
press the “SPACE” bar to stop transmitting.
5. Click the “OK” button to finish the frequency alignment and
save the data.
ê
ê