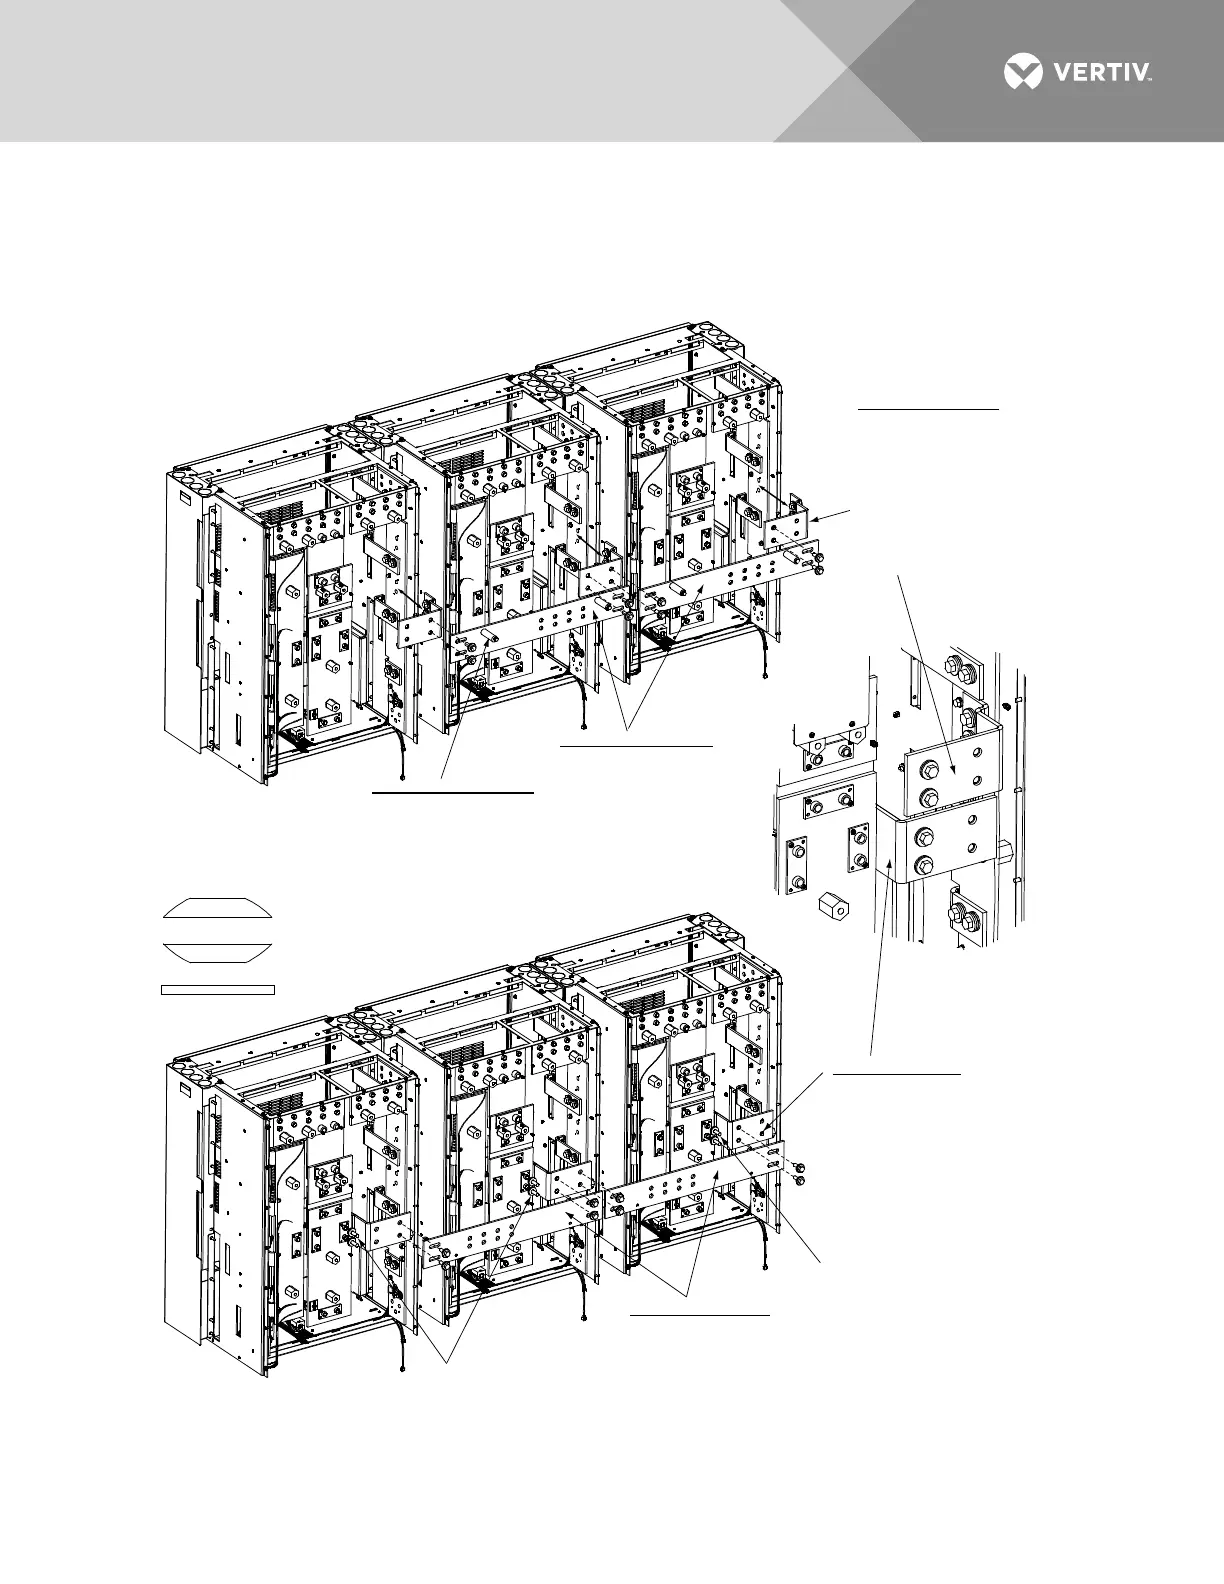
1. Remove center right (4-Row Cab.)
or lower right (3-Row Cab.) Rear
Access Cover from distribution
cabinets (note that the complete
rear cover is removed in the
illustration for clarity only).
2. Attach Return Angle Brackets.
3. Attach -48V Angle Brackets.
4. Attach flat Return Interbay Busbars.
5. Attach flat -48V Interbay Busbars.
6. Attach Insulator Standoffs onto
Return Interbay Busbars.
Return Angle Bracket
Secure 2 places
with (in order listed)
3/8-16 x 1-1/4” Bolt,
3/8” Belleville Lockwasher,
(concave side of Belleville
Lock Washers face each other)
3/8” Belleville Lockwasher,
3/8” Flat Washer.
Torque to 180 in-lbs.
Return Interbay Busbar
Secure in 4 places
with (in order listed)
3/8-16 x 1-1/4” Bolt,
3/8” Belleville Lockwasher,
(concave side of Belleville
Lock Washers face each other)
3/8” Belleville Lockwasher,
3/8” Flat Washer.
Torque to 180 in-lbs.
1/4-20 Insulator Standoff
Secure from back of
return interbay busbar
with 1/4-20 x 5/8” Bolt
and 1/4” Flat Washer.
-48V Angle Bracket
Secure in 2 places
with (in order listed)
3/8-16 x 1-1/4” Bolt,
3/8” Belleville Lockwasher,
(concave side of Belleville
Lock Washers face each other)
3/8” Belleville Lockwasher,
3/8” Flat Washer.
Torque to 180 in-lbs.
-48V Interbay Busbar
Secure in 4 places
with (in order listed)
3/8-16 x 1-1/4” Bolt,
3/8” Belleville Lockwasher,
(concave side of Belleville
Lock Washers face each other)
3/8” Belleville Lockwasher,
3/8” Flat Washer.
Torque to 180 in-lbs.
Hardware attached
from other side.
Hardware attached
from other side.
SEE NEXT PAGE FOR
ASSEMBLED VIEW
Belleville Lockwasher
Belleville Lockwasher
Flat Washer
(concave side of Belleville
Lock Washers face each other)

 Loading...


