English-38-
The second way to apply TKGS installation manually
after the First Time Installation is starting an update.
To do this press the Menu button and select Install
and Retune>TKGS Installation>Start update.
To use the update options of TKGS
TKGS feature keeps your satellite channel lists up-
to-date in three different ways.
Standby: While going into standby mode, the TV
controls the TKGS table version number whether it is
the last version or not. If any changes are detected,
TV starts to update. On the next switch-on a message
will be displayed to inform the user about the changes.
Background: When a channel is opened which isn’t
denedintheTKGSchannellists, the TV controls
the TKGS table version number whether it is the last
version or not. If any changes are detected, TV starts
to update. When the update is completed a message
will be displayed to inform the user about the changes.
Manual: An update can be started manually any
time. Press the Menu button. Highlight Install and
Retune and press OK. In the sub menu highlight
TKGS Installation and press OK. Than select Start
Update and press OK.
In the TKGS system, channels can be blocked by the service
provider and Audio/Video transmission will not be available
from these channels.
Using SatcoDX Feature
SatcoDX (optional):
You can perform SatcoDX
operations using the Satelite Settings menu. In the
SatcoDXmenu,therearetwooptionsregardingto
the SatcoDx.
YoucandownloadoruploadSatcoDXdata.Inorder
to perform these functions a USB device must be
connected to the TV.
You can upload current services and related satellites
&transpondersinTV,toaUSBdevice.
Additionally you can download one of the SatcoDx
lesstoredinUSBdevice,totheTV.
Whenyouselectoneoftheseles,allservicesand
related satellites and transponders in the selected
lewillbestoredintheTV.Ifthereareanyinstalled
terrestrial, cable and/or analog services, they will be
kept and only satellite services will be removed.
Afterwards, check your antenna settings and make
changes if necessary. An error message stating “No
Signal” may be displayed if the antenna settings are
notconguredproperly.
Media Playback via USB Input
You can connect a 2.5” and 3.5” inch (hdd with external
power supply) external hard disk drives or USB memory
stick to your TV by using the USB inputs of the TV.
IMPORTANT! Backup your les before making
any connections to the TV. The Manufacturer will
notberesponsibleforanyledamageordataloss.
Certain types of USB devices (e.g. MP3 Players)
or USB hard disk drives/memory sticks may not be
compatible with this TV. The TV supports FAT32
and NTFS disk formatting .
While formatting a USB hard disk that has 1TB (Tera
Byte) or more le capacity, you can experience
problems with the formatting process.
Quickly plugging and unplugging USB devices, is a
very hazardous operation. This may cause physical
damage to the USB player and the USB device itself.
DonotpullouttheUSBmodulewhileplayingale.
You can use USB hubs with your TV’s USB inputs.
External power supplied USB hubs are recommended
in such a case.
It is recommended to use the TV’s USB input(s)
directly, if you are going to connect a USB hard disk.
Media Browser Menu
You can play photo, music,and movie les stored
on a USB disk by connecting it to your TV. Connect
a USB disk to one of the USB inputs located on the
side of the TV. Pressing the MENU button while in the
Media Browser mode will access the Picture, Sound
and Settings menu options. Pressing the MENU button
again will exit from this screen.
You can set your Media
Browser preferences by using the Settings Menu.
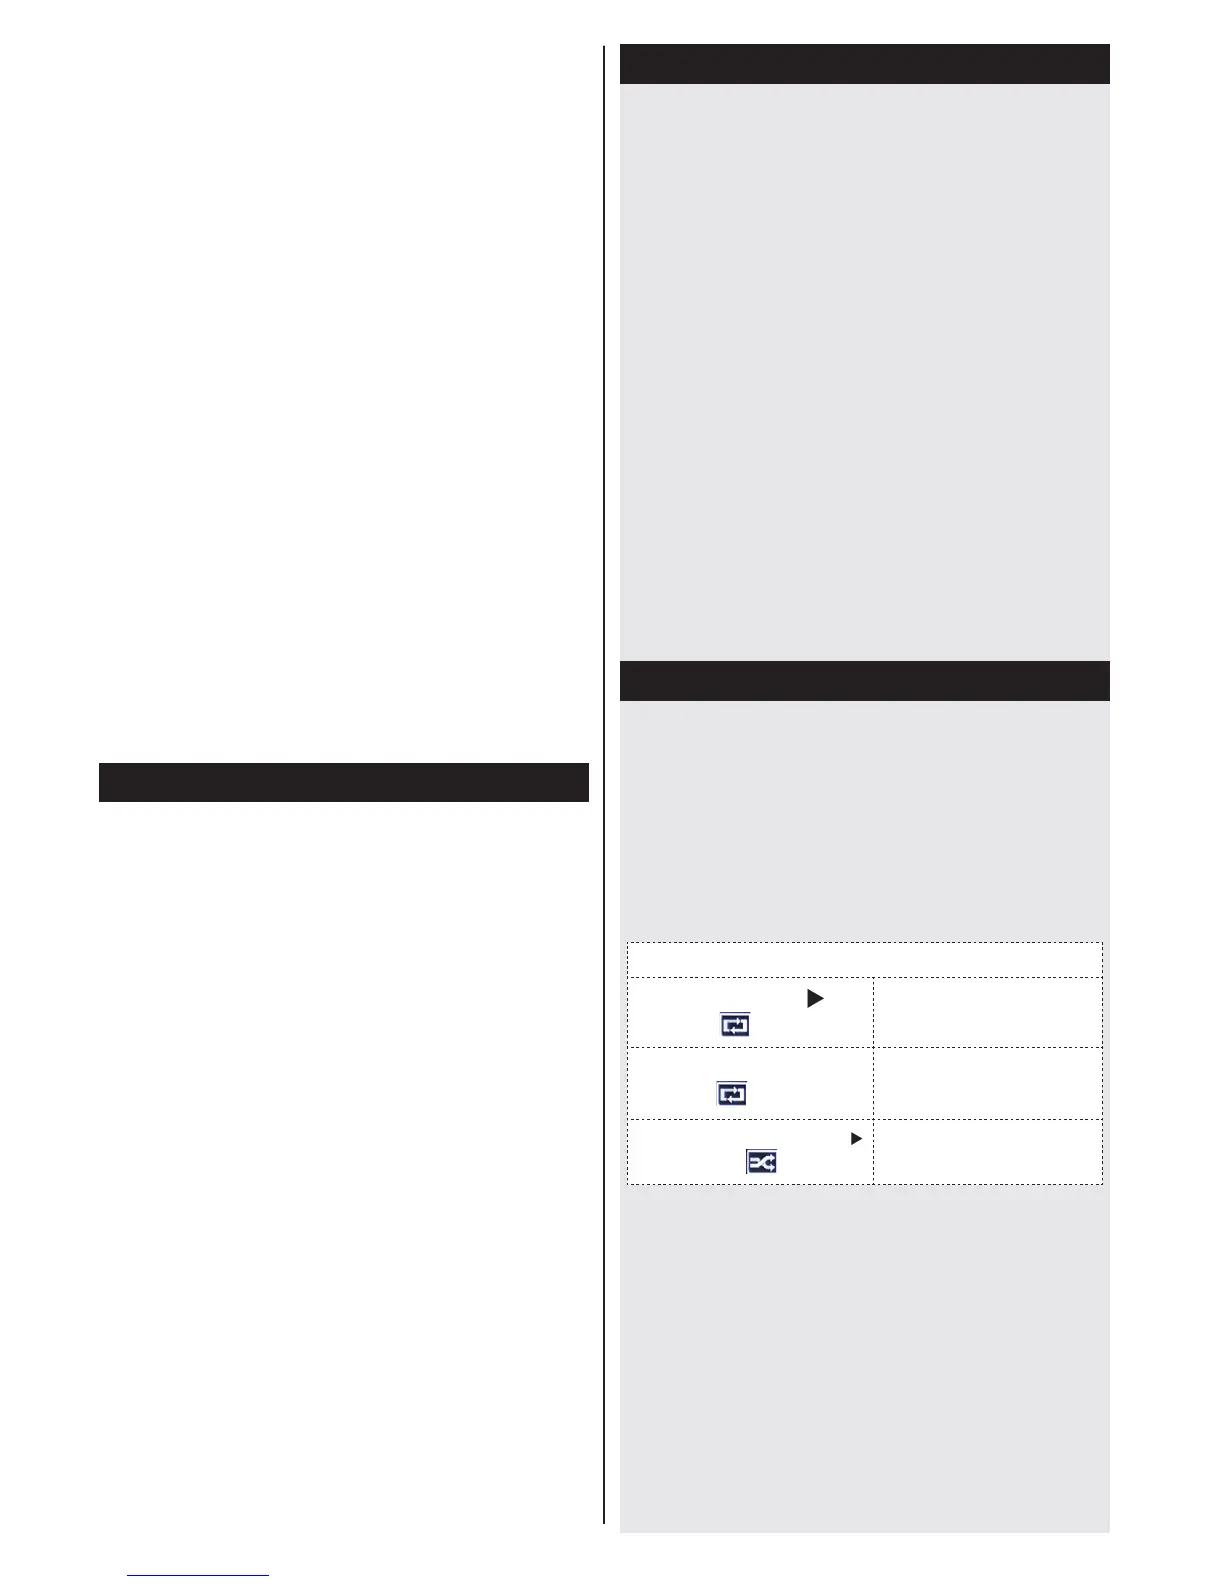
Loop/Shufe Mode Operation
Start playback with and
activate
TV plays next file and
loop the list.
Start playback with
OK and
activate
The same file will
be played in a loop
(repeat).
Start playback with
OK/
and activate
The file will be
played in a shuffle.
Custom Boot Up Logo (Opsiyonel)
You can personalize your TV to show your favorite image
or photo on screen each time your TV boots up. To do
this,placeyourfavoriteimagelesonaUSBmemory
stick, insert the memory stick into your TV and open
your images from the media browser menu. When you
have chosen the desired image, highlight it and press
OK to view it in full screen. Press OK again to choose the
imageasyourcustomlogo.Iftheimageleissuitable*
you will see it on screen during the TV’s next boot up.
Note: If you perform an FTI the TV will return to using
the default logo.
 Loading...