EN - 6 -
Fixing the appliance to the wall
Note: This xing part should be used for in the case of , the appliance is out off ballance
when then the inside of the appliance is fully empty but the door shelves are full with stuffs.
For usage please follow the below instructions:
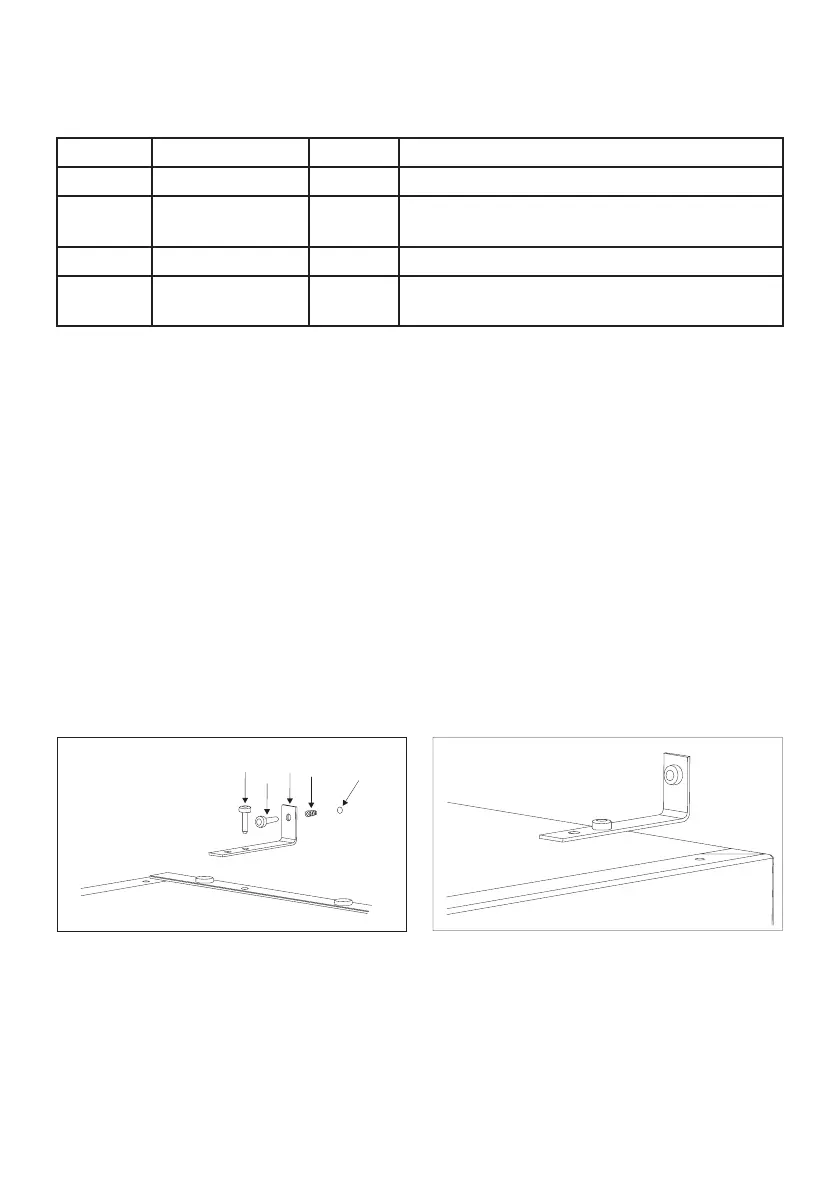
1. Check the kit to locate the following parts.
2. Prepare a star-tip screwdriver for xing the screws.
3. Prepare a driller for making hole to the wall.
4. Put the refrigerator, where you will use it.
5. Refere the holes, which has been drilled before on the top of the refrigerator, and mark
the hole places on the wall.
6. Drill the holes on the wall with Ø 8 mm.
7. Put screw grommet (Part no: 1) in to the hole.
8. Assemble the xing part (no: 2) to the wall by using the plastic screw (part no:3).
9. With the screw M4 (Part no: 4) assemble the xing bracket to the refrigerator.
10. If your appliance is Tropical class then x Screw M4 to the “T” hole on the bracket; if your
appliance is Normal class the x Screw M4 to the “N” hole on the bracket.
11. Do the same actions to the 2nd xing part.
T
N
4
3
2
1
T
N
HOLE
Figure -1 Figure -2
Part No Description Quantity Used
4 Screw M4 No:4 2 pcs For xing Bracket (Part no: 2) to the appliance
3
Screw for plastic
No:3 (Ø 3,5mm)
2 pcs For xing Bracket (Part no: 2) to the wall
2 Fixing Bracket 2 pcs Main part for xing
1 Screw grommet 2 pcs
For xing Plastic screw (Part no: 3) to the
wall.