EasyManua.ls Logo

Vex Robotics Tank tread kit - User Manual

Vex Robotics Tank tread kit
8 pages
To Next Page IconTo Next Page
Loading...
tank tread kit • 1
Inventor’s Guide insert
accessories
accessories
motion accessories
Tank treads will enable your robot to explore much more
demanding terrain than ordinary wheels. Tank treads
distribute a vehicle’s weight more evenly than wheels,
allowing your robot to move more easily in sand or on soft,
spongy surfaces into which wheels would sink and bog down.
This increased surface area also gives your robot more
traction for hauling heavy loads up an incline. And because
each link can grip the surface over which it’s traveling, a
robot with tank treads can more easily climb obstacles or
traverse crevasses in which wheels would get stuck.
tank tread
drive/idler wheel x 4
INSERT THIS PAGE
at the back of the
Motion chapter in your
Vex Inventor’s Guide.
tank tread kit
bogey wheel assembly x 4
bogey wheel
support screw x 12
(8-32x1")
bogey wheel support
keps nut x 12
tank tread links (2 preassembled chains )
x 85 links each (32.75" each)
single bogey
wheel assembly (tensioner) x 2
Question and Answer IconNeed help?

Do you have a question about the Vex Robotics Tank tread kit and is the answer not in the manual?

Vex Robotics Tank tread kit Specifications

General IconGeneral
BrandVex Robotics
ModelTank tread kit
CategoryRobotics
LanguageEnglish

Summary

VEX Tank Tread Kit Assembly Guide

Tank Tread Kit Overview and Benefits

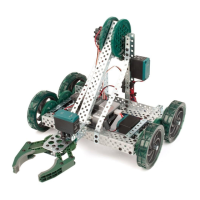
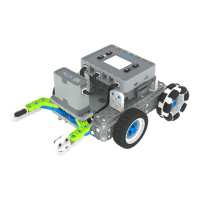
Explains how tank treads improve robot performance on demanding terrain and soft surfaces.

Build Robot Support Structure

Assemble the robot chassis and structural components to mount the tank tread system.

Attach Bogey Wheel Assemblies

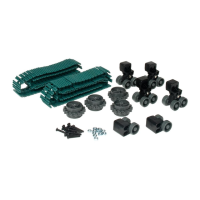
Secure two bogey wheel assemblies to the support structure using screws and keps nuts.

Install Tensioner Assembly

Mount the single tensioner assembly flush with the bogey wheel assembly for track adjustment.

Mount Drive Wheels

Place the tank tread drive/idler wheels onto the designated axles of the support structure.

Verify Component Placement

Ensure all components are correctly positioned for proper fit of the tread links.

Adjust Tread Link Chain Length

Prepare the tread links by separating the required number of links from the preassembled chains.

Install and Mesh Tread Links

Wrap the tread link chain around wheels and assemblies, ensuring drive wheel teeth mesh with rollers.

Complete Tread Loop and Tension

Connect the tread link ends and adjust tensioner/bogey assemblies for optimal track tightness.

Related product manuals