mode), and the meter default enter to 300mV DC volts calibration mode.
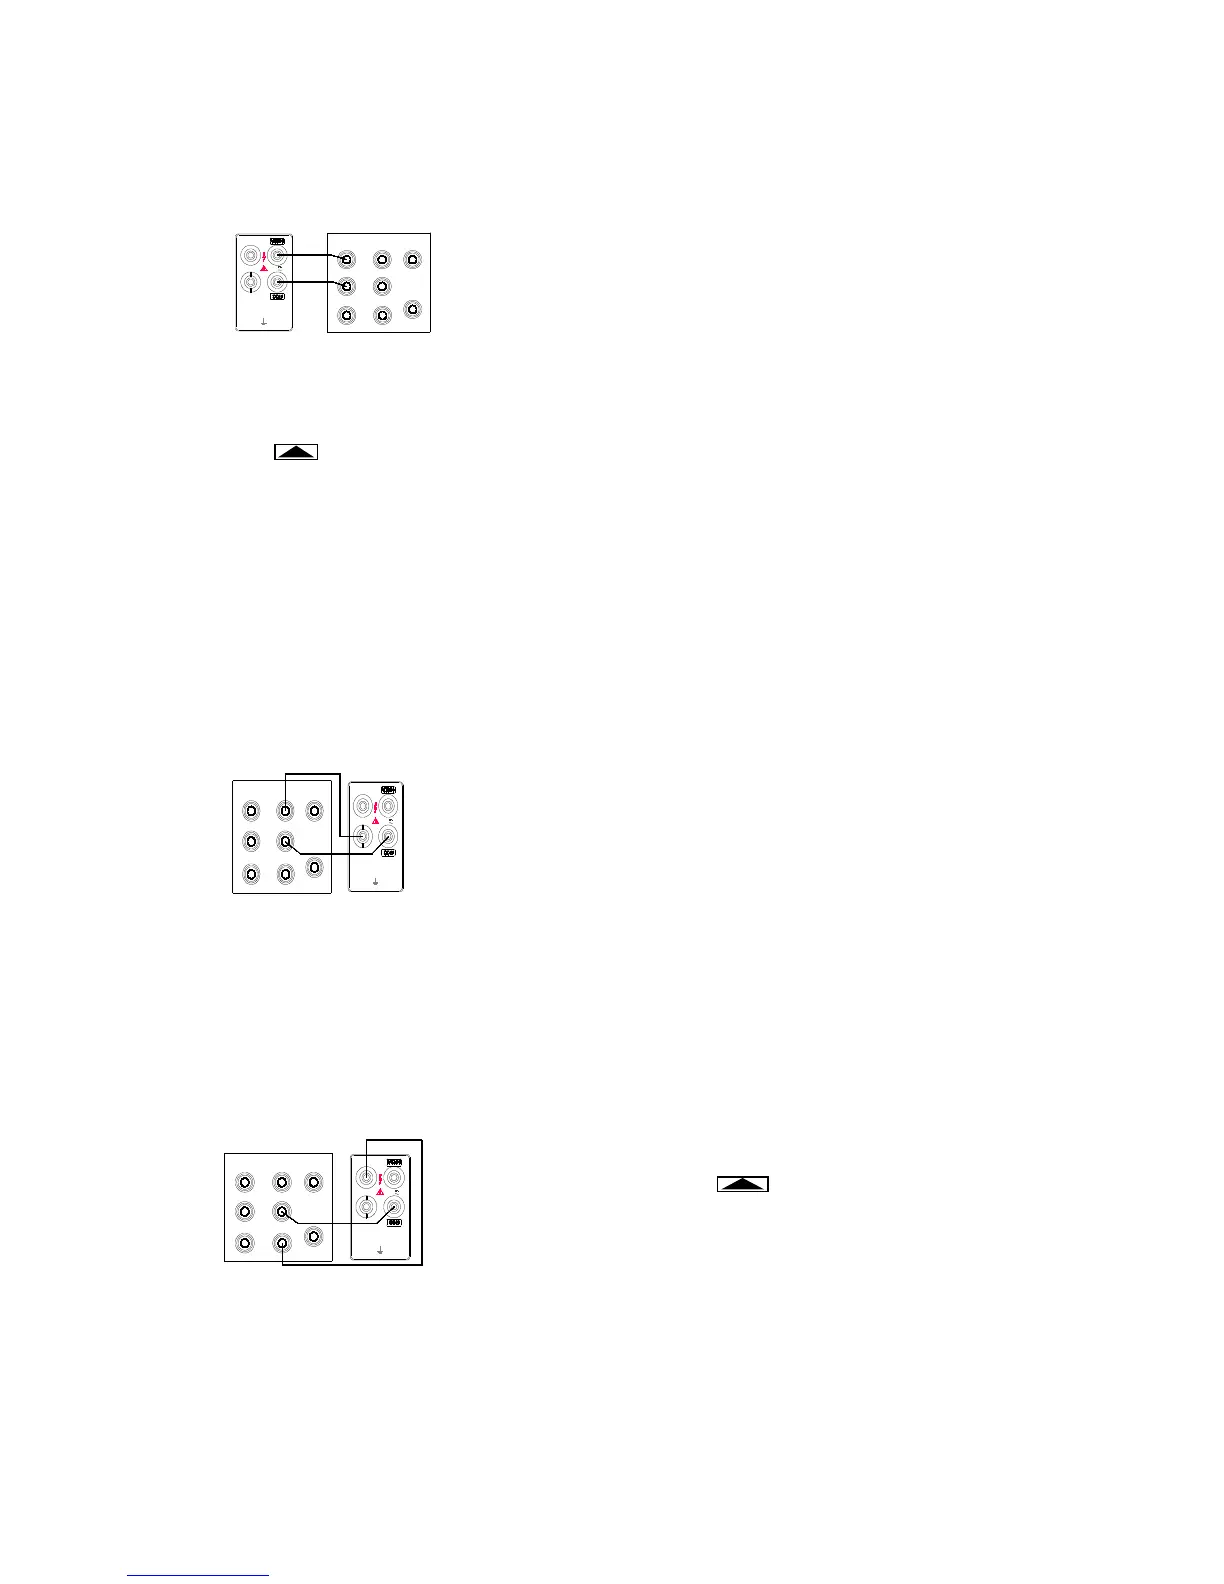
2) Placed the standard equipment in the “STBY” state, and connected with the meter as shown in Figure
5-1.
3)
Set the standard equipment to DCV, and adjust until the display reads 300mV, press the OPR button
to output.
4) Press the SHIFT button of the meter to
calibrate the rated range for the DCV function, and the
display reads the calibrated point.
5) Press the REL button to save the calibrated
value after 5 seconds, and the “SAVE” displayed on the
LCD; if the “ERR” displayed, check the set value for the
standard equipment, and inspect the function and the
method of the line connection right or not newly.
6)
Press the button to change range (in calibration mode, the meter is in manual range)
7) Set the standard equipment to the required output.
8) Repeat step 4 to 7 until complete all range.
Note
Be sure that the standard equipment is in the “STBY” state before change the function.
DC 300mA amps calibration
1) Placed the standard equipment in the “STBY” state, press the DCA button and the meter default enter
to 300mA DC Amps calibration state.
2) Connect the standard equipment with the meter as shown in Figure 5-2.
3) Adjust the standard equipment until the display reads 300mA, press the OPR button to output.
4)
Press the SHIFT button of the meter to calibrate the
300mA range, and the display reads the calibrated
point.
5) Press the REL button to save the calibrated value
after 5 seconds, and the “SAVE” displayed on the
LCD; if the “ERR” displayed, check the set value for
the standard equipment, and inspect the function
and the method of the line connection right or not
newly
DC 10A amps calibration
1) Placed the standard equipment in the “STBY” state, press the DCA button to enter to DCA calibration
state.
2)
Connect the standard equipment with the meter as
shown in Figure 5-3.
3)
Press the button to select the 10A range.
4) Press the SHIFT button of the meter to calibrate the
10A range, and the display reads 3A, Applied the
standard equipment 3A to the meter.
5) Press the REL button to save the calibrated value
after 5 seconds, and the “SAVE” displayed on the
LCD; if the “ERR” displayed, check the set value for the standard equipment, and inspect the function
and the method of the line connection right or not newly.
AC Volts calibration
1) Placed the standard equipment in the “STBY” state, press the ACV button to enter to AC Volts
calibration state.
2) Connect the standard equipment with the meter as shown in Figure 5-1 before.