at approximately 0.8mA. Readings are displayed in the 3V range at the fast measurement rates. “OL” is
displayed for voltages above 2.0V. Under normal measurement condition, the positive pole of diode is
connected with the black test lead.
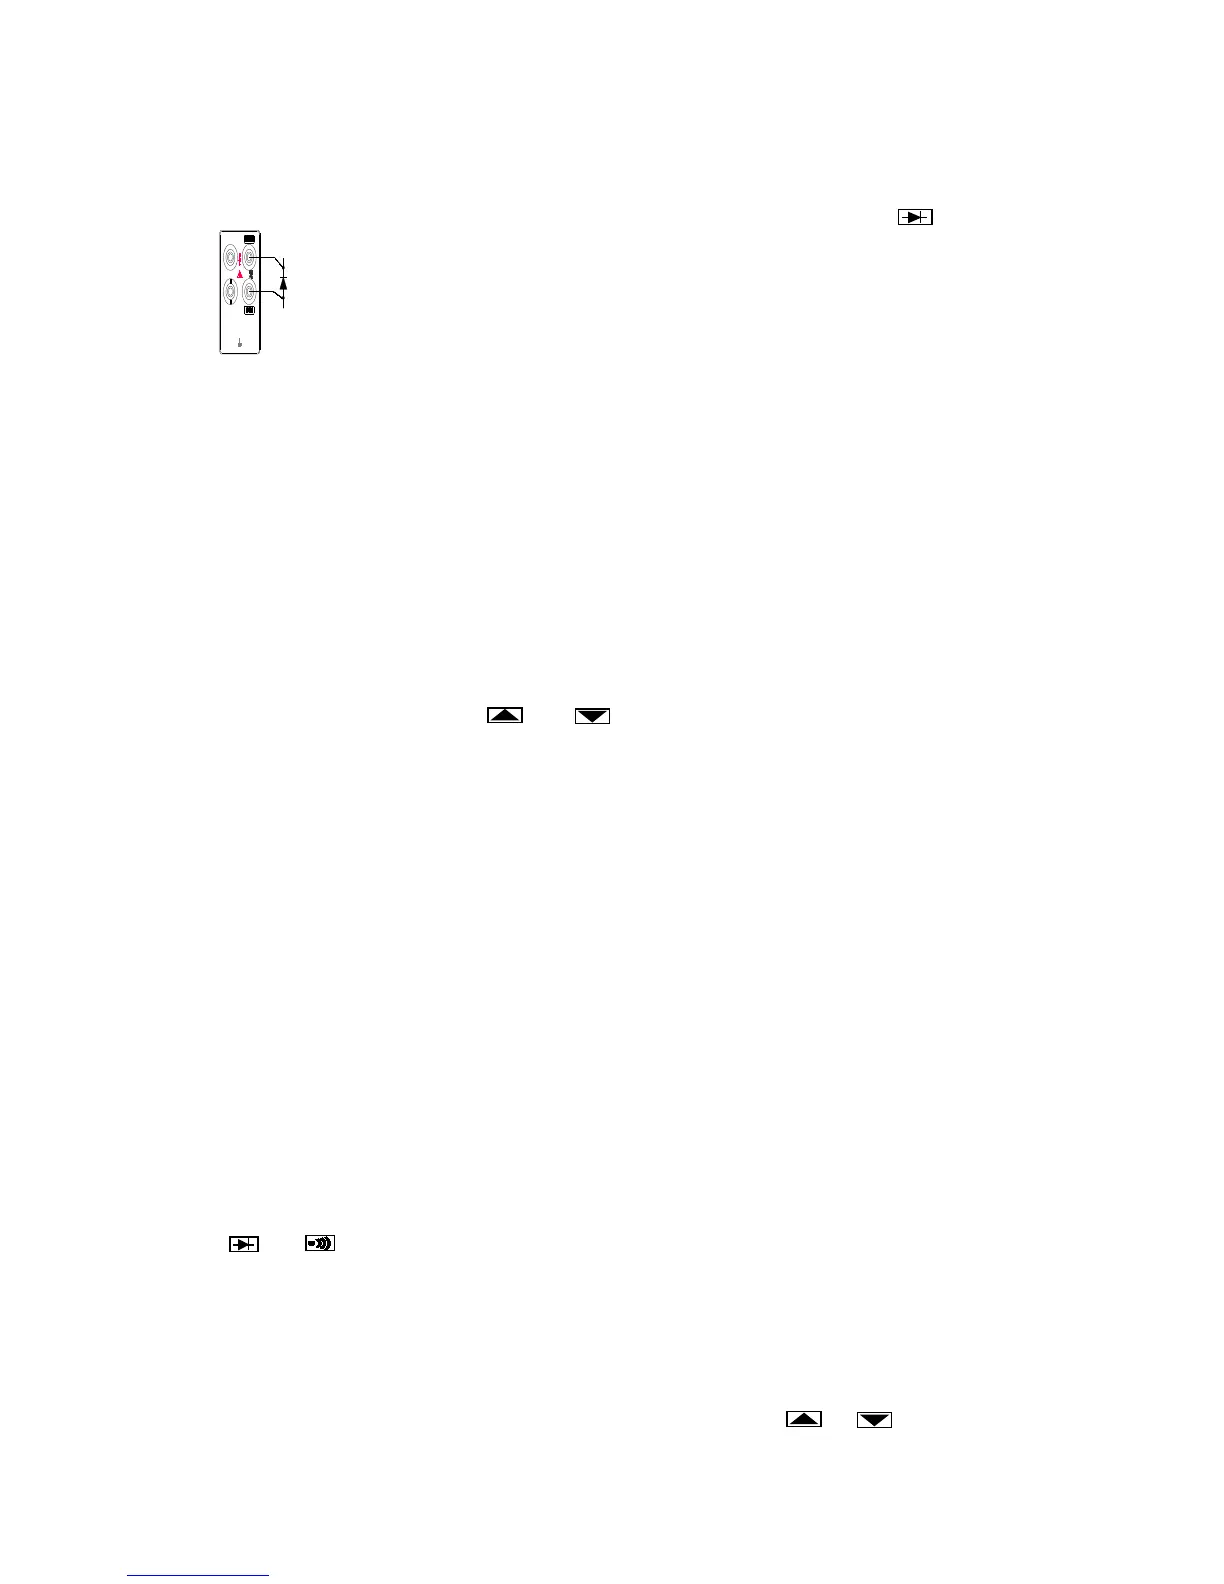
To perform a diode or transistor junction test, press to
select the diode function. Then connect the test leads across
the diode as shown in Figure 2-7.
Notice how the test leads are placed. Reversing the polarity will
reverse-bias the diode.
dBm (Decibels) measure
The decibels modifier takes an ac voltage measurement, converts it to dBm (measure of decibels
relative to one milliwatt), and displays the result on the primary display. Connect the test leads as
shown in Figure 2-4.
Press dBm to toggle in and out of the decibels mode. When the decibels mode is selected, “dBm” is
shown on the primary display, AC voltage value is shown on the secondary display.
Decibels can be selected only when ac voltage function is selected. Decibels are always displayed
in a single, fixed range with 0.01 dB resolution. Press the AUTO toggle in and out autorange, you
can also press the . and change range manually.
A voltage measurement is converted to dBm using the following formula:
dBm = 10*lg (1000*value
2
/reference impedance)
where “value” is the measurement value, and displayed on the secondary display. The reference impedance
can be changed. (Refer to “Changing the Power-UP Configuration” later in Section 3).
Communication Interface
The real time measured value can be transmitted to the computer by the devote USB cable and the
VICTORVIEW_8145B software (refer to “using the communication function”in section 3).
SECTION 3
Operating the Meter from the Front Panel
INTRODUCTION
Section 3 explains how to operate the meter from the front panel.
FRONT PANEL OPERATIONS
The following operations can be performed from the front panel:
Select a measurement function ( DCV, ACV, DCA, ACA, Ω, FREQ, dBm
and )
Select function modifiers that cause the meter to display relative readings (REL), minimum
,maximum or average values (MN MX)
Enter the Touch Hold mode (HOLD) to hold a reading on the display
Set Measurement Rate (RATE), change the rate as “F”(Fast) or “S”(Slow)
Take a measurement and compare (COMP) it to a setting value
Select the manual or autorange mode (AUTO), up range or down range manually to
desired range
Turn on or turn off the back light (when arrive the setting time the back light can automatically off)
Power-on or off the power supply (POWER)