5
6. Screw the Oxy Valve Assembly into the torch body and
wrench tighten.
7. Reattach the Cutting Lever. (See Section 3.04, Cutting Lever)
8. Remove from vise.
9. Check for leaks.
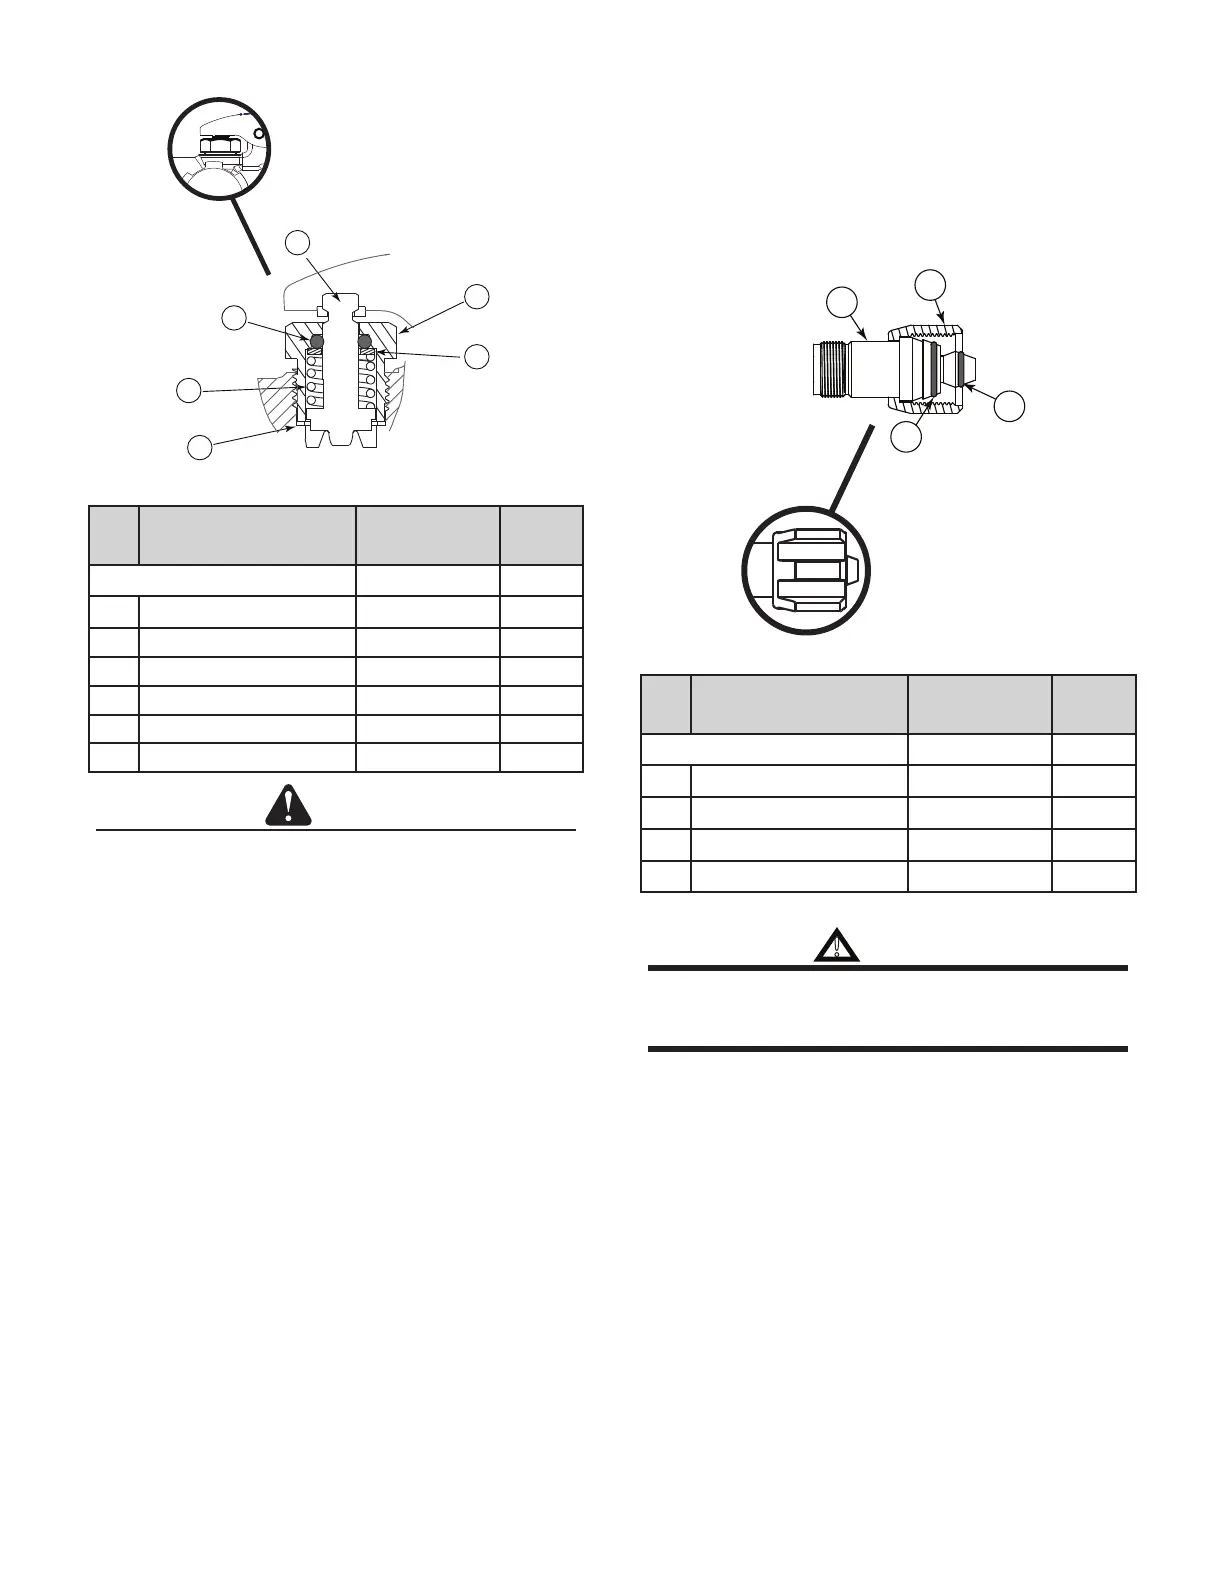
3.06 CONE END ASSEMBLY REPAIR KIT
1
2
3
4
Cone End Assembly
Item
No.
Description Part number Qnty
Cone End Assembly Repair Kit 0390-0087 1
1 Cone End 0317-0008* 1
2 Coupling Nut 0309-0136* 1
3 O-Ring 1407-0178 1
4 O-Ring 1407-0177 1
*Sold as part of kit only.
!
WARNING
There MUST be two (2) sealing O-Rings in good condition on the
Cone End. The absence of either O-Ring creates a condition that
allows pre-mixing of oxygen and fuel gases.
Service
• Use an air hose to clear any debris from opening.
• Replace O-Rings on Cone End.
• Check for leaks.
Disassembly
Remove the Cutting Lever before beginning the task.
1. Place torch in RT-108 by mounting Cone End in xture.
2. Use a wrench to loosen and unscrew the Cone End Assembly.
3. Clean opening in Cutting Torch Body.
4. Discard old Cone End from RT-108.
3.05 H.P. OXY VALVE REPAIR KIT
1
2
3
6
4
5
H.P. Oxy Valve
Item
No.
Description Part number Qnty
H.P. Oxy Valve Repair Kit 0390-0016 1
1 Seat Assembly 0320-0103 1
2 Gasket 1408-0093 1
3 Spring 0320-0072 1
4 Washer 1406-0107 1
5 O-Ring 1407-0005 1
6 Valve Cap 0320-0104 1
CAUTION
Discard used O-Ring, Seat Assembly, Gasket and Washer.
Replace them each time you reassemble a Cutting Torch.
Service
• Wipe with dry cloth. Do not use any cleaning solvents.
• Check for leaks.
Disassembly
Remove the Cutting Lever before beginning the task.
1. Place torch in a vise.
2. Use a wrench to loosen and unscrew the Oxy Valve Assembly
from the Cutting Torch Body.
3. Remove the Oxy Valve Assembly from the Cutting Torch Body.
Assembly
1. Install the Spring followed by the Washer and O-Ring on the
Valve Stem.
2. Apply Christo-Lube to the outside of the O-Ring and along
the Valve Stem.
3. Insert the Seat Assembly with Spring, Washer, and O-Ring
in through the Valve Cap.
4. Check and clean the H.P. Oxy opening on the torch body.
5. Gently drop the Gasket in the opening of the torch body.
Make sure that it is at against the bottom.
 Loading...