Do you have a question about the Victron energy BlueSolar SCC010005000 and is the answer not in the manual?
| Brand | Victron energy |
|---|---|
| Model | BlueSolar SCC010005000 |
| Category | Inverter |
| Language | English |
Details the system voltage supported by the controller.
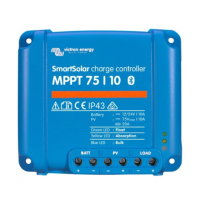
Specifies the maximum voltage from the solar panels.
Indicates the controller's current handling capacity.
Provides essential safety guidelines for installation and operation.
Introduces the features and capabilities of the charge controller.
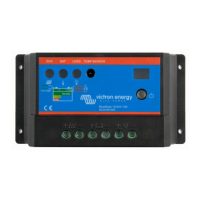
Details the physical components and indicators of the charge controller.
Outlines general precautions and requirements for installing the controller.
Provides guidance on how and where to mount the charge controller for optimal cooling.
Explains the procedure for connecting the battery to the charge controller.
Illustrates how to connect electrical loads to the controller.
Details the process of connecting the solar modules to the controller.
Emphasizes checking all connections for correctness and tightness.
Instructions for installing fuses in the battery and load circuits.
Steps to verify the controller is operating correctly after installation.
Explains the Pulse Width Modulation charging technology used by the controller.
Describes the different stages of battery charging (Bulk, Boost, Float).
Details the equalize charge process and its associated warnings.
Identifies and explains the function of the controller's LED indicators.
Explains the meaning of different states of the charging status LED.
Explains the meaning of different states of the battery status LED.
Explains the meaning of different states of the load status LED.
Describes the indicator for controller overheating and its meaning.
Explains how to configure the dual timer for load control.
Details the "Dusk to Dawn" load control method.
Describes the test mode for verifying system functionality.
Explains how to manually control the load output.
Illustrates the process for setting timer functions.
Lists available work modes and their corresponding LED display numbers for Timer 1.
Lists available work modes and their LED display numbers for Timer 2.
Explains how to select the battery type and its corresponding LED display numbers.
Details various protection mechanisms of the charge controller.
Provides solutions for common faults and issues encountered with the controller.
Recommended periodic inspections and maintenance tasks for optimal performance.
Lists key electrical specifications of the controller.
Specifies threshold voltages for various operational parameters.
Details the temperature compensation coefficient for charging.
Lists charging parameters for different battery types at 25°C.
Lists environmental operating conditions for the controller.
Details the physical dimensions and weight of the controller.
Provides a graphical representation of the controller's physical dimensions.
Overview of the BlueSolar Charge Controller series and its PWM technology.
Lists the key features and protections of the charge controller.
Emphasizes connecting batteries first during installation.
Step-by-step guide for connecting the battery, solar module, and load.
Warns about the consequences of incorrect connection order.
Explains how to navigate the LCD display and its monitoring functions.
Describes the main display showing battery voltage and charge status.
Details how to set the battery type and lists available types.
Explains the low voltage disconnect setting and its default value.
Explains the low voltage reconnect setting and its default value.
Shows how to view solar-to-battery current and charge status.
Explains the different load output modes (H, L, L01-L23, 24H).
Describes setting the trigger voltage for load ON/OFF based on solar panel voltage.
Explains setting the delay for load ON/OFF based on solar panel voltage.
Details how to enable or disable short-circuit protection.
Shows how to view load current and battery capacity.
Explains how to view the USB voltage output.
Describes how the controller displays its internal temperature.
Describes high temperature protection phases and LCD indications.
Explains low battery voltage alarms and load output disable.
Details short-circuit protection indicators and recovery.
Describes over-current protection indicators and shutdown behavior.
Compares specifications across different BlueSolar models.
Lists the various protection features of the controllers.
Specifies suitable solar panel arrays for different system voltages.
Details the specifications for the USB output ports.
Lists the default charging and load disconnect voltages.
Overview of PWM technology and its benefits for charging.
Lists the key features of the BlueSolar Charger series.
Shows how to connect solar panels, battery, and loads.
Specifies indoor, dry, and nonflammable requirements for installation.
Explains the status of the green charging LED.
Explains the status of the battery LEDs (green, yellow, red).
Explains the status of the load LEDs (red).
Notes on load output cutoff, restart, and reconnection after over-discharge.
Basic steps to correct common problems with the controller.
Detailed specifications for the 12/24-20A model.
Technical drawing showing the physical dimensions of the unit.
Lists the capabilities of the optional remote meter display.
Explains the LEDs and backlight behavior of the remote meter.
Describes the functions of the remote meter's push buttons (K1-K4).
Explains how to cycle through various data displays on the remote meter.
Guides on adjusting battery capacity, temperature compensation, and battery type.
Provides more details on adjustable parameters like battery capacity and temperature compensation.
Instructions for resetting total charged and discharged values.
Explains the red LED and error icon behavior.
Information on how frequently display and counter data are updated.
Details the LCD specifications for the remote meter.
Provides dimensional drawings for the remote meter.
Overview of the BlueSolar DUO charger series and its PWM technology.
Lists key features of the BlueSolar DUO charger, including dual battery charging.
Illustrates connections for battery #1, battery #2, and PV.
Explains the connection and function of the remote and local temperature sensors.
Details the charging and battery status indicators for each battery.
Describes the communication port for the remote panel.
Explains troubleshooting based on LED blinking patterns.
Guides on navigating and selecting settings via LEDs and buttons.
Explains how to set the battery type using the first LED.
Details setting the charge current distribution between two batteries.
Explains setting the PWM charging frequency.
Technical drawing showing the physical dimensions of the unit.
Detailed specifications for the BlueSolar DUO 12/24-20 model.
Overview of the PWM charge controller and its technology.
Lists the key features of the PWM charge controller.
Emphasizes connecting batteries first for system voltage recognition.
Step-by-step guide for connecting battery, solar array, and load.
Warns about potential damage from incorrect connection sequence.
Explains navigating the LCD display for monitoring and settings.
Describes the main display showing battery voltage and charge status.
Details how to set the battery type and lists available types.
Explains the low voltage disconnect setting and its default value.
Explains the low voltage reconnect setting and its default value.
Shows how to view PV voltage and battery state of charge.
Shows how to view PV to battery current and charge status.
Explains setting load output modes (H, L, L01-L23, 24H).
Describes setting the trigger voltage for load ON/OFF.
Explains setting the delay for load ON/OFF.
Details how to enable or disable short-circuit protection.
Shows how to view discharge current and battery capacity.
Explains how to view the USB voltage output.
Describes how the controller displays its internal temperature.
Describes high temperature protection phases and LCD indications.
Explains low battery voltage alarms and load output disable.
Details over-current protection indicators and shutdown behavior.
Details short-circuit protection indicators and recovery.
Compares specifications across different PWM models.
Lists key features like programmable load output and three-stage charging.
Emphasizes connecting batteries first and avoiding exceeding ratings.
Explains the meaning of green, orange, and red LED states.
Describes the states of the green LED for charging status.
Details the color codes for battery charge level (green, orange, red).
Explains LED indications for load output status (ON, OFF, Overload, Short Circuit).
Notes on load output behavior after over-current/short-circuit and over-discharge.
Lists numerical and alphabetical codes for load output modes.
Describes the mode where the load output is permanently off.
Explains timed load operation based on sunset and timer settings.
Describes manually controlling the load output with a push button.
Explains load control based solely on battery voltage.
Describes automatic load operation based on light levels.
Explains the debug mode for testing.
Details specifications for the 48V PWM models.
General safety guidelines for installation and operation.
Lists features like lighting control, three-stage charging, and protections.
Emphasizes connecting batteries first for system voltage recognition.
Notes on positive grounding, system ground, and connection diagram.
Detailed description of LED statuses for charging, load, and battery.
Explains the functions of the manual ON/OFF load control button.
How to modify settings using software or a remote panel.
Lists available load programs and battery types for configuration.
Details protection against excessive load current.
Details protection against load wiring short circuits.
Explains protection against incorrect solar panel polarity.
Explains protection against incorrect battery polarity.
Behavior when the temperature sensor is damaged.
Details protection against controller overheating.
Explains protection against voltage transients.
Table detailing common faults, reasons, and troubleshooting steps.
Compares technical specifications for PWM-Pro models.
Lists programmable battery parameters and their settings.
Explains day/night timing options for load control.
How to set region and language for the operating system.
Instructions for downloading the necessary software from the Victron Energy site.
Guidance on extracting the downloaded software archive.
Steps to install the BlueSolar software on a PC.
Instructions for installing the USB driver for controller communication.
Detailed steps for installing the USB driver.
How to configure the COM port settings in Device Manager.
How to check the RS-485 option in the driver properties.
Steps for logging into the Solar Station Monitor software.
Displays the main monitoring interface after successful login.
Configuring serial port settings for controller communication.
Entering basic system data like station name, device ID, and rated power.
Entering details about the solar panel arrays, including peak power and number of strings.
Entering battery type, capacity, and voltage information.
Entering controller specifications, supplier name, and port settings.
How to initiate and view real-time monitoring data.
Options for logging off, switching users, changing passwords, adding stations, and printing.
Options to show/hide toolbar, station explorer, and messages window.
Reference to serial port settings for communication.
Configuring backlight timer and local date/time.
Setting internal and external temperature limits for the device.
Assigning a unique ID to the device.
Configuring battery-related control parameters.
Detailed table of adjustable battery parameters like voltage, capacity, and charge settings.
Options for configuring the load output settings.
Manually switching the load output ON or OFF.
Automatic ON/OFF based on solar voltage with optional delay.
Timed ON/OFF operation after dusk and before dawn.
Setting ON-time periods using the internal clock.
Displaying station name, model, version, and serial number.
Options for load test, restoring defaults, and clearing data.
Accessing real-time monitoring data.
Displaying status of all connected stations.
Options for exporting/importing data and recording maintenance events.
Information on accessing help and the manual.
Guidance on connecting and configuring multiple controllers sequentially.
Lists included items like wall mounting board and cable.
Provides dimensional drawings for mounting the remote meter.
Explains the icons and layout of the remote meter's LCD.
Describes the function of the charging and error LEDs on the meter.
Details how to navigate the meter using its buttons (K1-K4).
Guides on setting temperature units, backlight, and data repeat modes.
How to select between Celsius and Fahrenheit temperature scales.
How to configure backlight behavior and timers.
How to set automatic or manual data repetition.
How to adjust the internal clock of the remote meter.
How to check system connections and data.
How to reset collected data (max, min, Ah).
Includes specifications, trouble indicators, communication port notes, and data updates.
General safety guidelines before installation.
How to connect the remote panel to the charge controller using an RJ45 cable.
Identifies the LCD screen, buttons, and indicator LEDs on the remote panel.
Details the RS485 communication and power interface.
Explains the function of the warning indicator LED.
Describes the audible failure alarm feature.
Explains the communication status LED.
Shows the icons for charge current, battery status, load status, etc.
Explains the icons indicating daytime or nighttime conditions.
How the battery icon indicates state of charge.
Icons representing normal voltage, under voltage, and over discharge.
Icons indicating load output status (on/off).
Visual diagram of the remote panel buttons and their operation.
How to access monitoring and subpages using UP/DOWN/LEFT/RIGHT buttons.
How to access and browse the main menu using ESC and UP/DOWN buttons.
How to view controller model, ratings, and serial number.
How to test load output in manual control mode.
Detailed table of adjustable battery parameters like voltage, capacity, and charge settings.
Overview of different load output setting options.
How to set the load output to manual control mode.
Automatic ON/OFF based on solar voltage with delay.
Timed ON/OFF operation after dusk and before dawn.
Setting ON-time periods using the internal clock.
Configuring backlight timer and local date/time.
Setting and using the device password for security.
Note on charge mode settings for future applications.
How to reset the charge controller to default settings.
Displays failures like Over Voltage, Over Load, or Short Circuit.
Settings for switch-pages, backlight duration, and audible alarm.
Lists self-consumption, dimensions, cable length, and temperature range.
Pin assignments for the RS-485 connector.
Detailed dimensional drawings for the remote panel.