*Keurig® and K-Cup® are registered trademarks of Keurig Green Mountain, Inc.
**Nespresso® is a registered trademark of Societe des Produits Nestle S.A. and Nestlé Nespresso S.A.
Use of the Nespresso® trademark does not imply any affiliation with or endorsement by Societe des Produits Nestle S.A.
or Nestlé Nespresso S.A.
10
COFFEE BREWING
Fill the Water Reservoir. Before brewing, ensure there’s enough water in the Water Reservoir.
When the Water Reservoir is less than 12oz, there will be a water shortage alarm to remind,
and other buttons do not work except for the Power button.
Place your cup on top of one of the brewing platforms. Your brewer has three cup platforms
— one suited for a small espresso cup, one suited for a medium-sized mug, and one suited
for a travel mug.
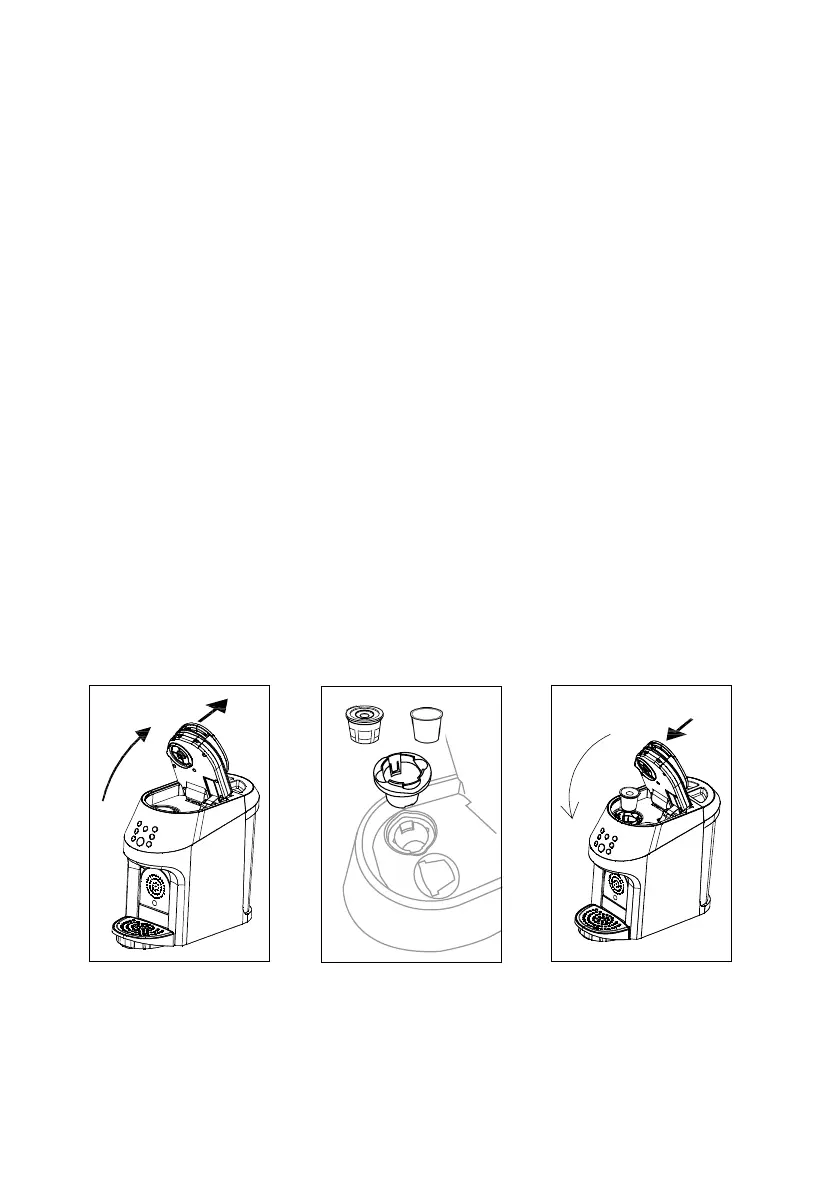
Access the Pod Brew Area. Place your hands on the Top Ring Handle and pull up until the lid
is fully open (see Fig.1). This will give you access to where you’ll insert your *K-Cup®and
**Nespresso® pods.
Insert a *K-Cup® pod into the left side of the Pod Brew Area (see Fig.2). Inside the Pod Brew
Area, there are two inlets of different shapes, sideby-side. The left inlet fits a *K-Cup® pod,
while the right inlet fits a **Nespresso® pod. To brew a cup of coffee, insert a *K-Cup® into
the left inlet making sure to secure it firmly in place.
1.
2.
3.
4.
Fig.1 Fig.2
or
Fig.3
WARNING: Be careful not to overfill the Water Reservoir.
NOTE: When the water in the reservoir is less than 12oz, the blue water droplet will illumi-
nate and flash on the Control Panel. If this happens in mid-brew cycle, do not operate on the
button and add water immediately.