6
Section 3: Product Overview
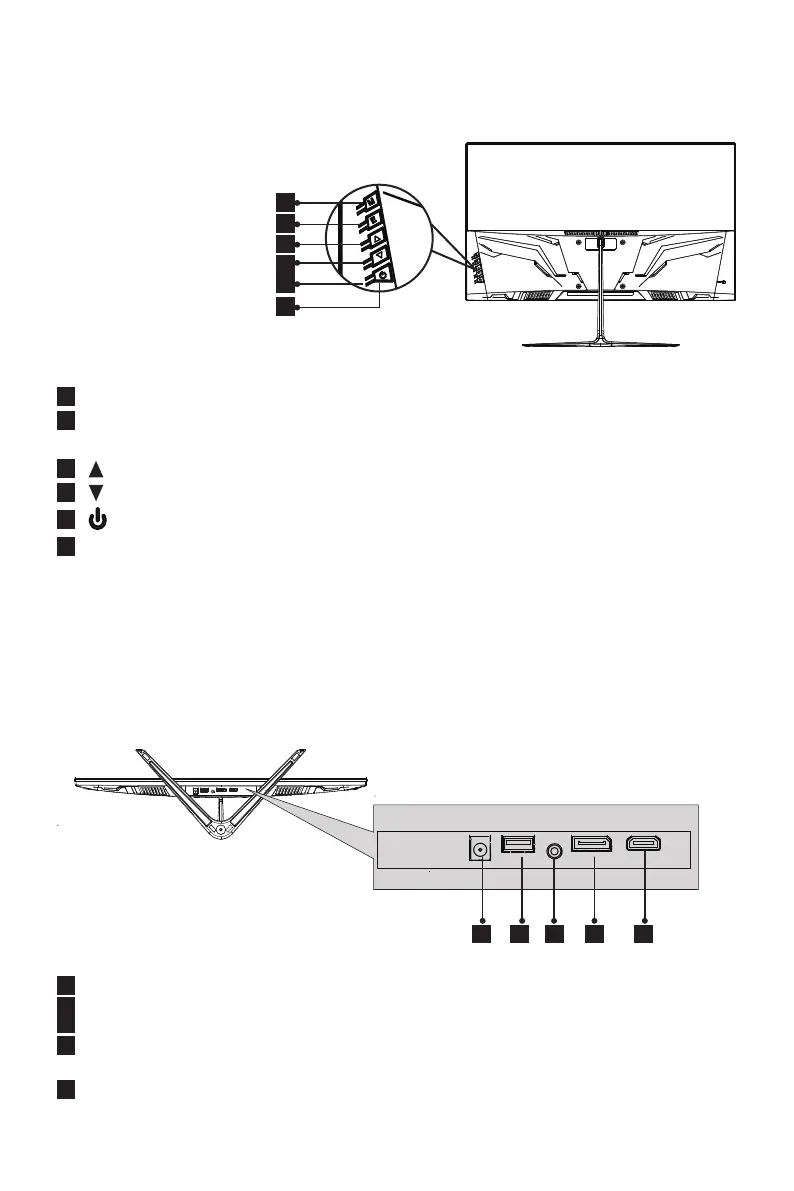
3.1 – Monitor Buttons
7
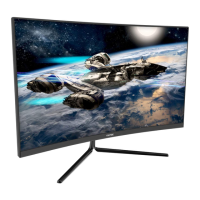
Power Connector: Insert the power cable to supply power to the monitor.
8
USB Port: The USB port is only for rmware update using USB portable device.
9
Audio Output: Insert the audio cable for output of audio signals.
10
DP Connector: Insert one end of the DP cable into the computer’s DP output
and connect the other end to the monitor’s DP port.
11
HDMI Connector: Insert one end of the HDMI cable into the computer’s
HDMI output and connect the other end to the monitor’s HDMI port.
2
3
4
5
6
1
1
M Menu Button
: Press to display the OSD menu or enter sub-menus.
2
E Exit Button
:
Press to exit. Or press E button directly to enter the channels
select screen.
3
Up Button
: Press to move up in the menus.
4
Down Button
: Press to move down in the menus.
5
Power Button
: Press to turn the monitor on/off.
6
LED Indicator: Changes colors to indicate status. Refer to Section 7.
3.2 – Monitor Ports
8 7 9 10 11